
Member Permissions
Member Permissions
Overview
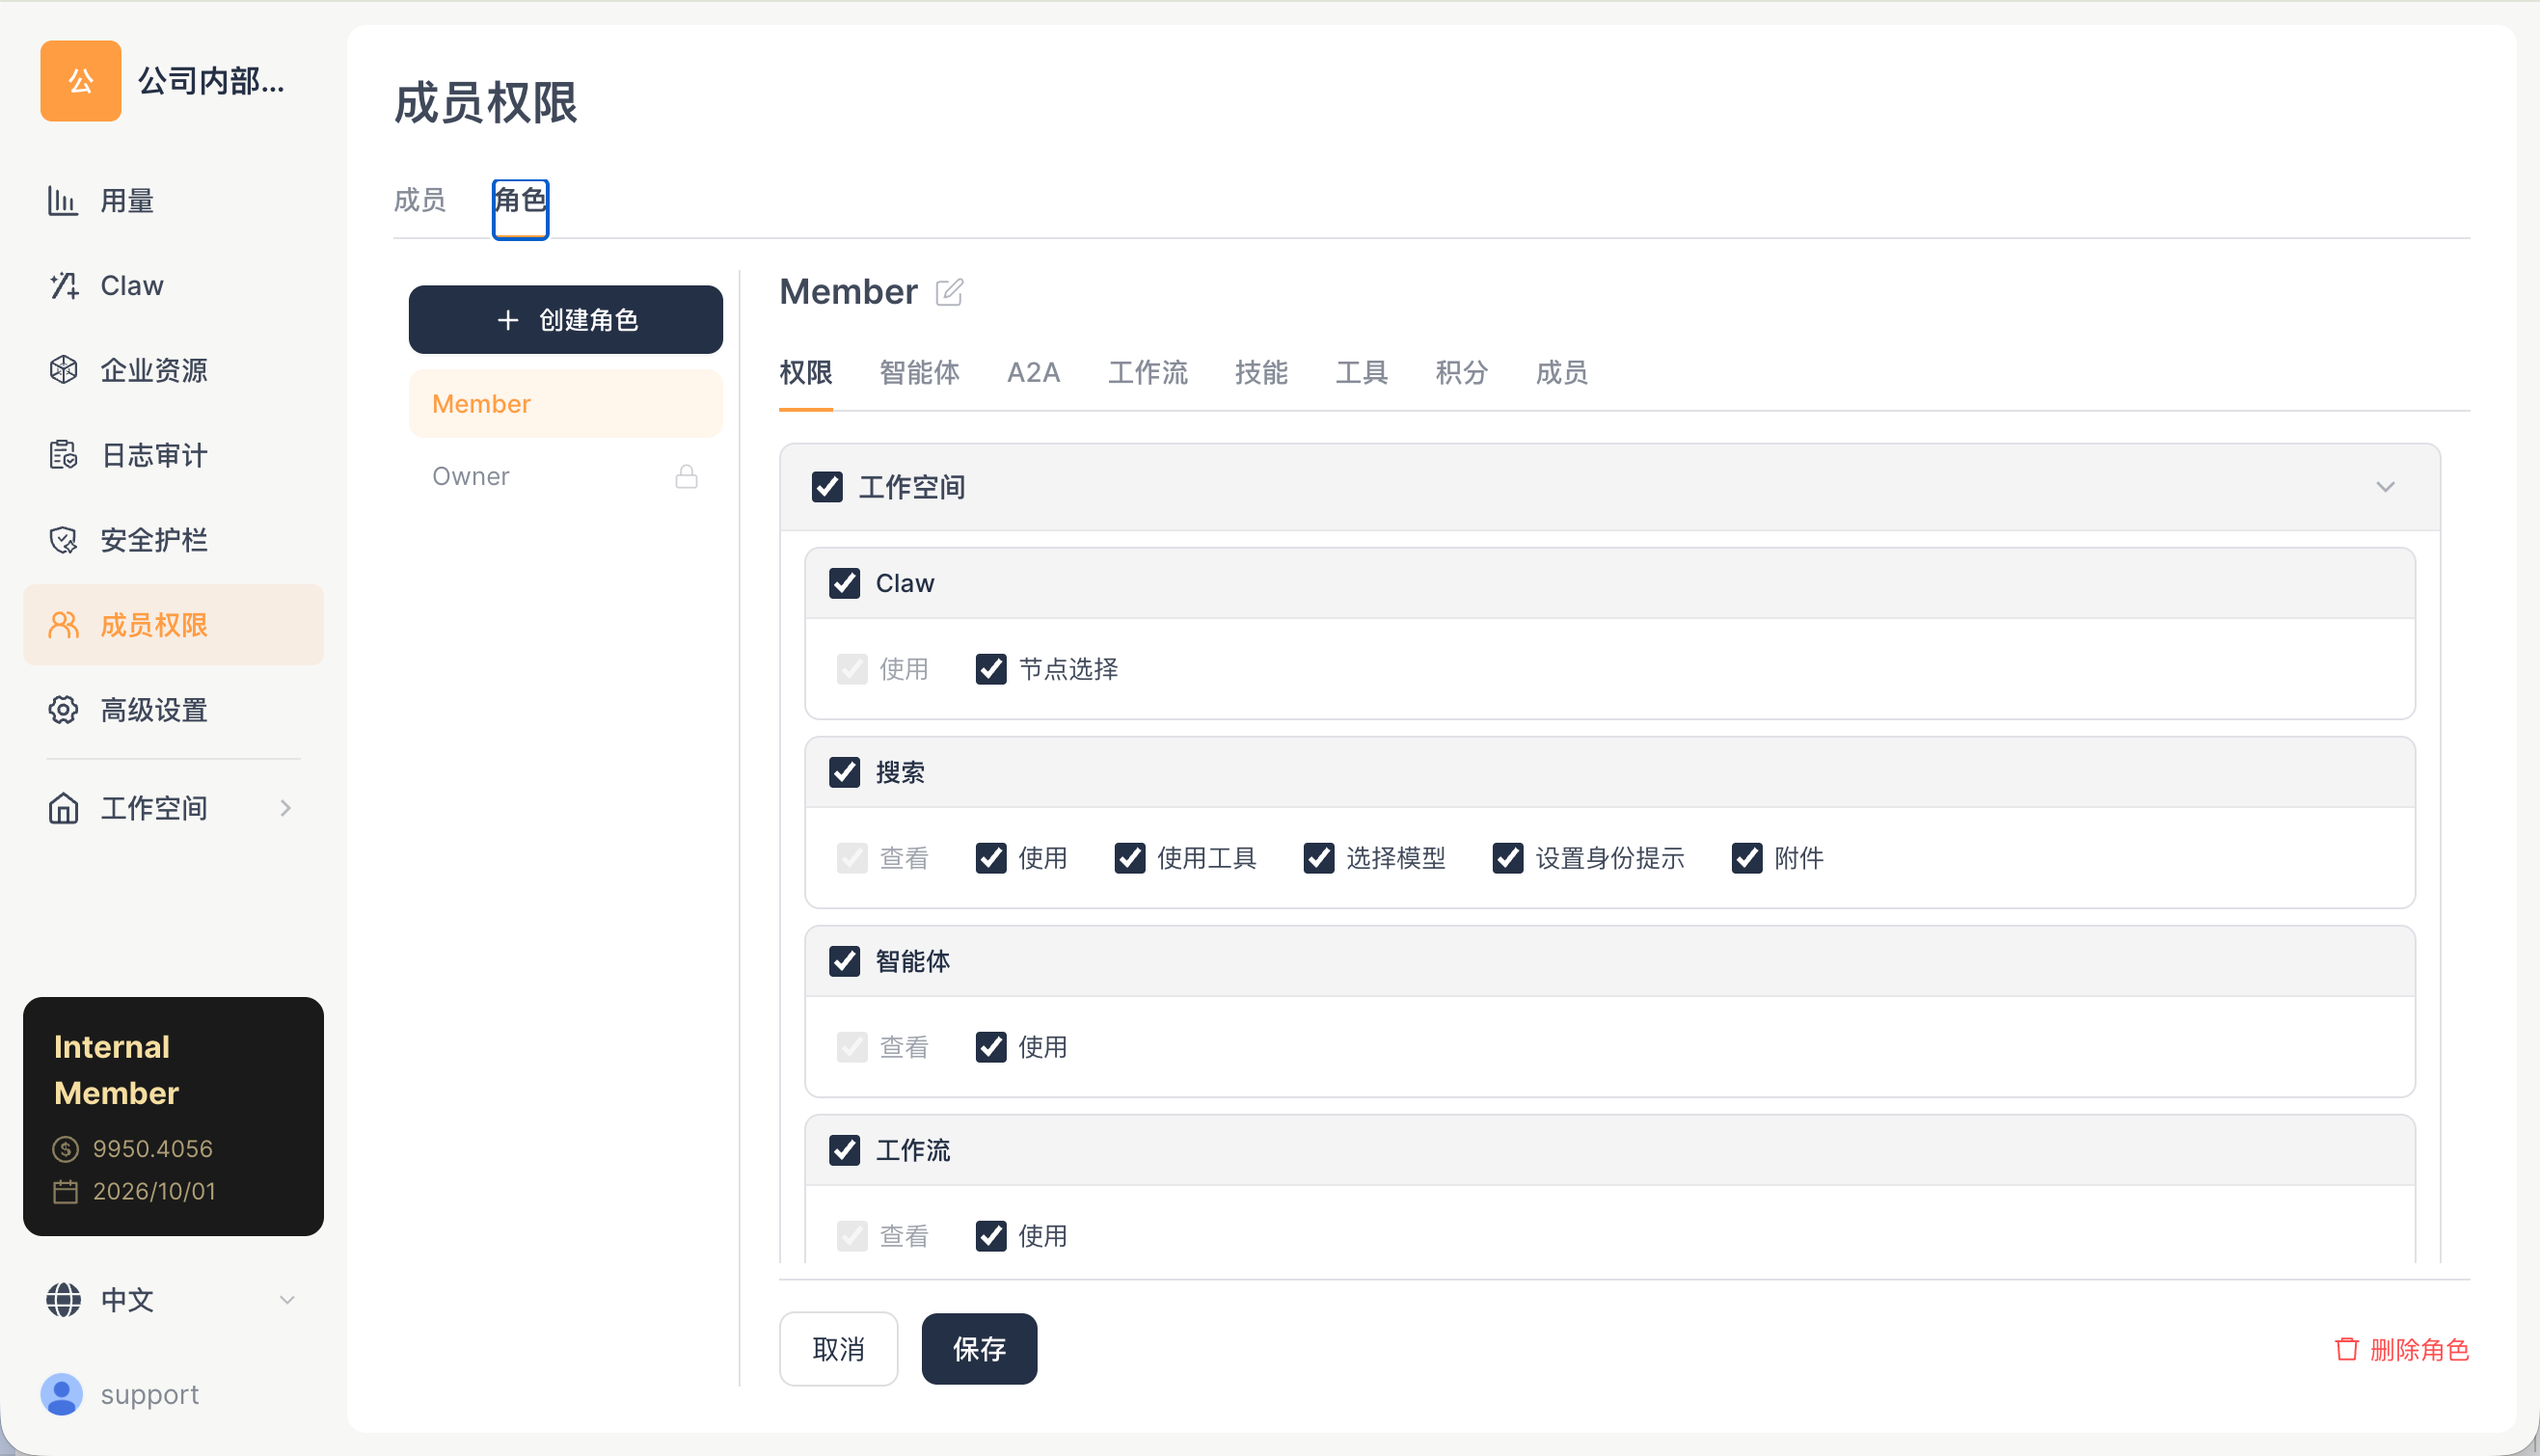
The Member Permissions page manages the members and roles of a workspace and supports fine-grained permission assignment. It contains two tabs: Members and Roles.
Members Tab
Member List
Displays all members of the workspace:
| Column | Description |
|---|---|
| User | Avatar + name + email |
| Role | The role the member belongs to (Owner / Admin / custom role) |
| Join Time | The time the member joined the workspace |
| Status | Active / Disabled |
Actions
| Action | Description |
|---|---|
| Invite | The Invite button in the top-right corner; invite new members by email |
| Search by name or email | The search box at the top |
| All Roles | Filter by role |
| Edit Member | Modify the member's role, notes, and other information |
| Remove Member | Remove the member from the workspace |
Roles Tab
Built-in Roles
| Role | Description | Editable |
|---|---|---|
| Owner | All permissions; cannot be modified or deleted | No |
| Admin | Most management permissions | Partial |
| Member | Basic usage permissions | Yes |
Custom Roles
Admins can create custom roles and assign fine-grained permissions.
Permission Assignment Dimensions
The role editing interface provides 7 permission tabs:
| Tab | Description |
|---|---|
| Basic Permissions (PermissionsTab) | Permissions to access the pages of each module |
| A2A Agent Permissions (A2aPermissionTab) | Permissions to manage and use A2A agents |
| Resource Permissions (ResourcePermissionTab) | Permissions to access enterprise resources |
| Skill Permissions (SkillPermissionTab) | Permissions to use specific skills |
| Tool Permissions (ToolPermissionTab) | Permissions to use specific tools |
| Credit Permissions (CreditPermissionTab) | Credit usage quota limits |
| Role Members (RoleMembersTab) | View and manage the members within a role |
Permission Code System
The system uses permission codes prefixed with WORKSPACE_CONSOLE_* to control access to each feature:
| Permission Code Example | Description |
|---|---|
WORKSPACE_CONSOLE_WORKFLOW_VISIT |
Access the workflow page |
WORKSPACE_CONSOLE_WORKFLOW_USE |
Use workflows |
WORKSPACE_CONSOLE_ENTERPRISE_AGENT_ONLINE |
Bring an enterprise Agent online |
USAGE_OVERVIEW_VISIT |
Access the usage overview |
USAGE_CLAW_VISIT |
Access Work usage |
Operation Guide
How to Invite a Member
- Open the web console → Space Management → Member Permissions → Members tab
- Click the Invite button in the top-right corner
- Enter the email address of the person to invite
- Select the role to assign (Admin / Member / custom role)
- Click send invitation
- After receiving the email, the invitee clicks the link to join the workspace
How to Create a Custom Role
- Switch to the Roles tab
- Click Create Role
- Enter a role name (such as "Developer" or "Operations")
- Configure permissions one by one across the 7 permission tabs
- Save the role
- Assign members to the role
Practical Impact of Permission Assignment
| Permission Configuration | Effect Seen by the Member |
|---|---|
Disable WORKFLOW_VISIT |
The member cannot see the Workflow menu in the workspace sidebar |
Disable WORKFLOW_USE |
The member can see the workflow list but has no run button |
| Disable A2A agent permissions | The member cannot see A2A agents on the agent page |
| Disable skill permissions | The corresponding skill will not appear on the member's APP side |
| Set a credit quota | Once the member's consumption exceeds the quota, conversations are paused until the next month's reset |
Recommended Role Templates
| Role Name | Basic Permissions | Resource Permissions | Credits | Target Audience |
|---|---|---|---|---|
| Developer | Full access to Work + Workflow + Agent | All skills and tools | Unlimited | R&D team members |
| Operations | Work + Search access, Workflow view-only | Basic skills (search, documents) | Limited quota | Operations/marketing teams |
| Guest | Basic Work conversation only | No enterprise resource permissions | Limited quota | External partners or temporary members |
| Admin | Full access + space management | All | Unlimited | Team leads |
Related Documentation
- Space Management Overview — Overview of the permission system
- Enterprise Resources — Resource-level permission control
- Security Guardrails — Organization-wide floor for tool permissions