
Quick Start
Run your first AI task in 5 minutes.
This article is organized into three paths based on "where you want to use it":
- Path A: Web browser (fastest, no installation needed)
- Path B: Desktop APP (most complete feature set)
- Path C: IM channels (invoke it from familiar tools like Telegram/DingTalk)
Path A: Web browser (5 minutes)
Step 1 · Sign in
Open your browser and go to https://www.gptbots.ai/workspace, then sign in with your enterprise account.
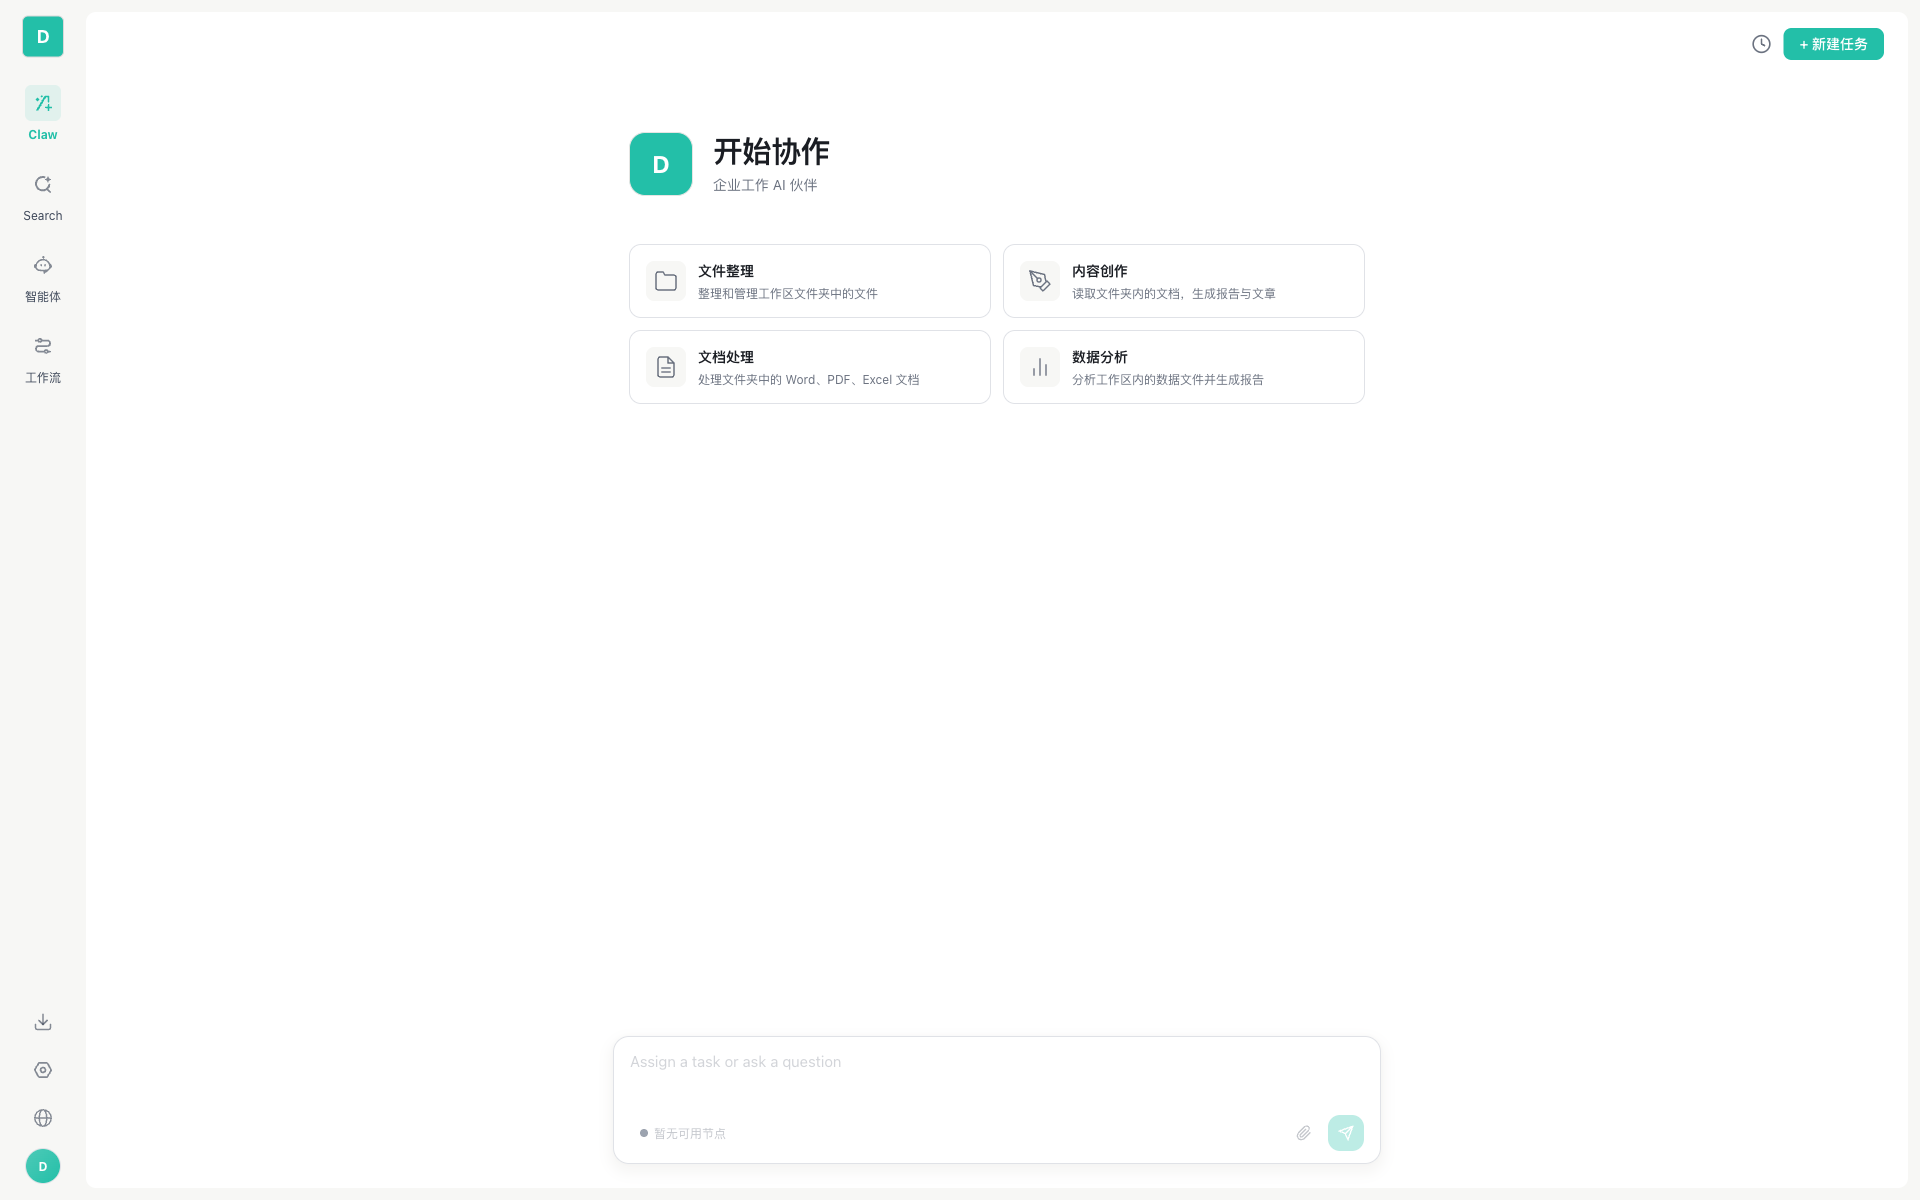
Tip: After signing in, you land on the Work conversation page by default. The left sidebar lists Work / Search / Agents / Workflows in order.
Step 2 · Start a conversation
- Type your question or task into the input box at the bottom (e.g., "Write me a Python sorting function")
- Press
Enterto send - Wait for the Agent to reply (text and tool calls stream in real time)
Step 3 · Try a tool call
⚠️ Prerequisite: The Web client cannot execute tasks on its own; it requires at least one desktop APP node to be online. If the input box shows "No available node" below it, follow "Path B" to install and start the desktop APP first.
Try these prompts:
| Prompt | What the Agent does |
|---|---|
| "List all image files on my desktop" | Calls List Directory → Glob Files |
| "Search for the latest React 19 features" | Calls the web-search skill |
| "Read out the text in this image" (with an image attached) | Uses the vision capability to analyze |
Step 4 · View history
The "History" icon in the top-right corner shows all conversations; you can also start a new session from the left.
Next steps
- Want to automate daily repetitive work → Scheduled Tasks (requires APP)
- Want to know which tools are available → Tool Management
- Want to learn advanced prompting techniques → Conversation Interaction
Path B: Desktop APP (recommended, most complete feature set)
Step 1 · Download and install
In the bottom-left corner of the Web client, click the APP Download button (downward arrow icon) to download the installer for your platform:
- macOS:
.dmginstaller, drag into Applications - Windows:
.exeor.msiinstaller, follow the guided setup - Linux:
.AppImage, run directly
Step 2 · Launch for the first time and sign in
After launch you'll see the sign-in screen. Sign in with the same enterprise account you use on the Web.
After signing in, the APP automatically registers as a node with the Gateway, so the Web client can remotely invoke this APP.
Step 3 · Configure an LLM model
- Click Settings in the bottom-left corner and go to the Models menu
- Select a provider (we recommend Claude Sonnet 4 as your first choice), enter the API Key, and test the connection.
- Save the key and you're done.
For detailed recommendations, see Model Configuration.
Step 4 · Your first conversation
- Return to Work (the first item in the left menu)
- Below the input box you'll see: the node name (e.g.,
Workspace (your computer name)) + model + working directory - Enter a task and press Enter to send
Step 5 · Try local capabilities
| Prompt | What happens |
|---|---|
| "Create a hello.py file on the desktop with the content print('hi')" | The Agent calls the Write File tool to actually create the file |
| "Run npm --version" | The Agent calls Bash (a confirmation dialog pops up the first time) |
| "Sort the files in this directory by type" | The Agent lists files → categorizes by extension → calls file move |
Next steps
- Configure automated tasks → Scheduled Tasks
- Connect the AI to Telegram → Channel Configuration
- Install MCP tools → Tool Management
Path C: IM channels (let your team use it directly in group chats)
Use cases
- Your team discusses things in a Telegram/DingTalk group and wants to @ the AI directly to ask questions
- Customers reach out via WhatsApp and you want the AI to reply automatically
- A Slack channel needs an on-duty AI
Step 1 · Install and sign in to the desktop APP
Channel features are only supported in the APP, so complete the APP setup first following "Path B".
Step 2 · Connect a channel
Using Telegram as an example:
- In Telegram, find @BotFather, send
/newbot, and get a Bot Token - APP → Settings → Channels → select Telegram, paste the Token
- The system automatically configures the Webhook, and the connectivity check shows pass
- Bring the channel online
Step 3 · Use it
- Direct message: Send a message directly to your Bot, and the Agent will reply
- Group: Add the Bot to a group, and group members trigger the Agent by @BotName
Detailed documentation
- Full integration guide → Channel Configuration
- Capability differences across platforms → Channel List and Capability Matrix
Common first-time questions
Q: After sending a message on the Web, it shows "No available node"
A: The Web client cannot execute tasks on its own. Please install and start the desktop APP, or have a colleague with an APP node on your team set their node to enterprise so you can invoke it remotely.
Q: The AI replies very slowly
A: Possible causes:
- The model itself is slow (e.g., Claude Opus 4 is slower than Sonnet 4 but more accurate)
- The task is complex and involves multiple rounds of tool calls
- Network latency on the remote node
Q: A dialog popped up the first time I ran a command
A: This is a security mechanism. P1-level tools such as Bash and Web Fetch trigger a confirmation dialog on their first call. After reviewing the tool name and parameters, click "Allow" if it's safe. See Runtime Security for details.
Q: How do I get the Agent to remember my preferences
A: Say in the conversation, "Please remember that I prefer to use TypeScript." The system automatically writes this to account memory, so the Agent will know it in your next new conversation. You can also add it manually under APP → Settings → Memory. See Memory Management for details.
Q: Can I have the AI run automatically every day
A: Yes. Create a scheduled task under APP → Settings → Scheduled Tasks, which supports three modes: one-time, interval, and Cron. See Scheduled Tasks for details.
Where to go next
- Want a full overview of the Work conversation interface → Work Conversation Overview
- Want to see which tools are available → Tool Management
- Want to dive into the architecture → Web vs. APP Capability Comparison