AWS Cognito OIDC 配置指南
AWS Cognito OIDC 配置指南
本指南详细介绍如何在 GPTBots 平台配置 OIDC 协议与 AWS Cognito 串接。
配置流程
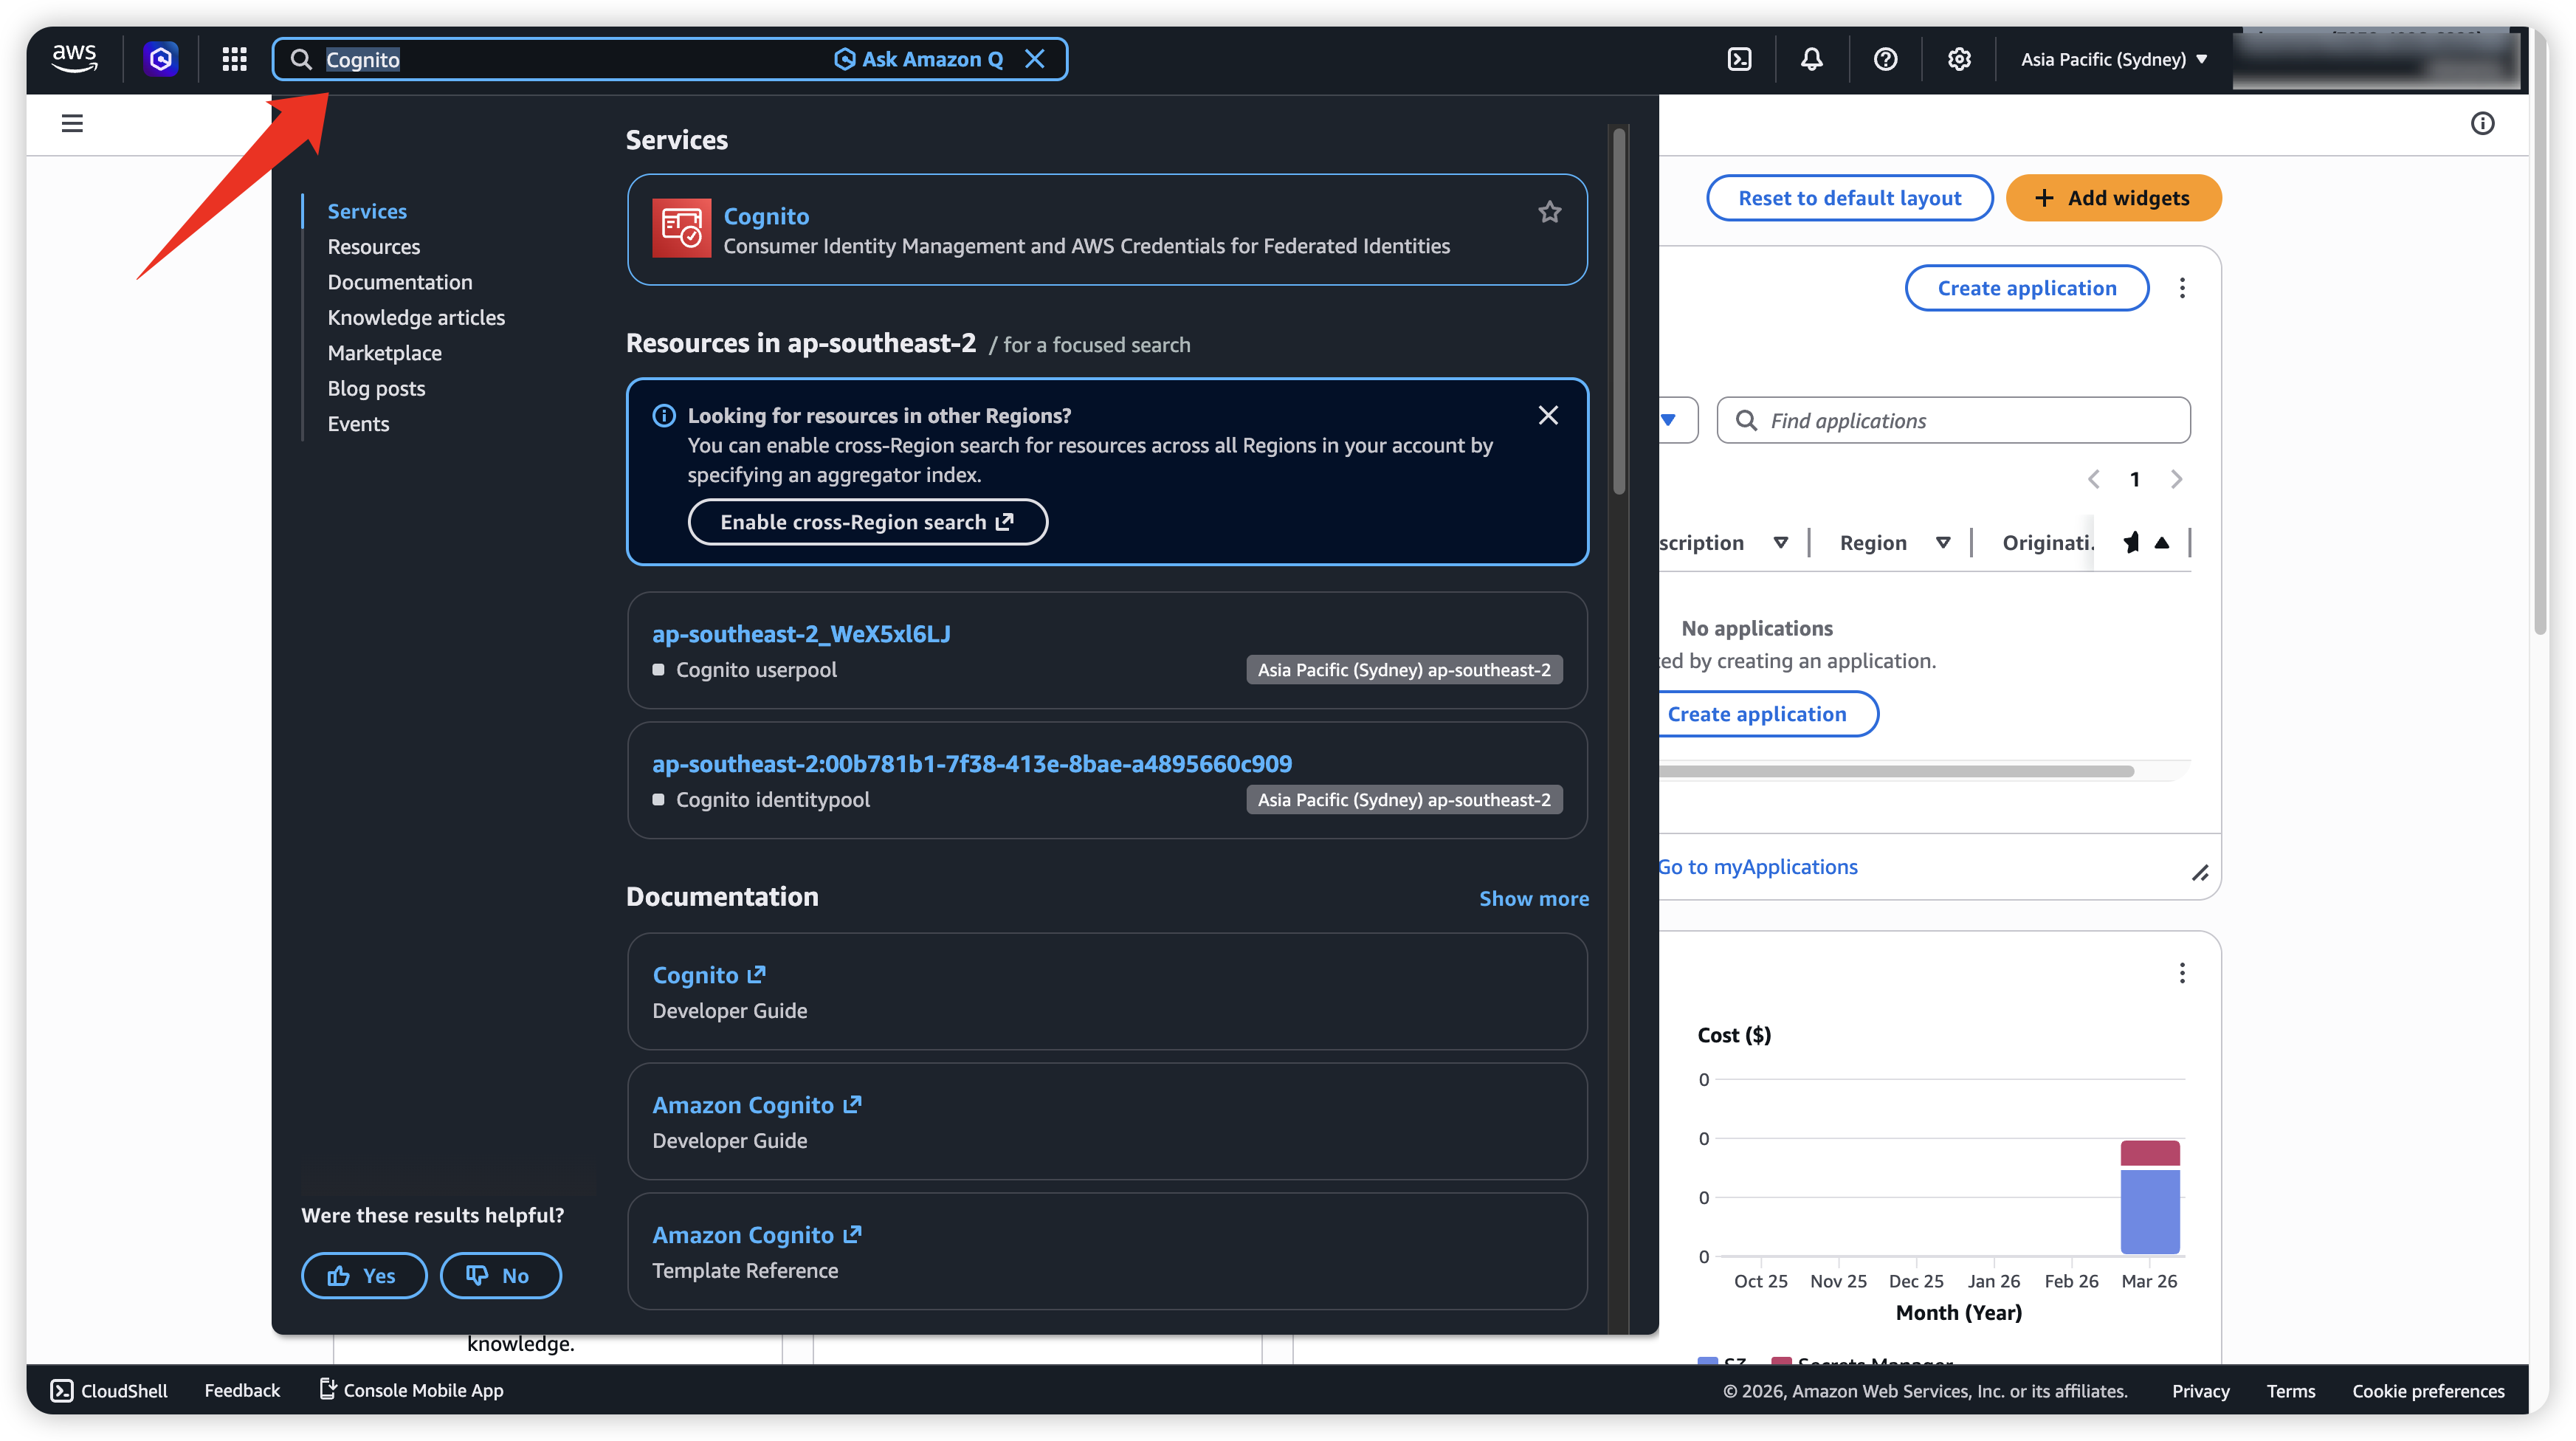
- 登录 AWS Cognito,在上方搜索框搜寻 Cognito 并点击。
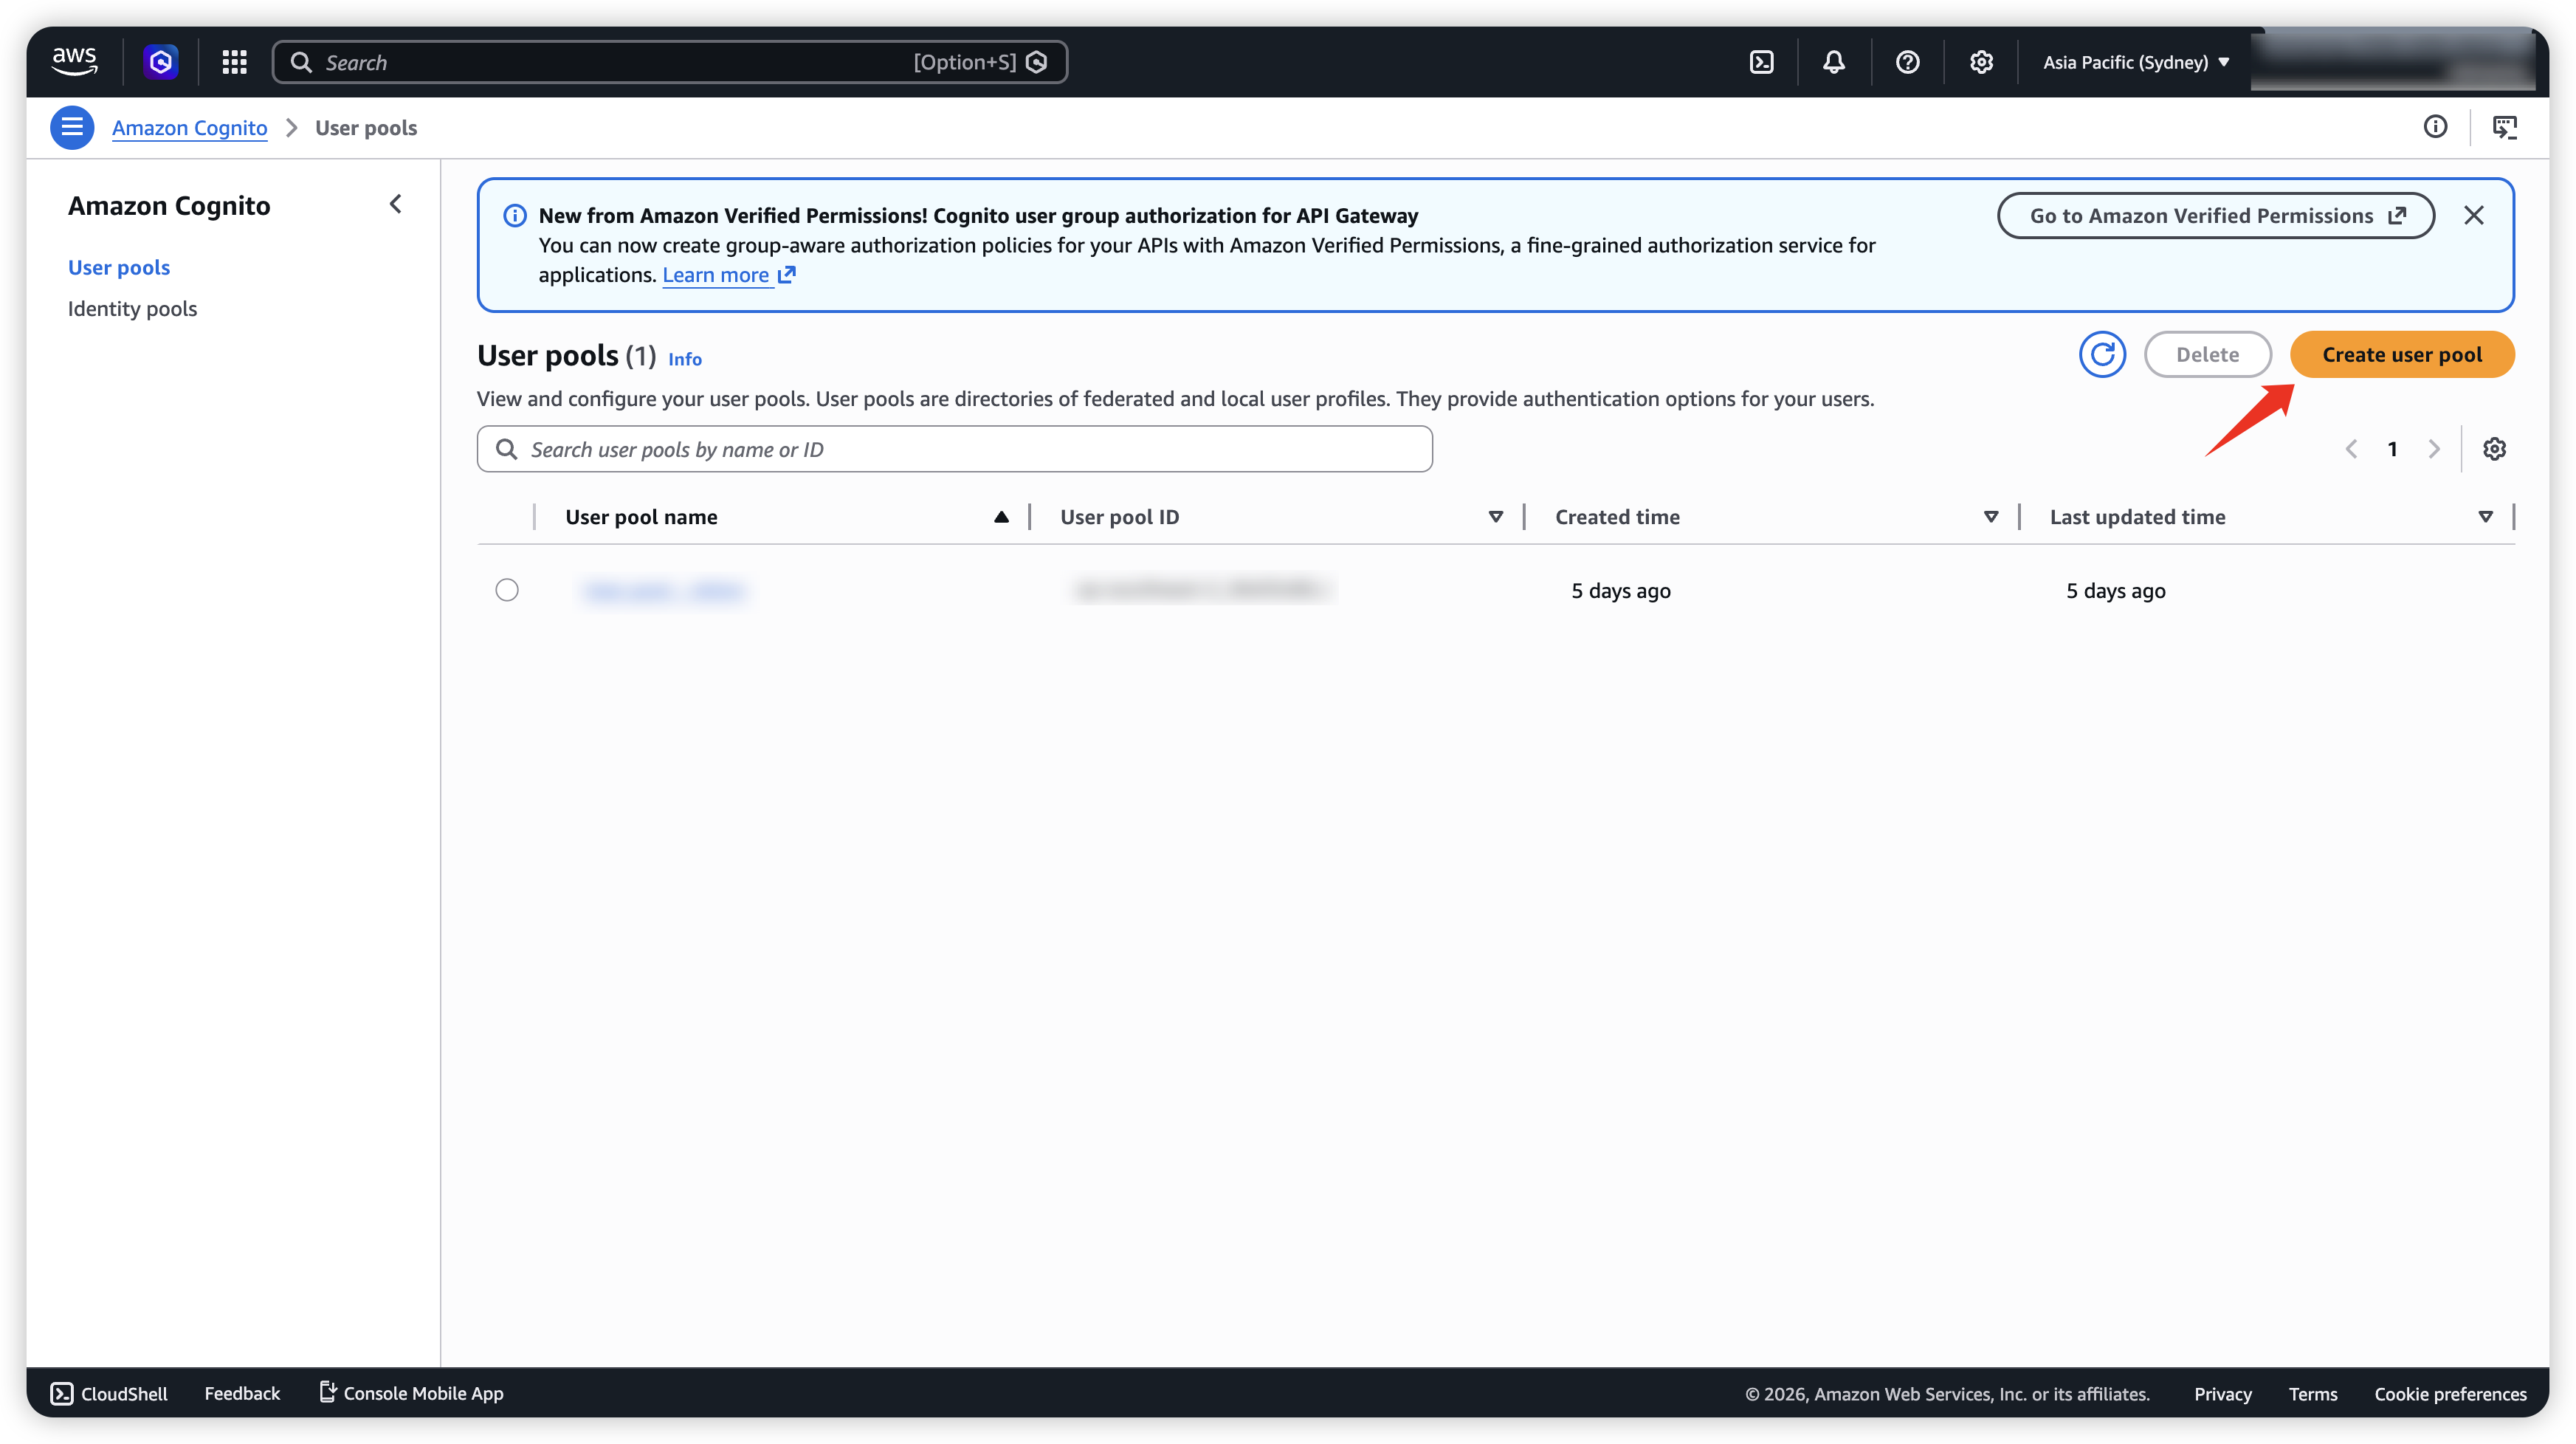
- 若無 User Pool 需要创建一个新的。
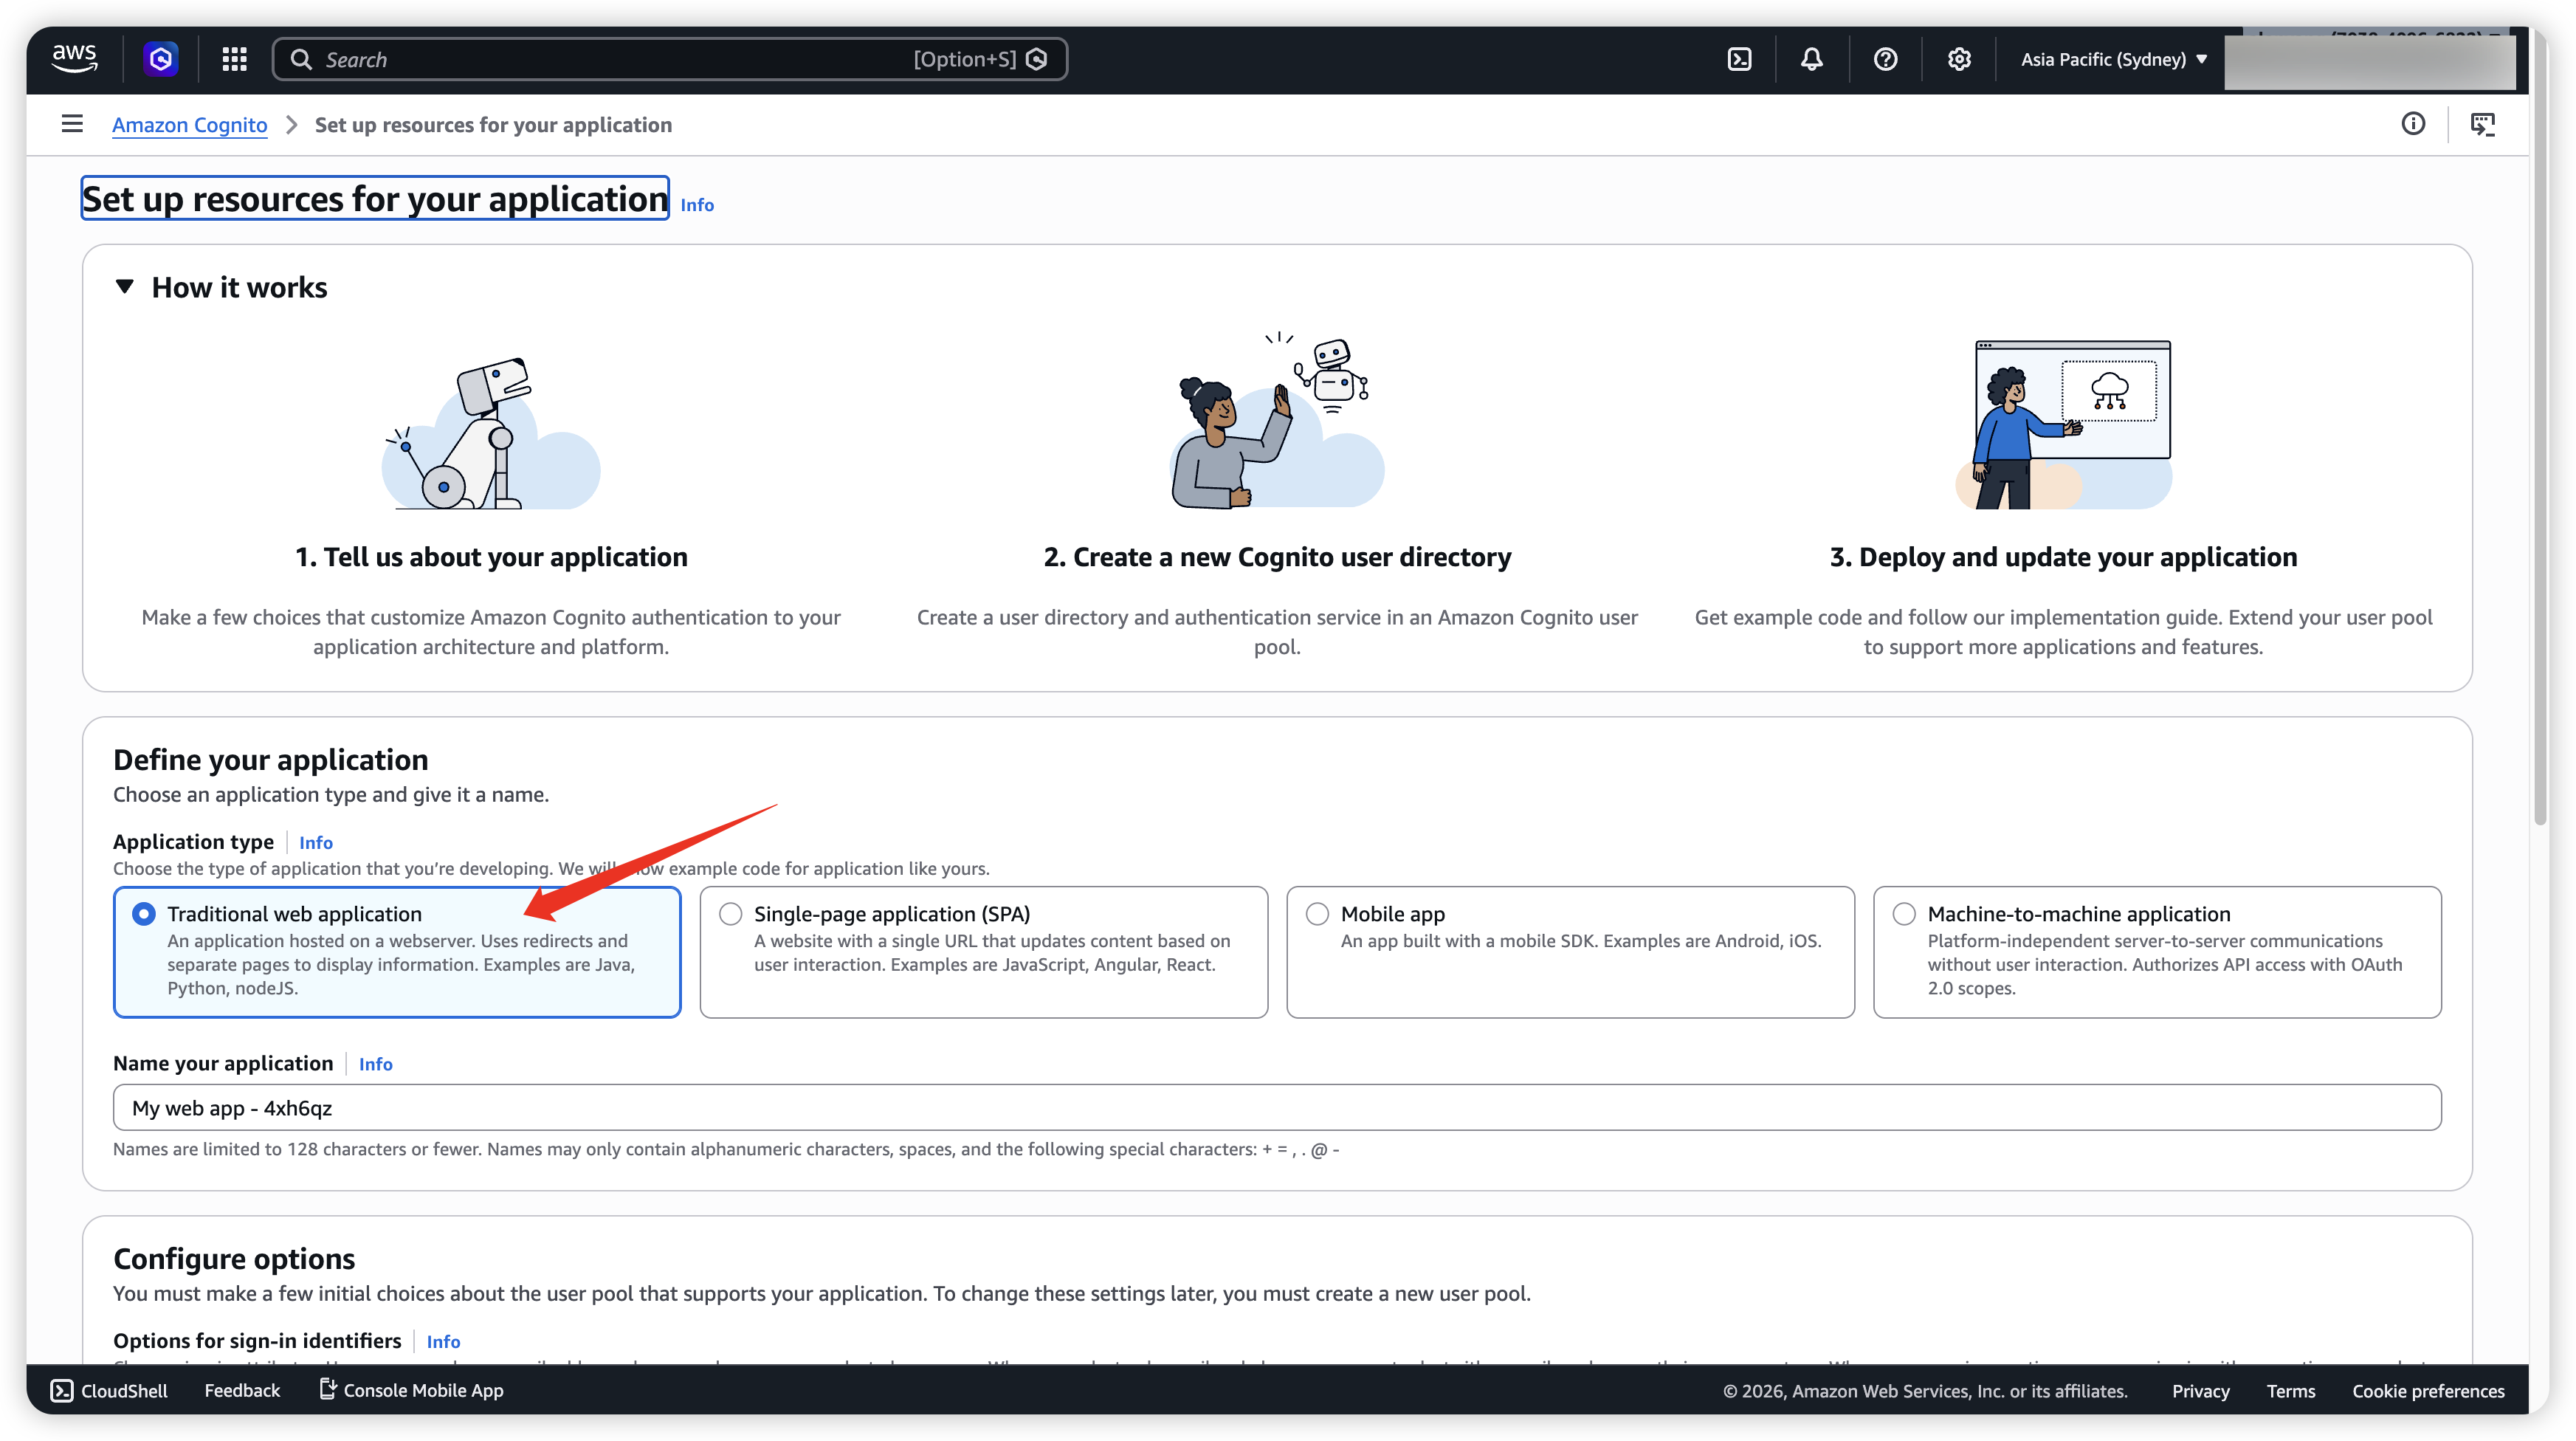
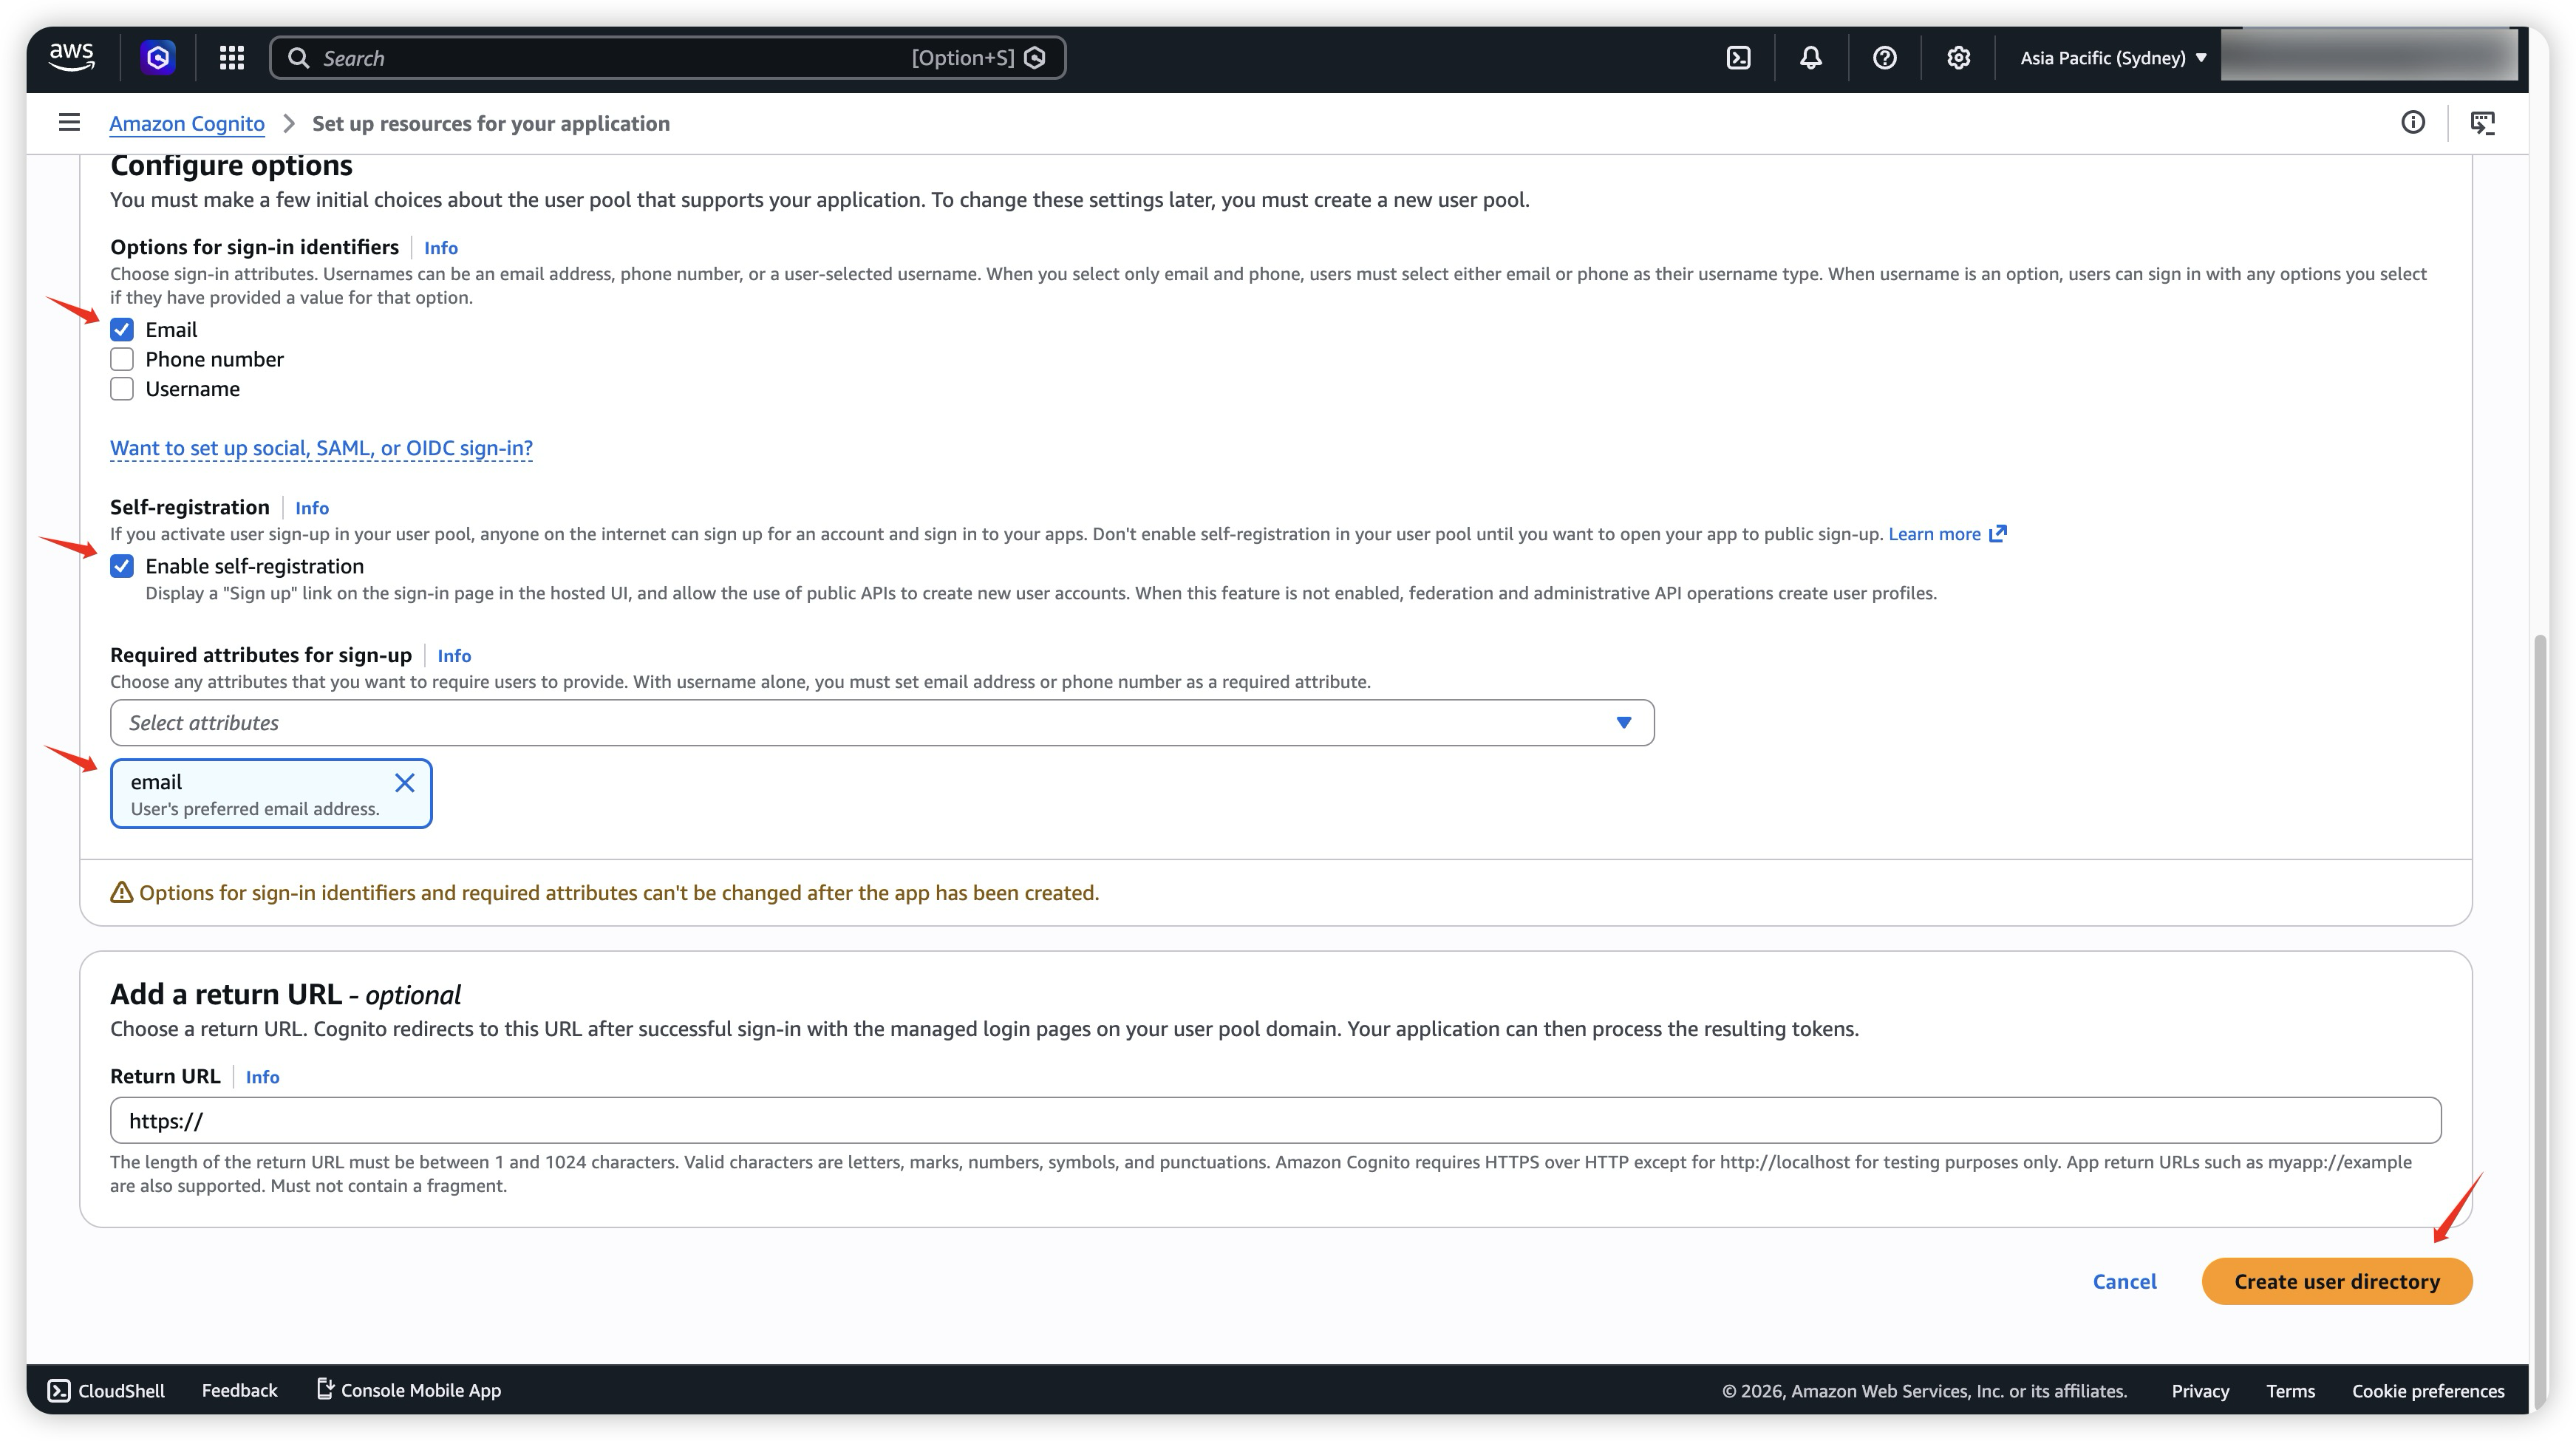
- 配置好以下基础信息。
- 成功後,会跳转到这个介面,往下滑点击 Go to overview。

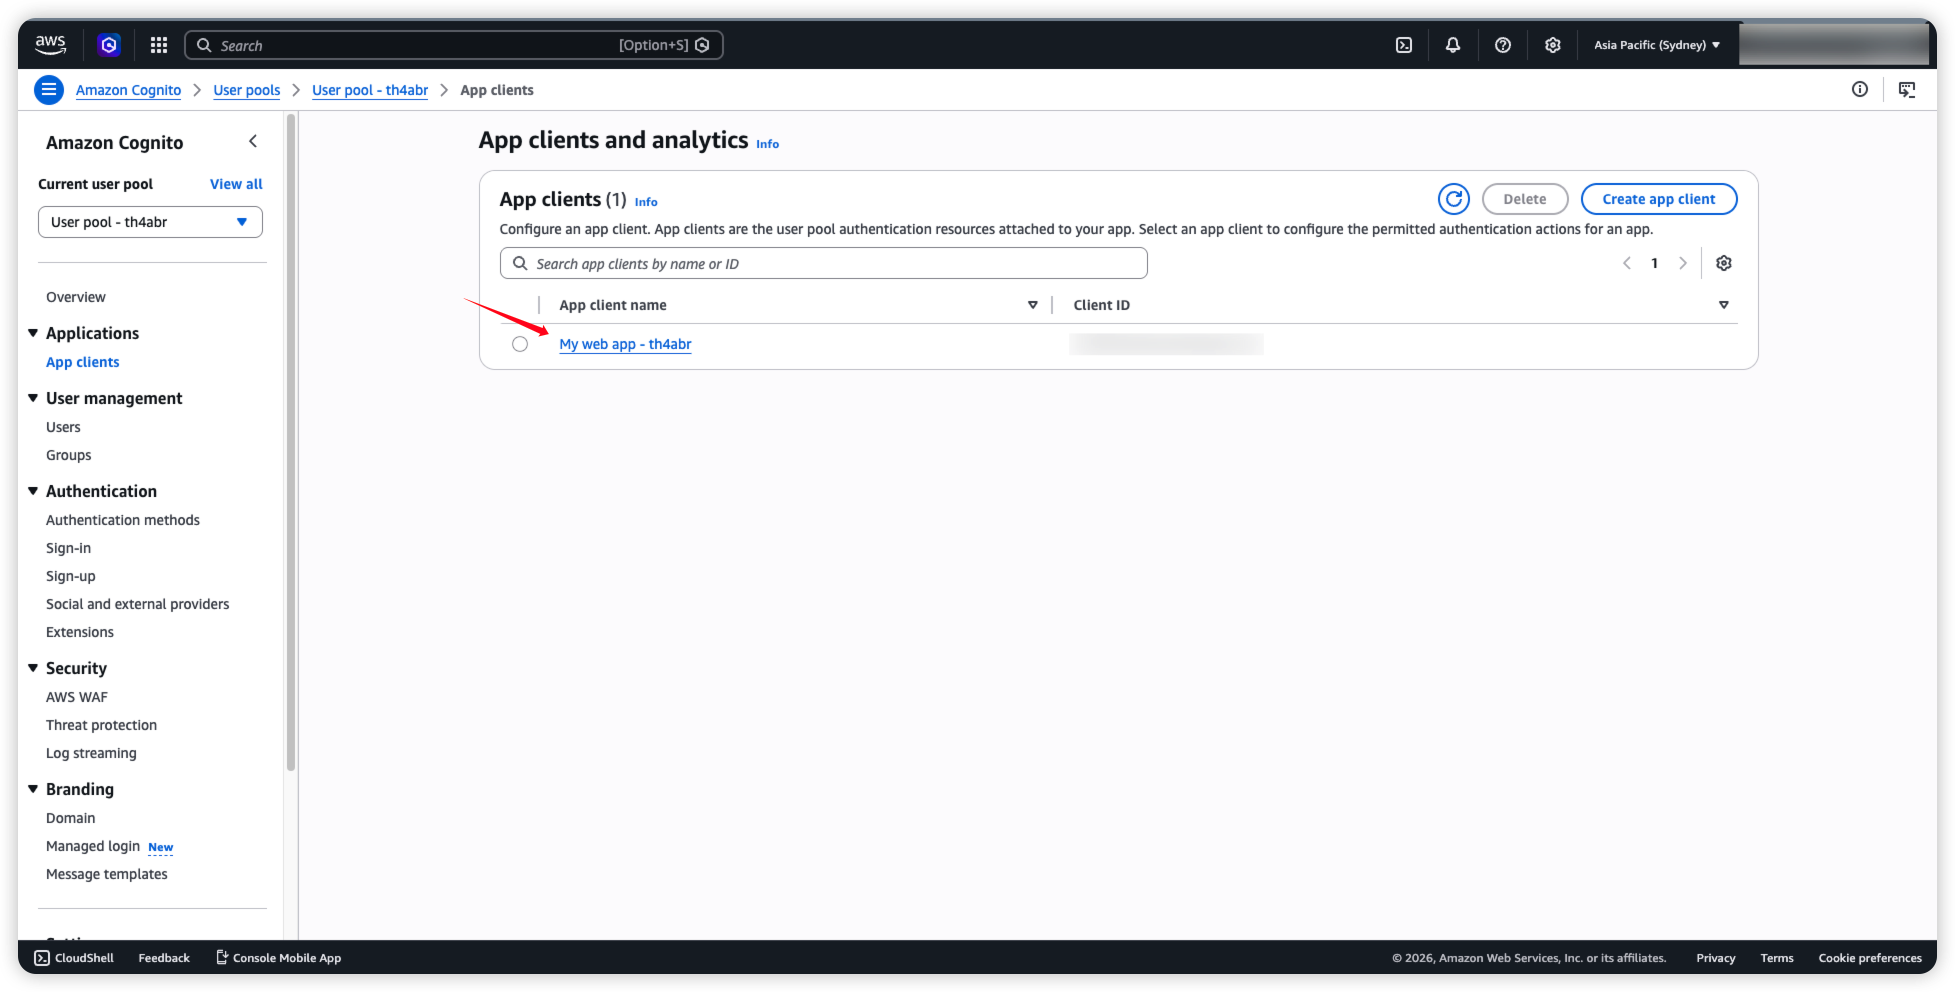
- 接著需要来配置 App Clients,点击刚刚建立的 App Client。
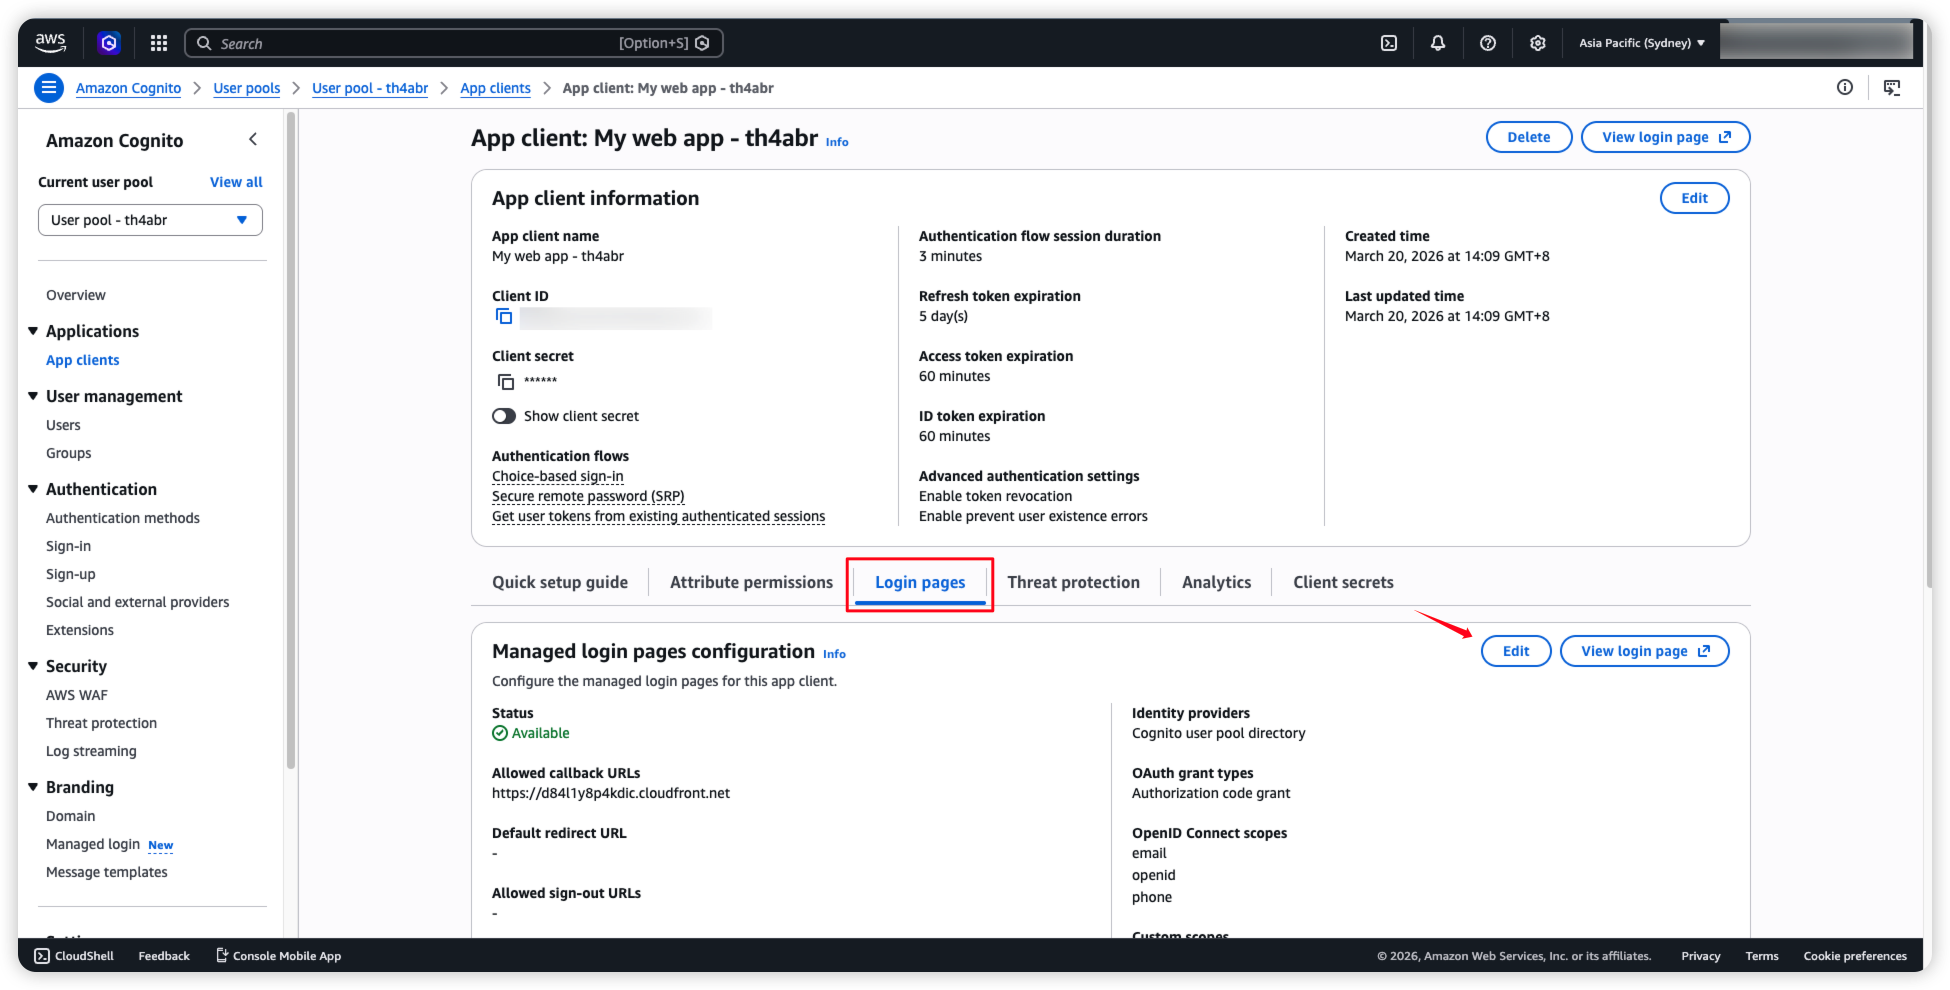
- 找到 Login pages,点击 Edit。
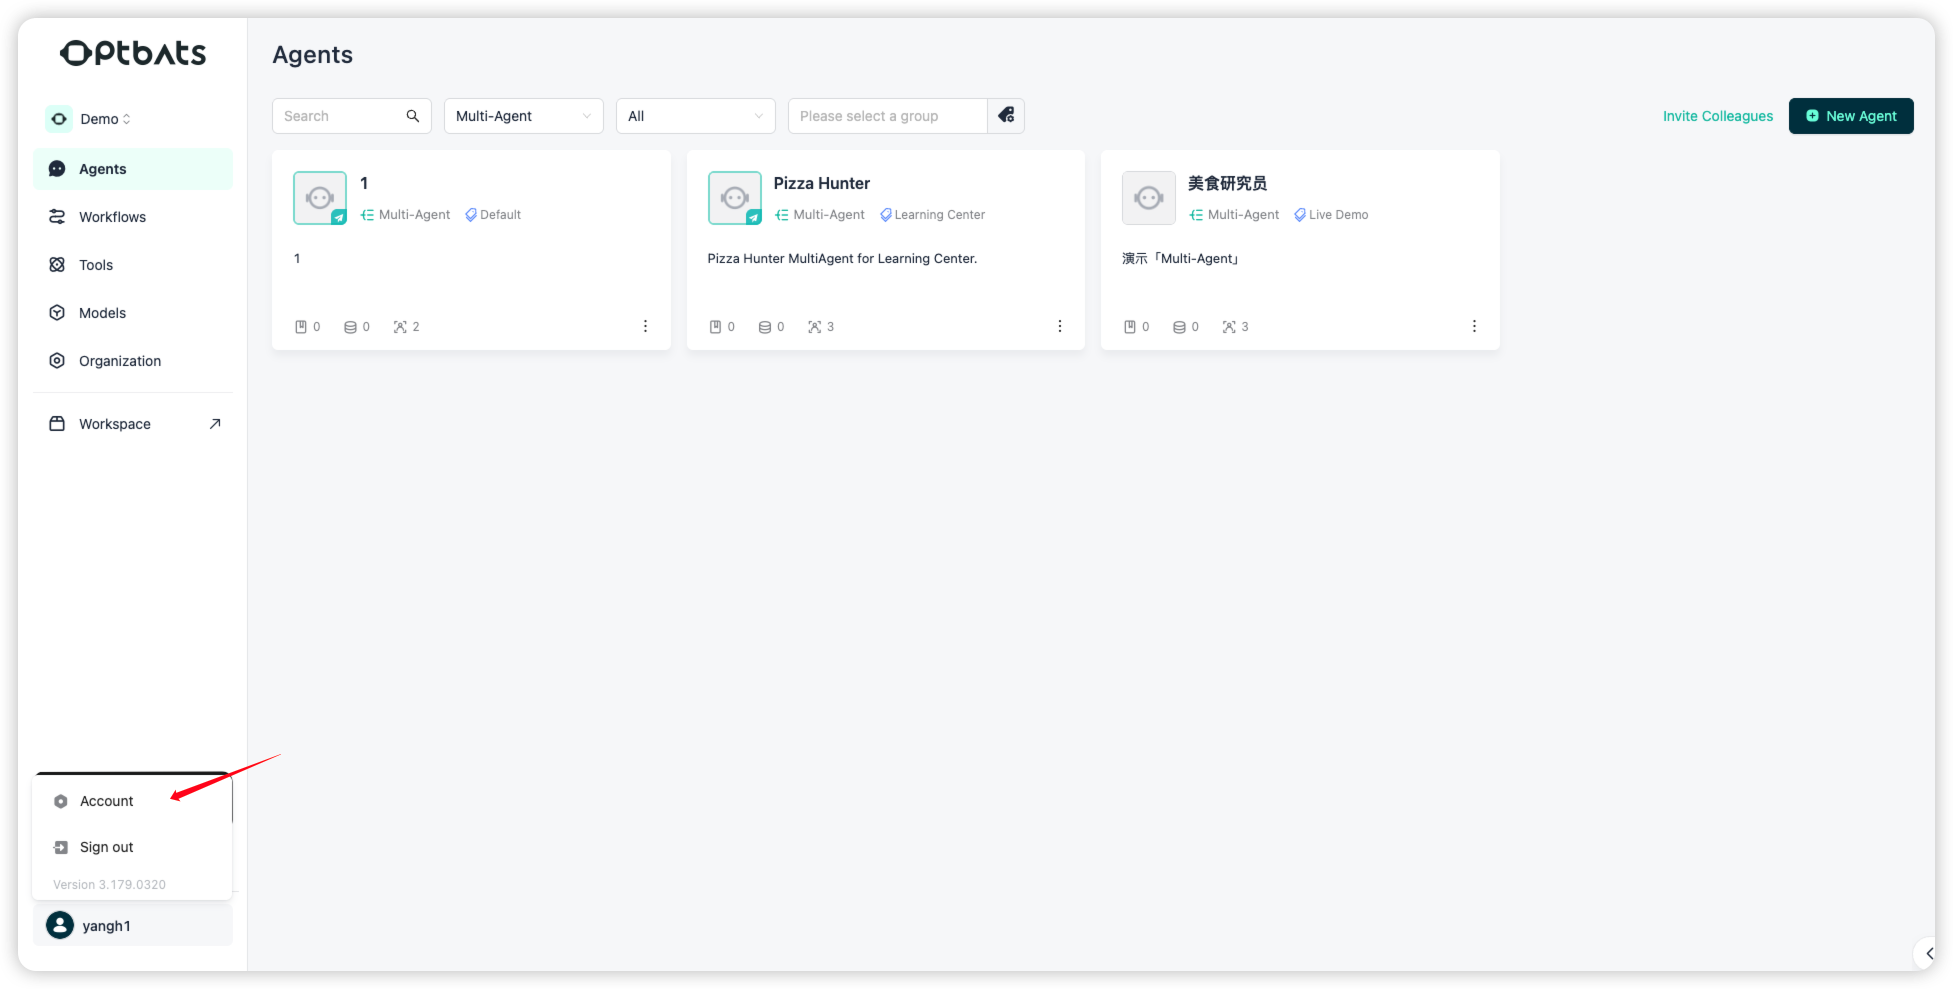
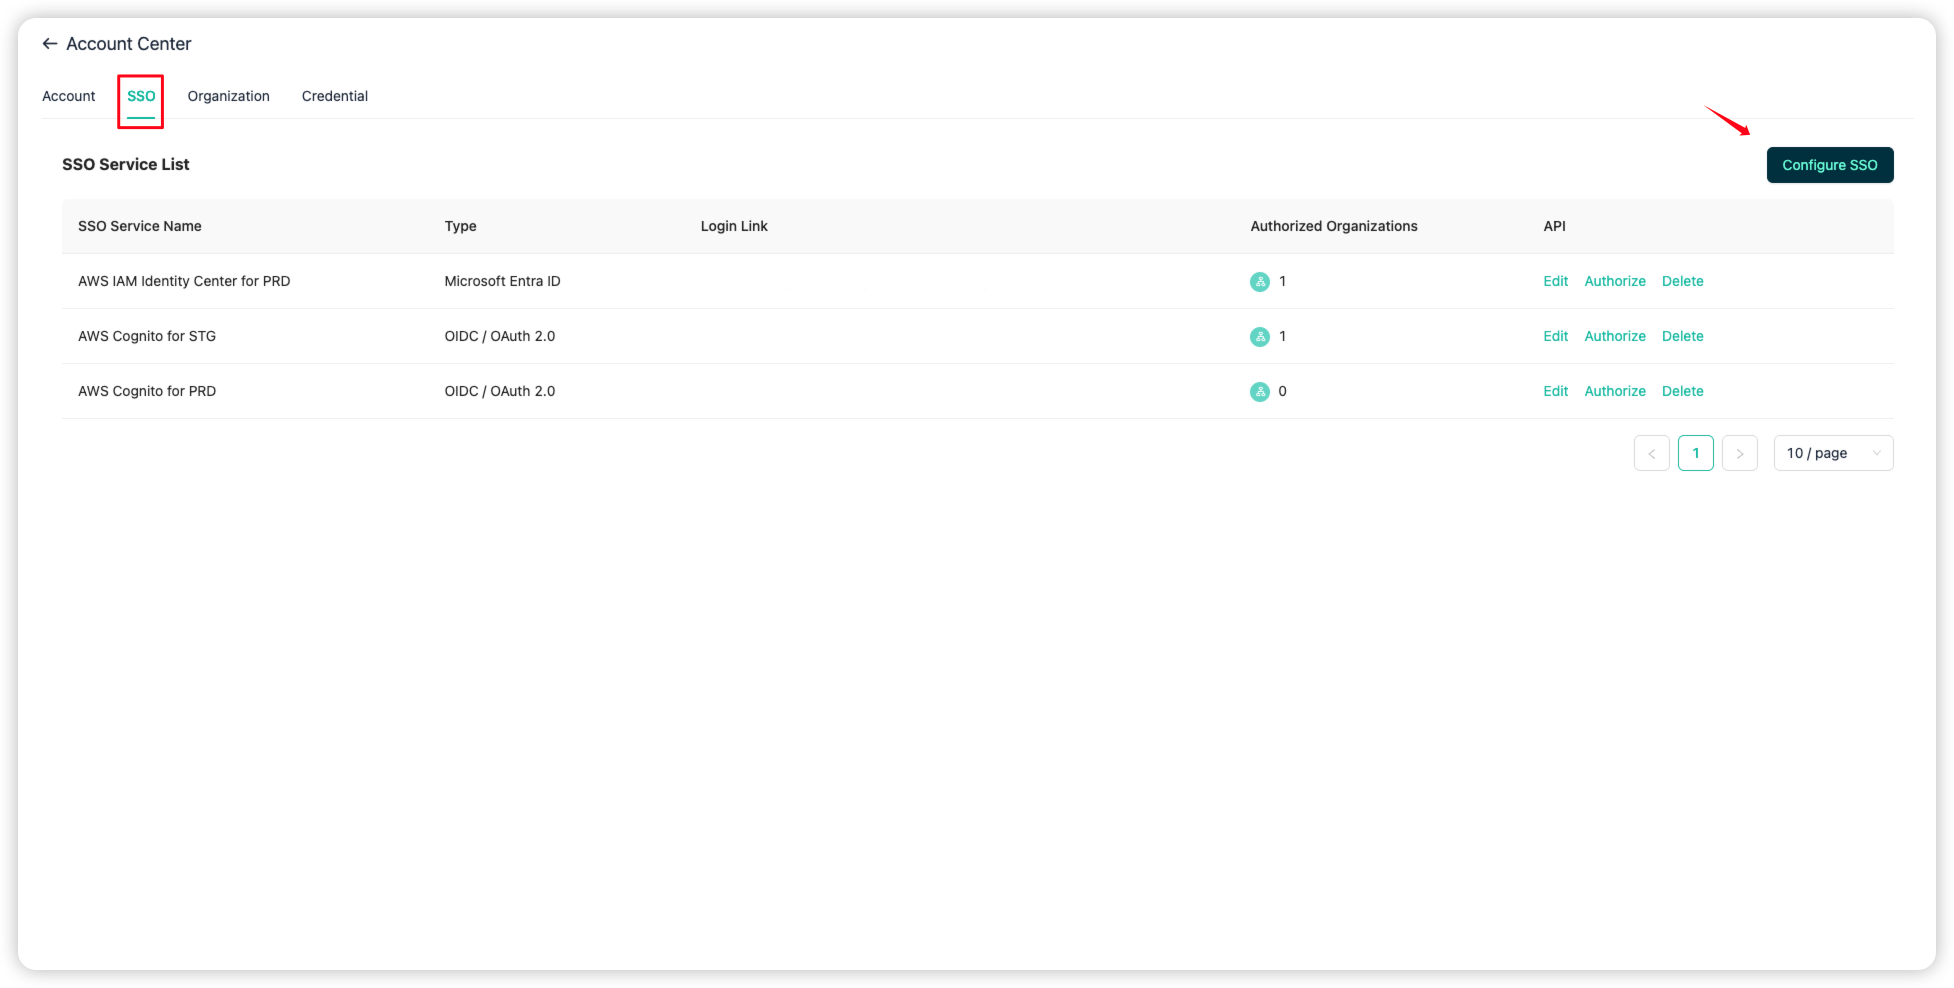
- 接著我们回来 GPTBots 平台,点击左下角的头像,选择 Account。
- 找到 sso 的页签,点击 Configure SSO。
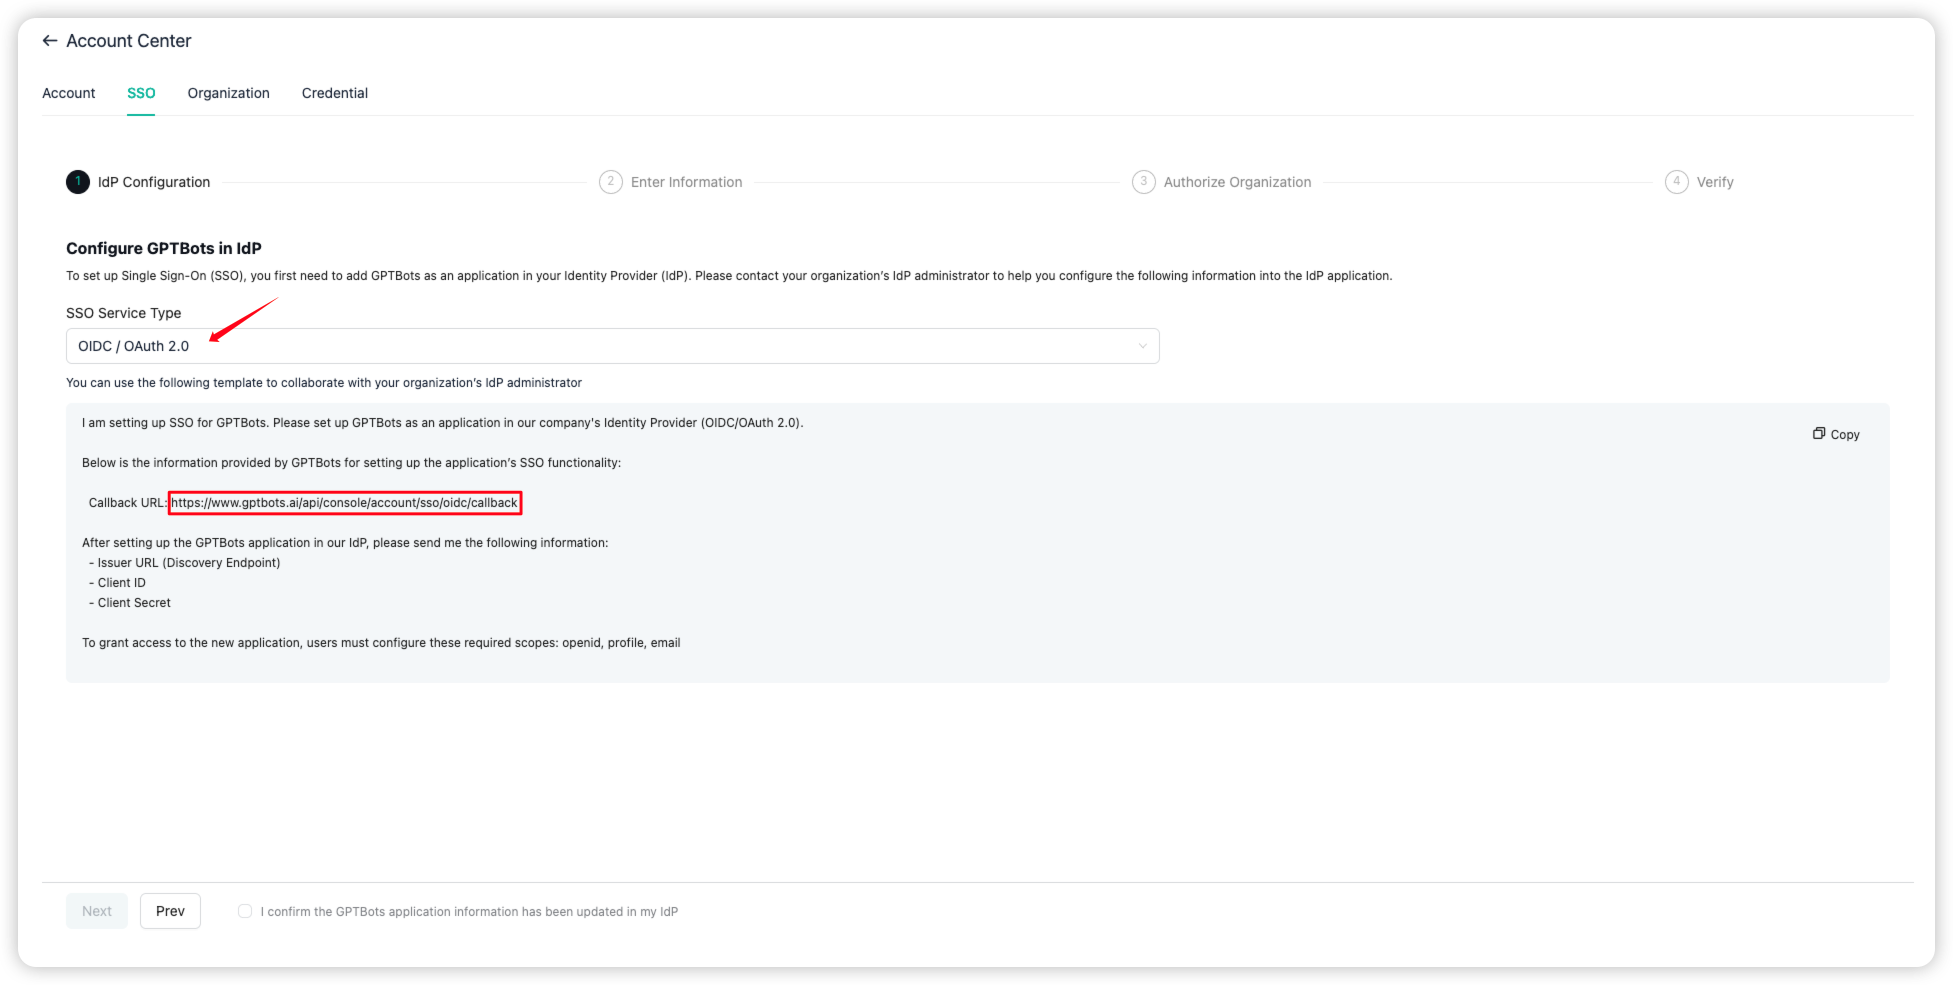
- 选择 "OIDC / OAuth 2.0" 这个协议,并且复制下面的 Callback URL。
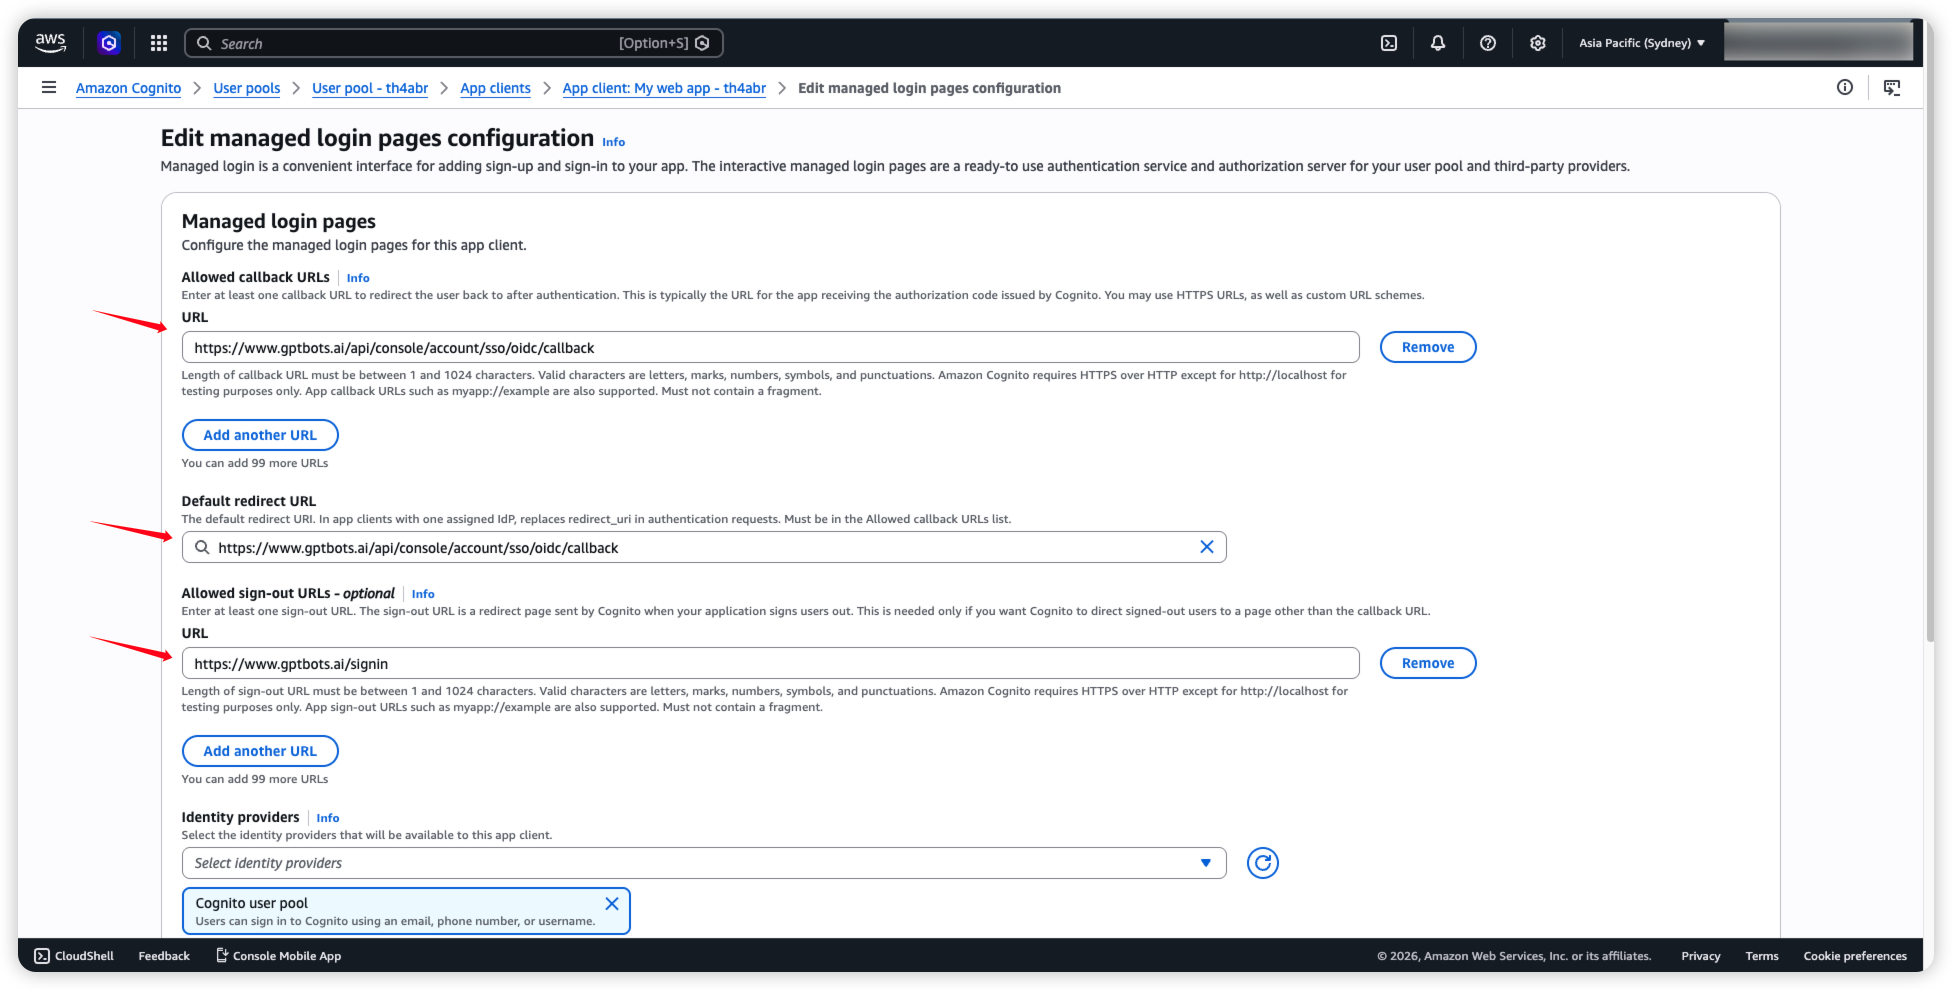
- 回到 AWS Cognito,把复制下来的值填入 Allowed Callback URLs 和 Default redirect URL,并且在 Allowed sign-out URLs 填入 https://www.gptbots.ai/signin
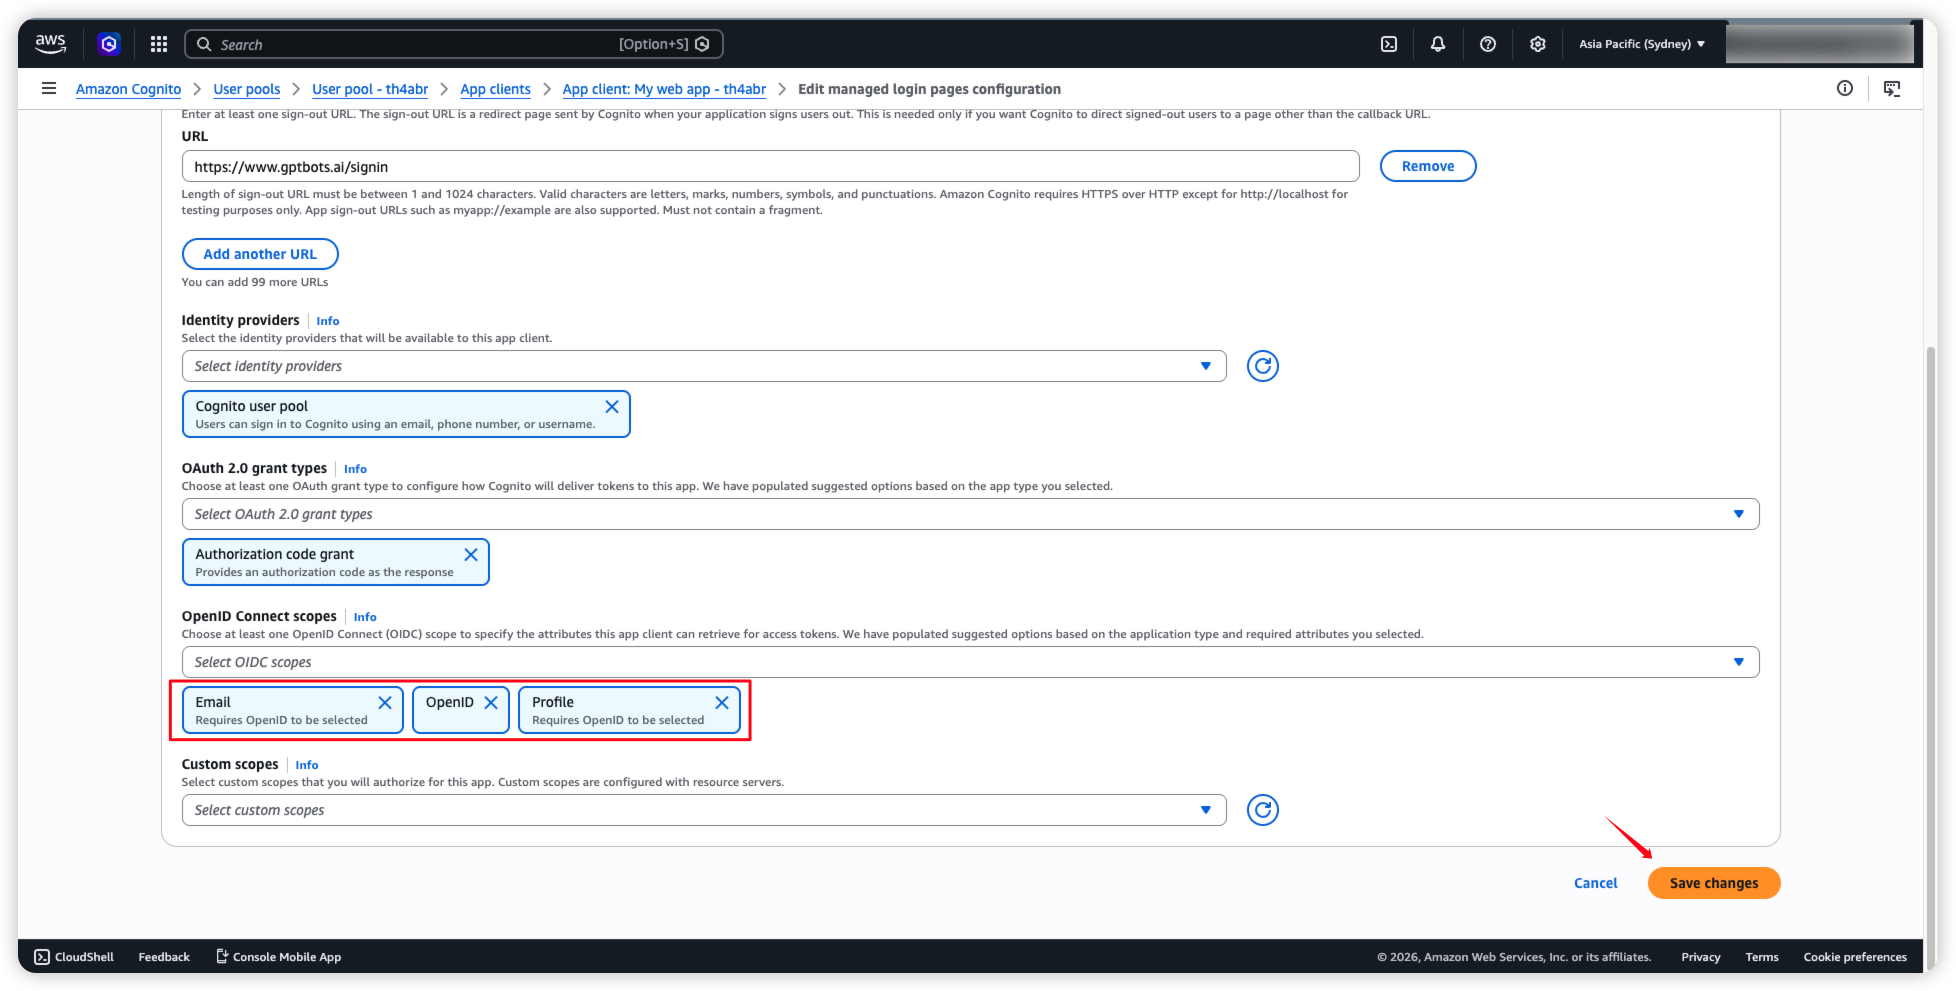
- 接著往下滑,在 OpenID Connect scopes 中,选择 "openid"、"email"、"profile",最后点击 Save changes。
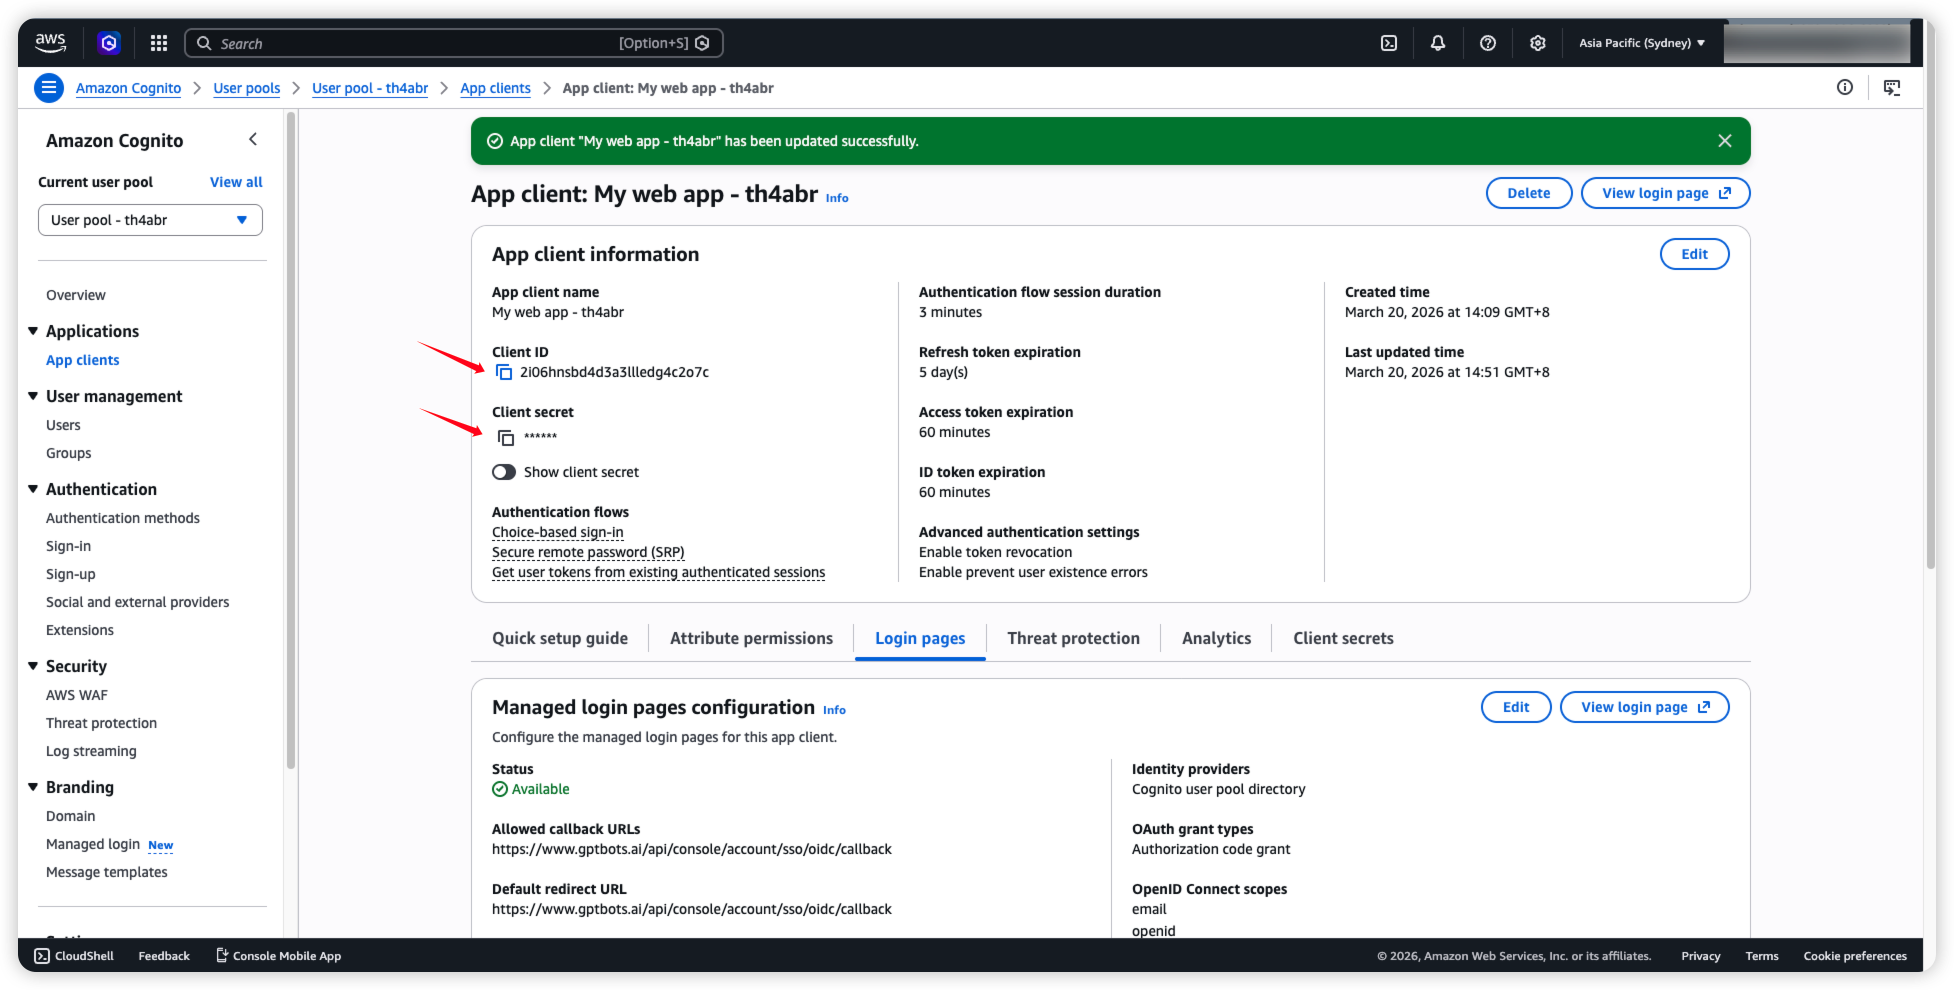
- 找到上方的 App Client information,复制 Client ID 和 Client secret。
- 回到 GPTBots 平台,勾选并点击 Next。
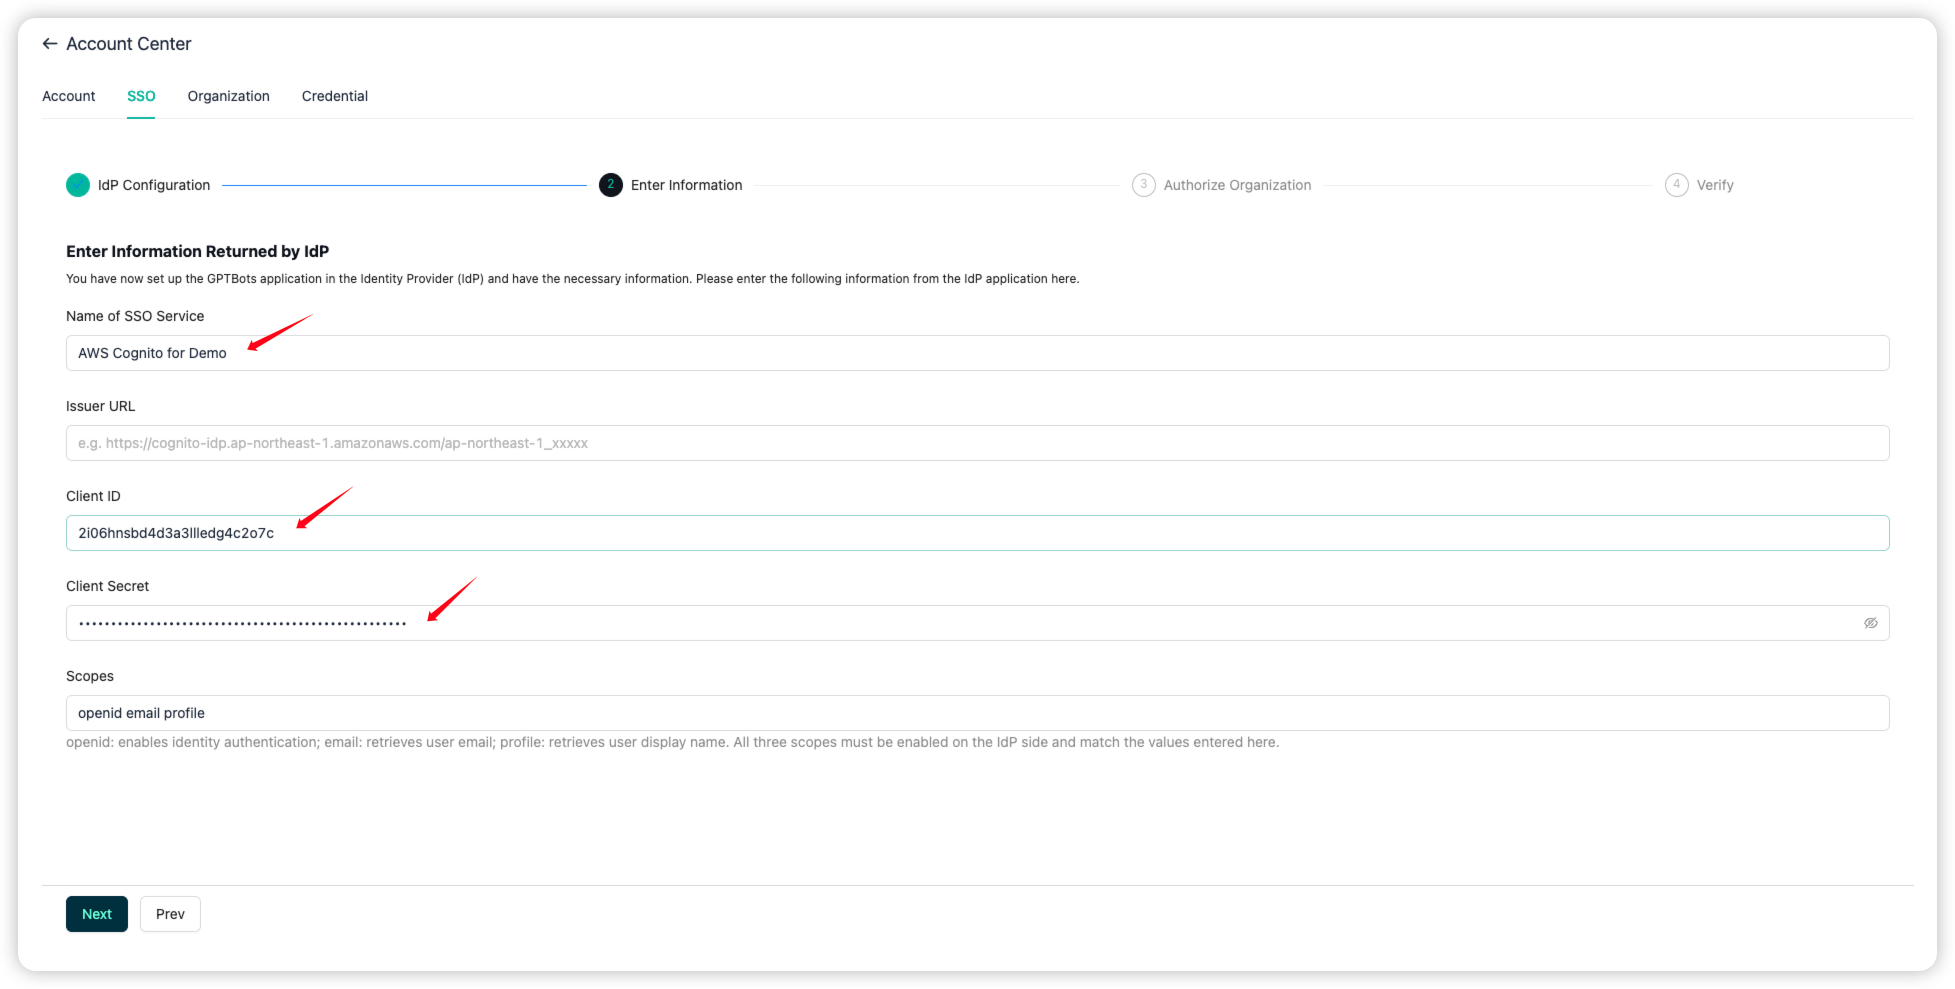
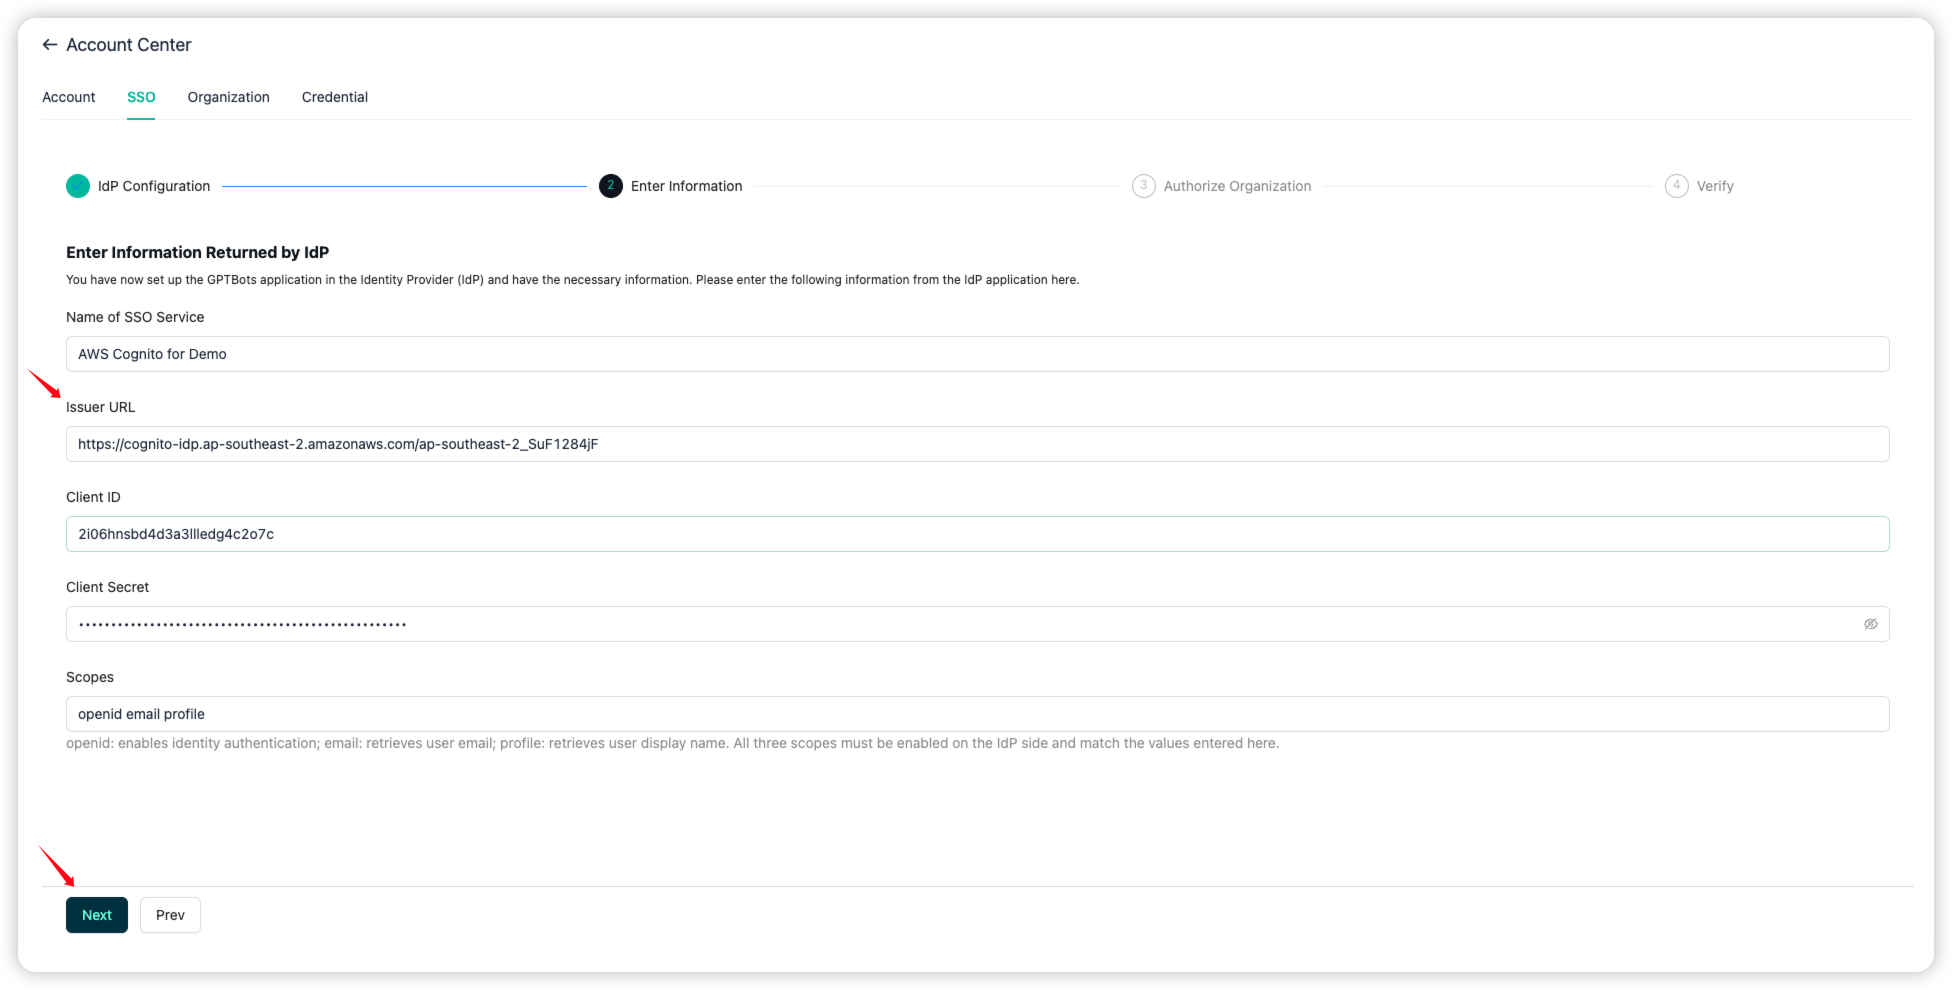
接著把复制下来的值分别填入 Client ID 和 Client secret。
Name of SSO Service 根据自己需求命名。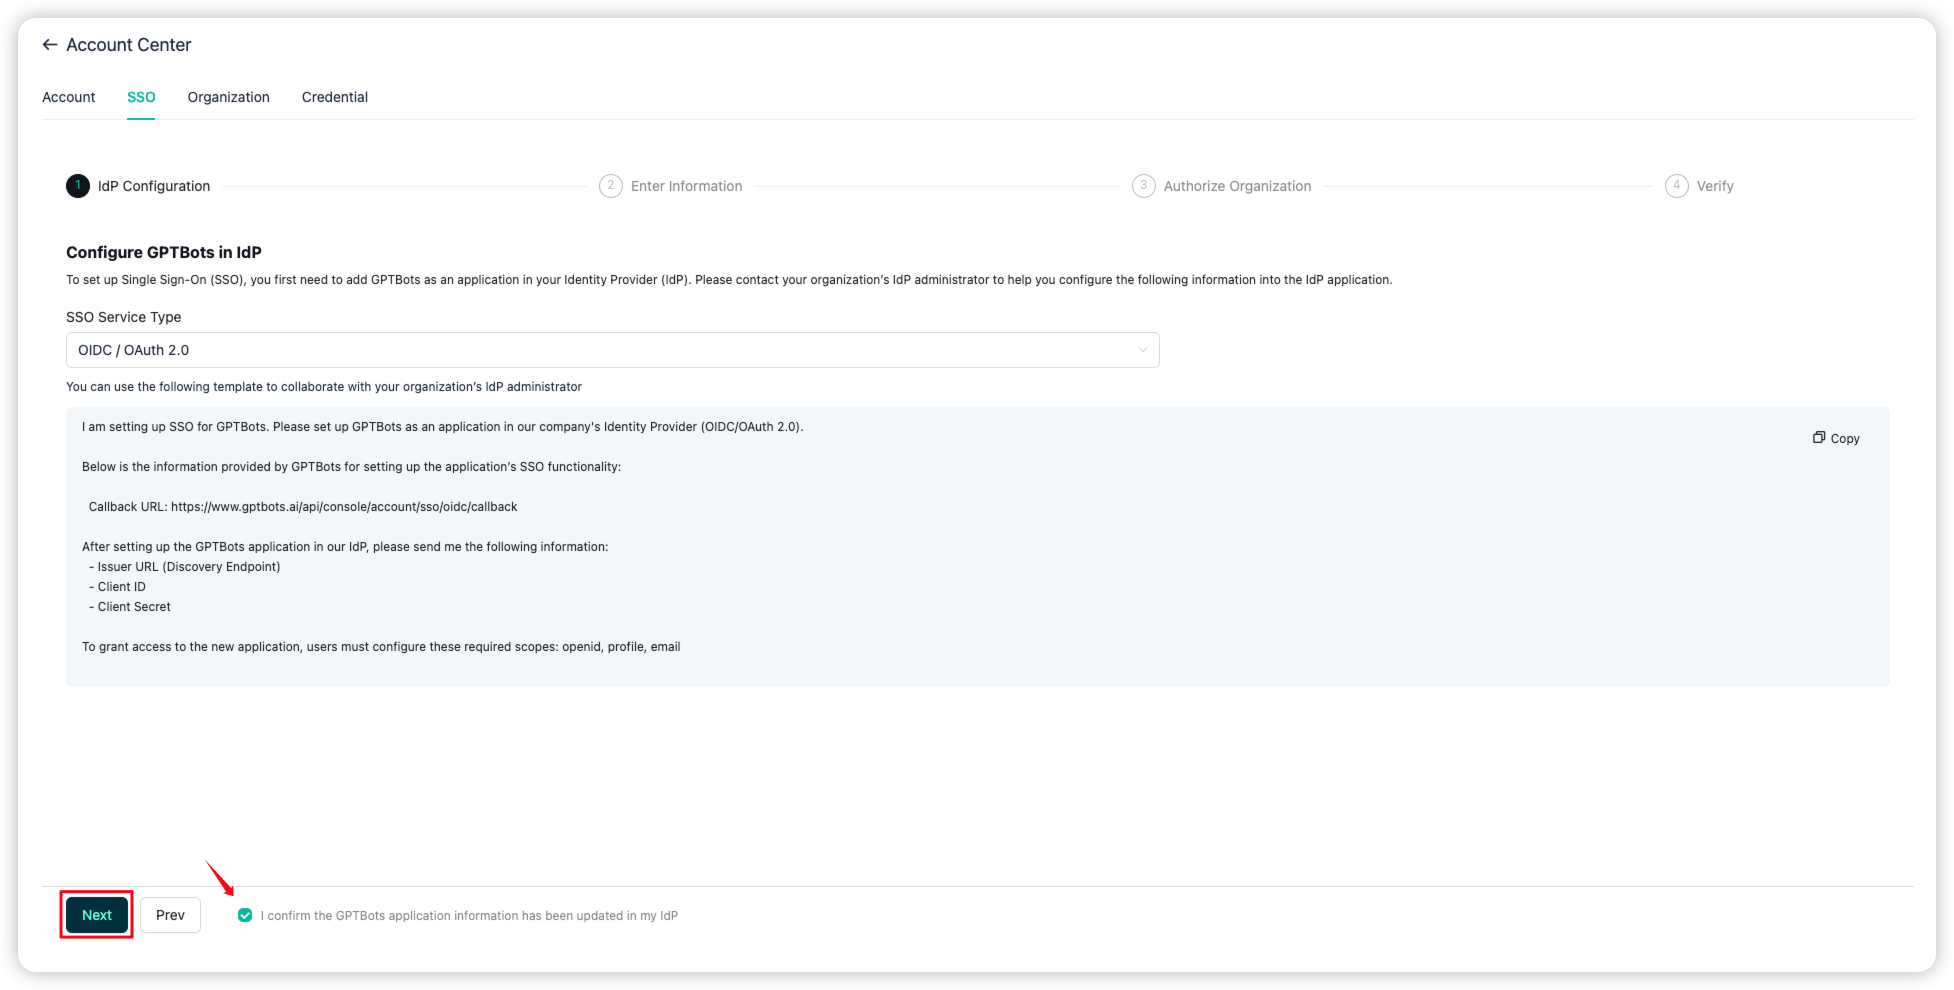
- 回到 AWS Cognito, 点击测边栏的 overview,复制 Token signing key URL。
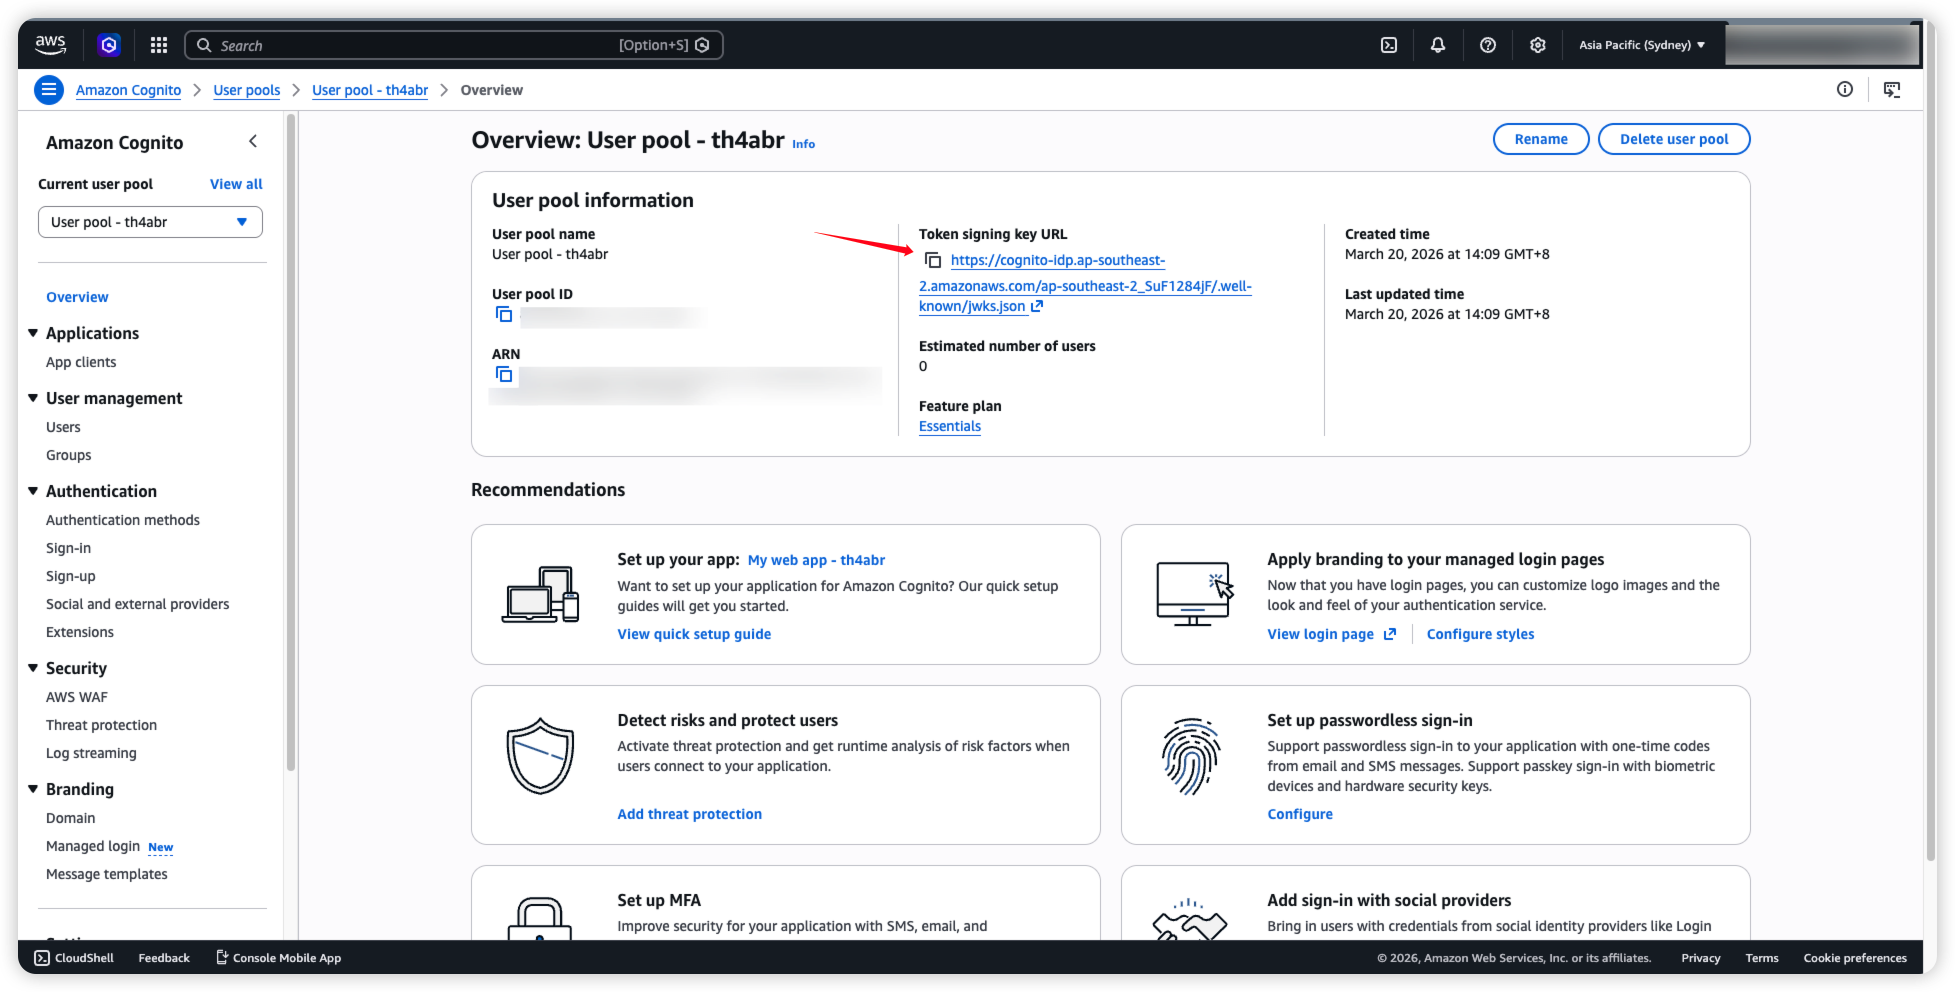
- 贴回 GPTBots 平台 的 Issuer URL,点击 Next。
注意: 贴上后请将 /.well-known/jwks.json 的部份删除,仅保留前面的部份。
16. 回到 Aws Cognito,我们要来创建 User。点击 create user。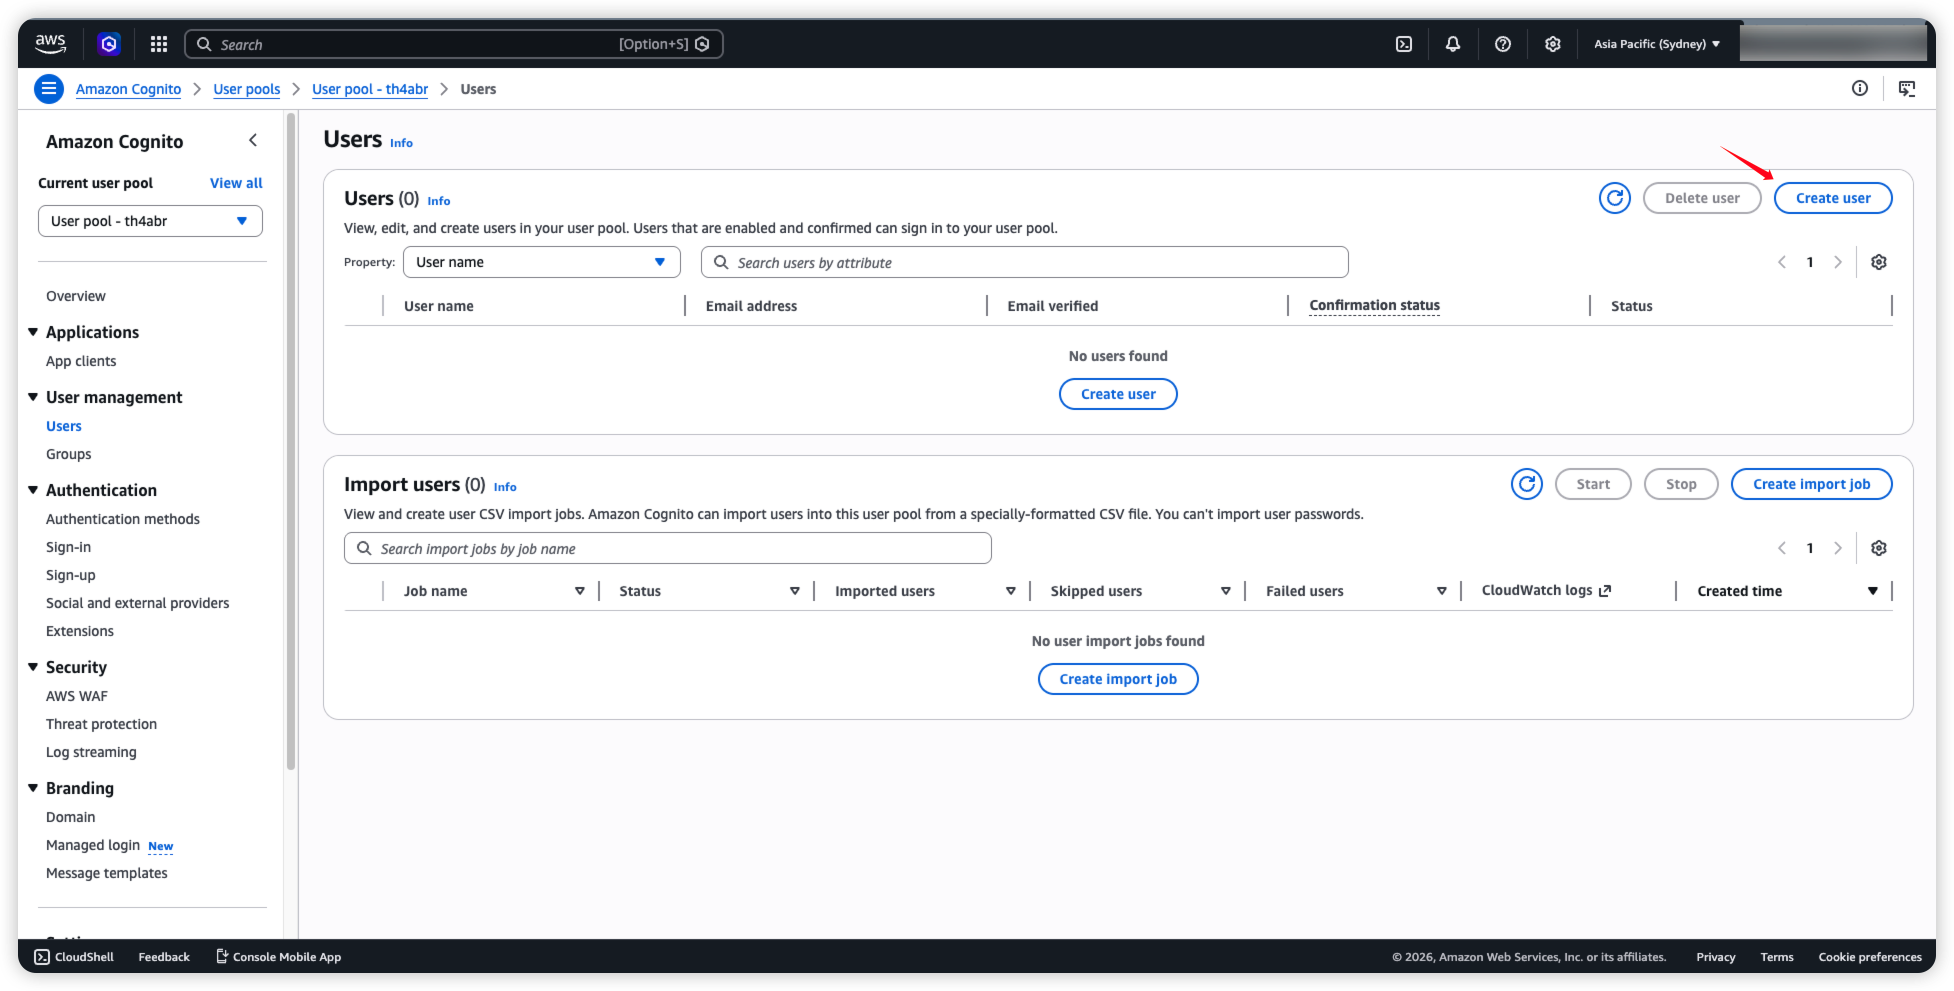
17. 保持图中的配置,点击 Create user。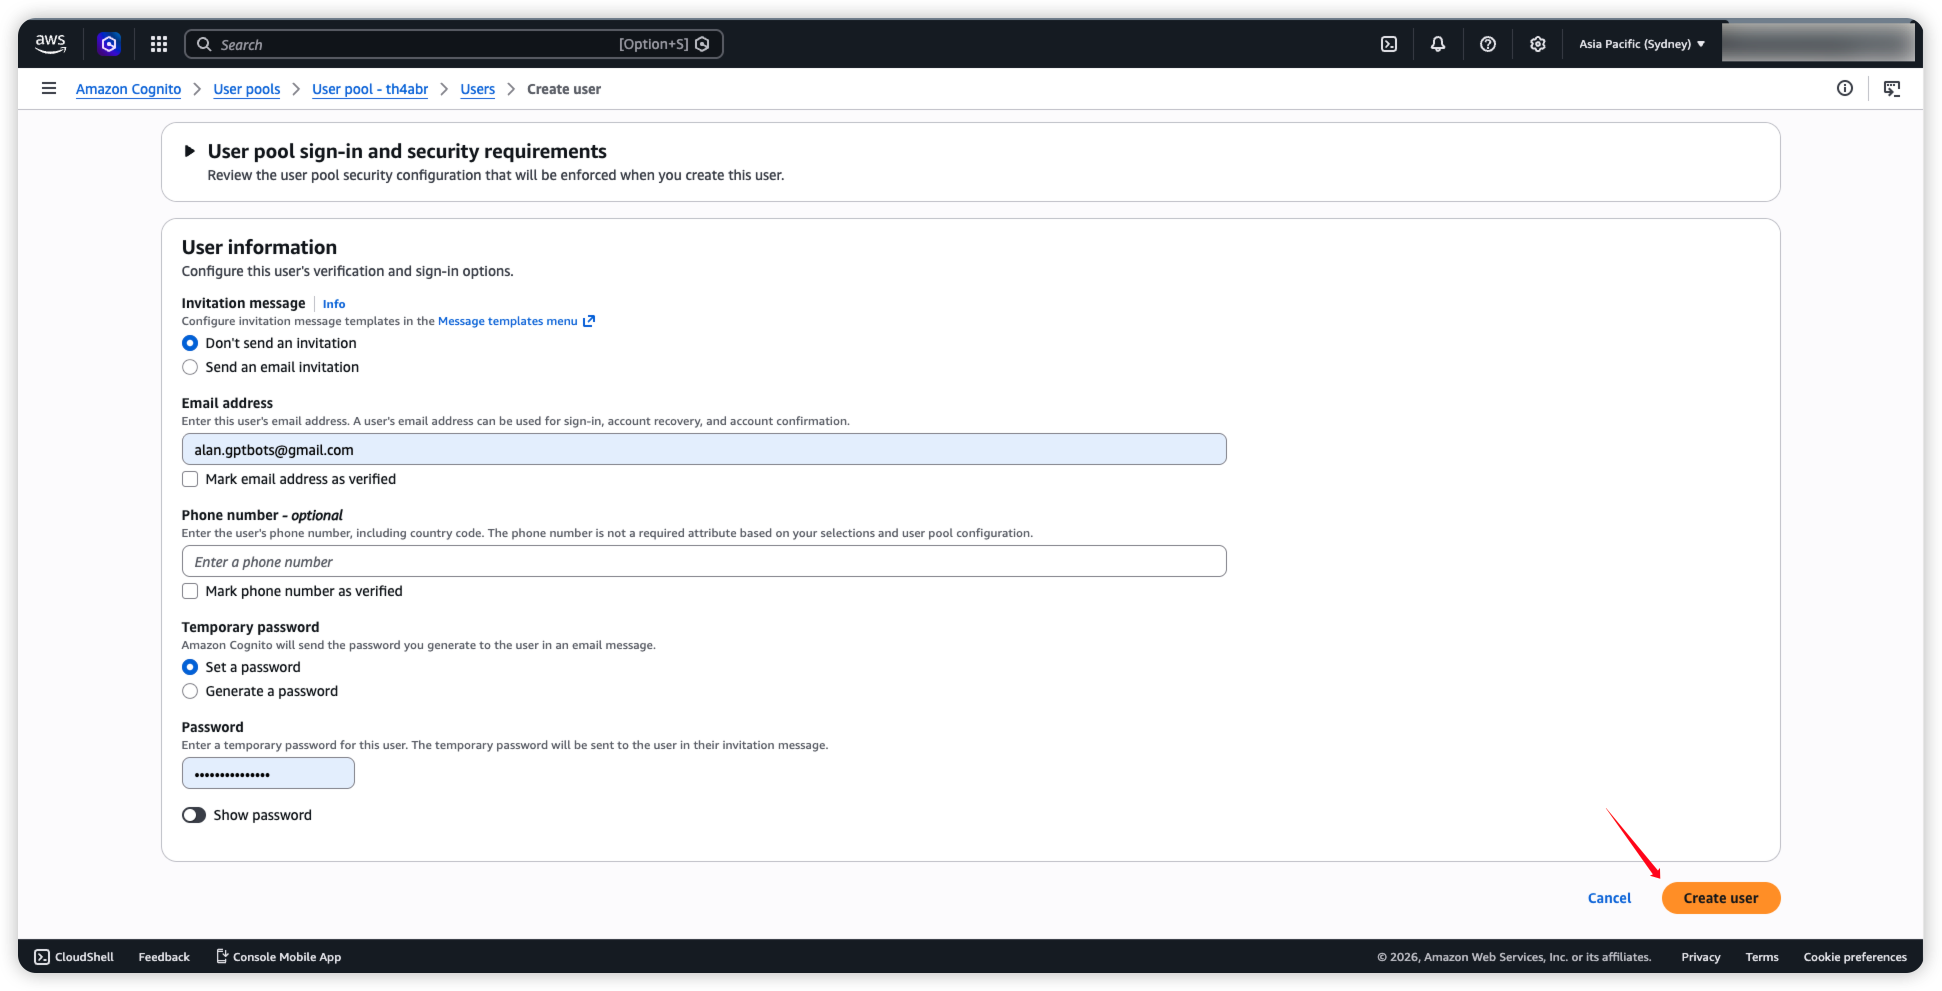
18. 最后在测边栏找到 Branding 下的 Domain,点击 Edit。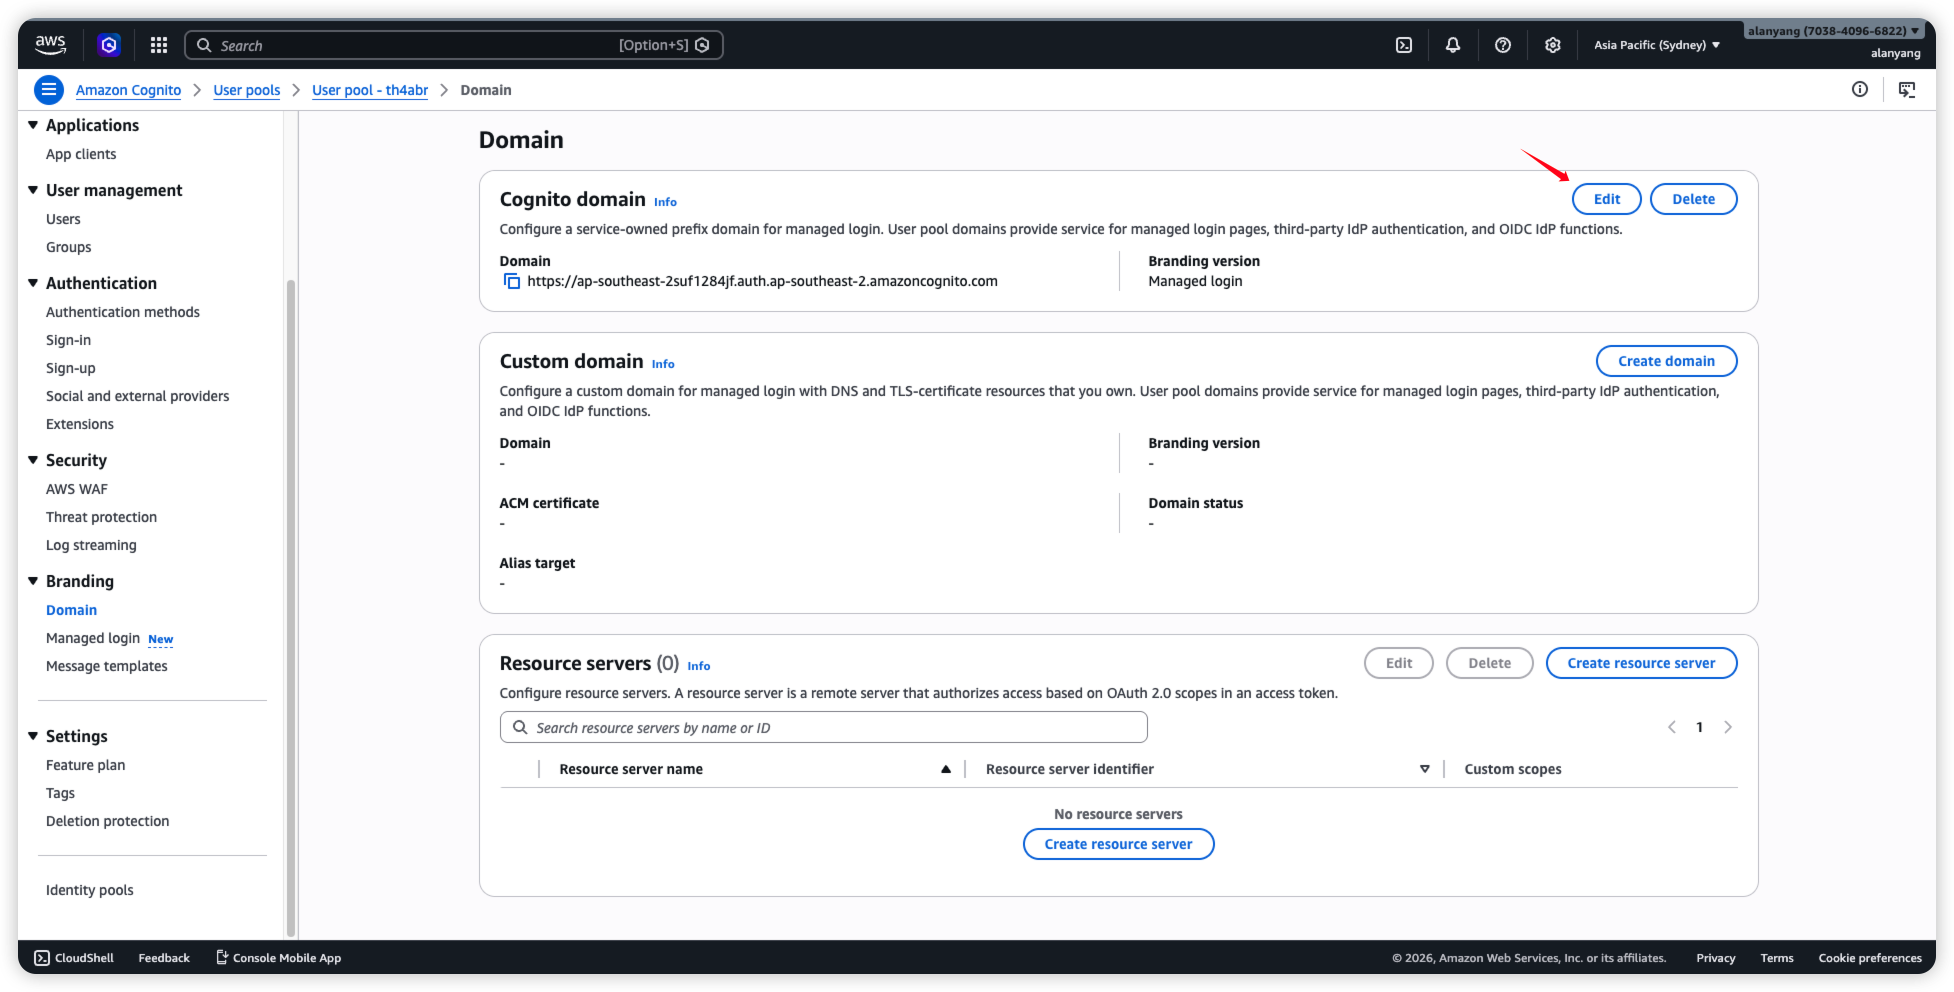
19. 选择 Hosted UI 点击 Save changes。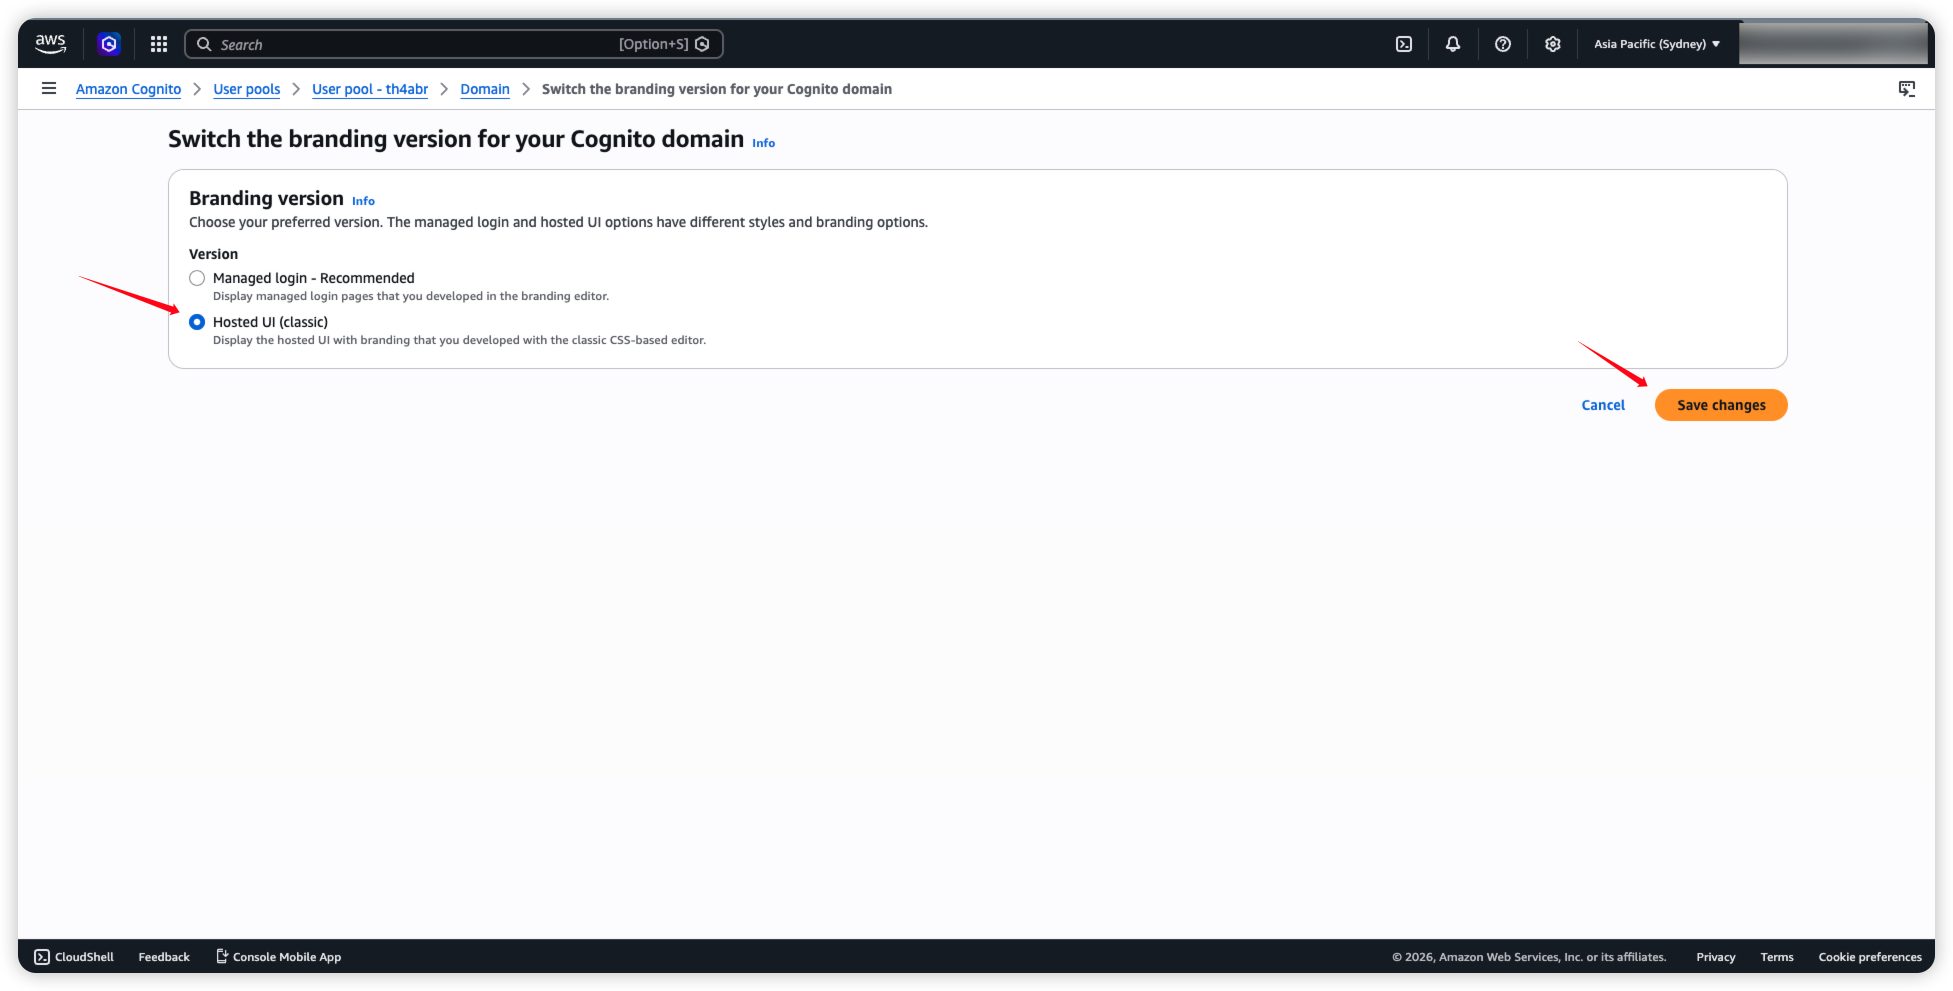
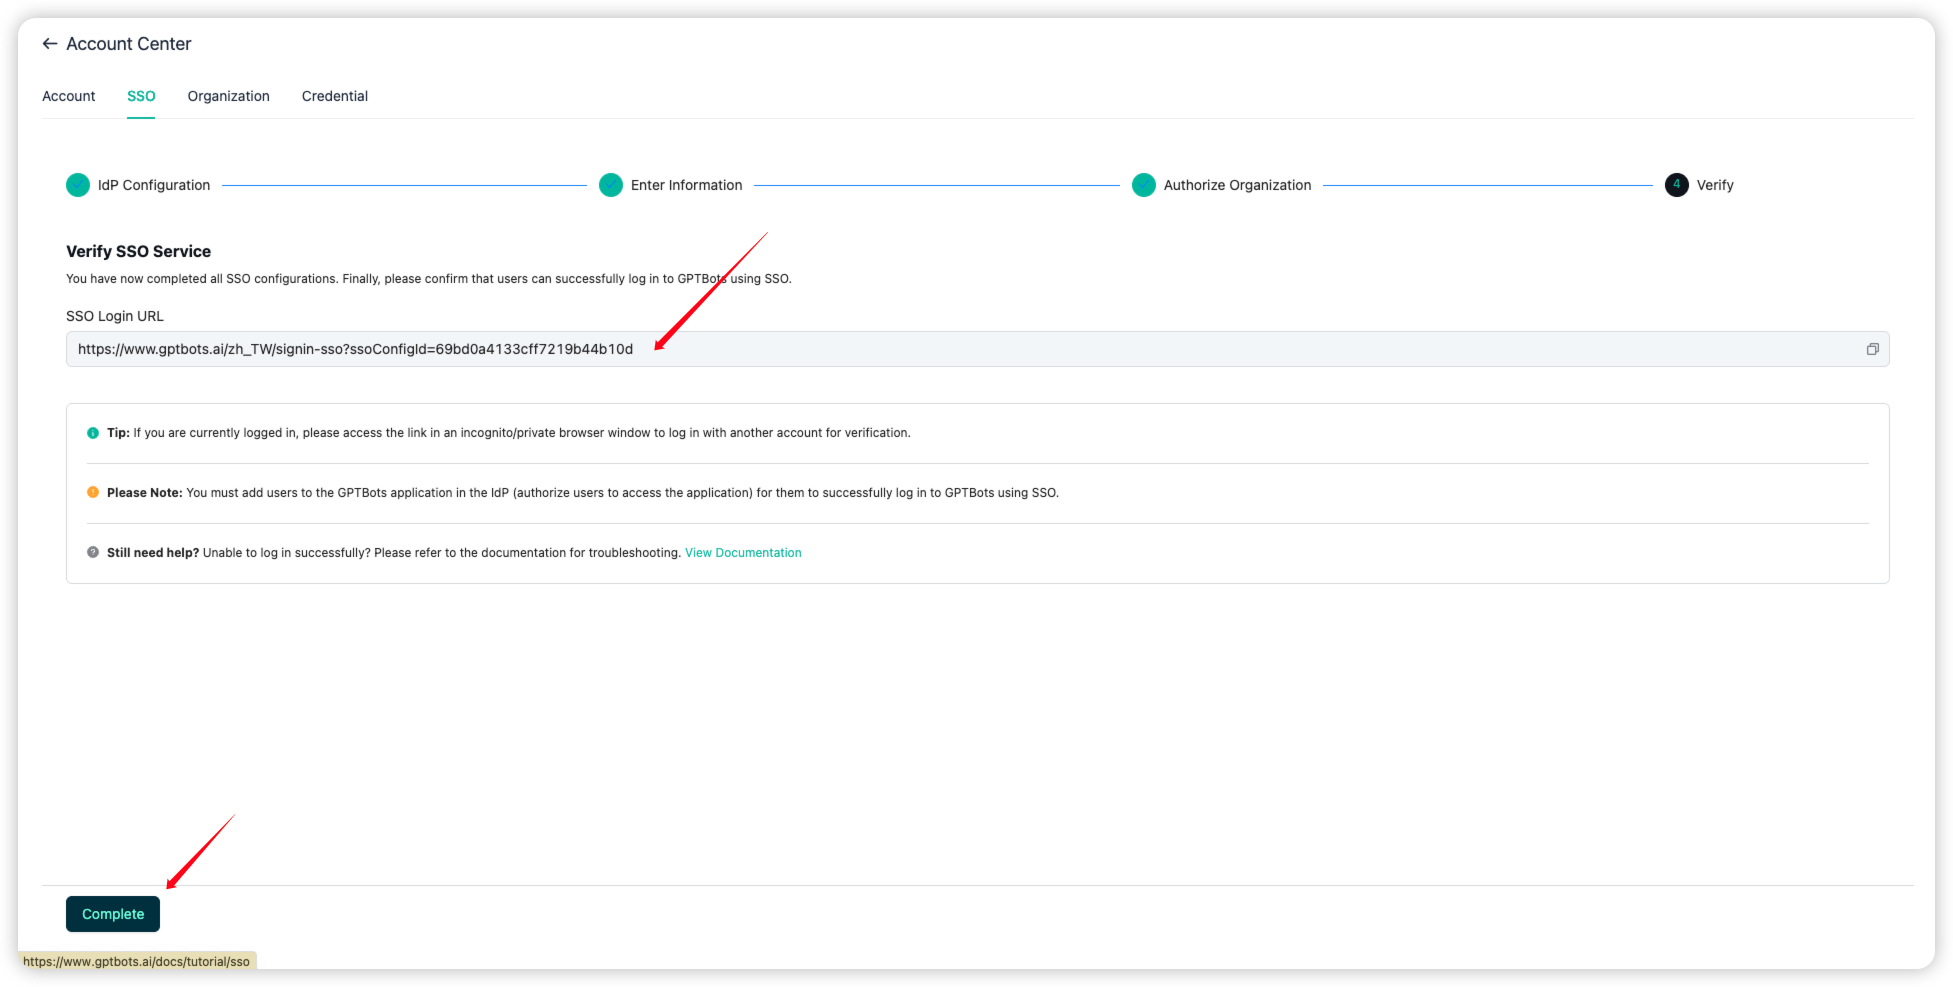
20. 最后回来 GPTBots 平台,选择要授权的组织,点击 Save and Verify。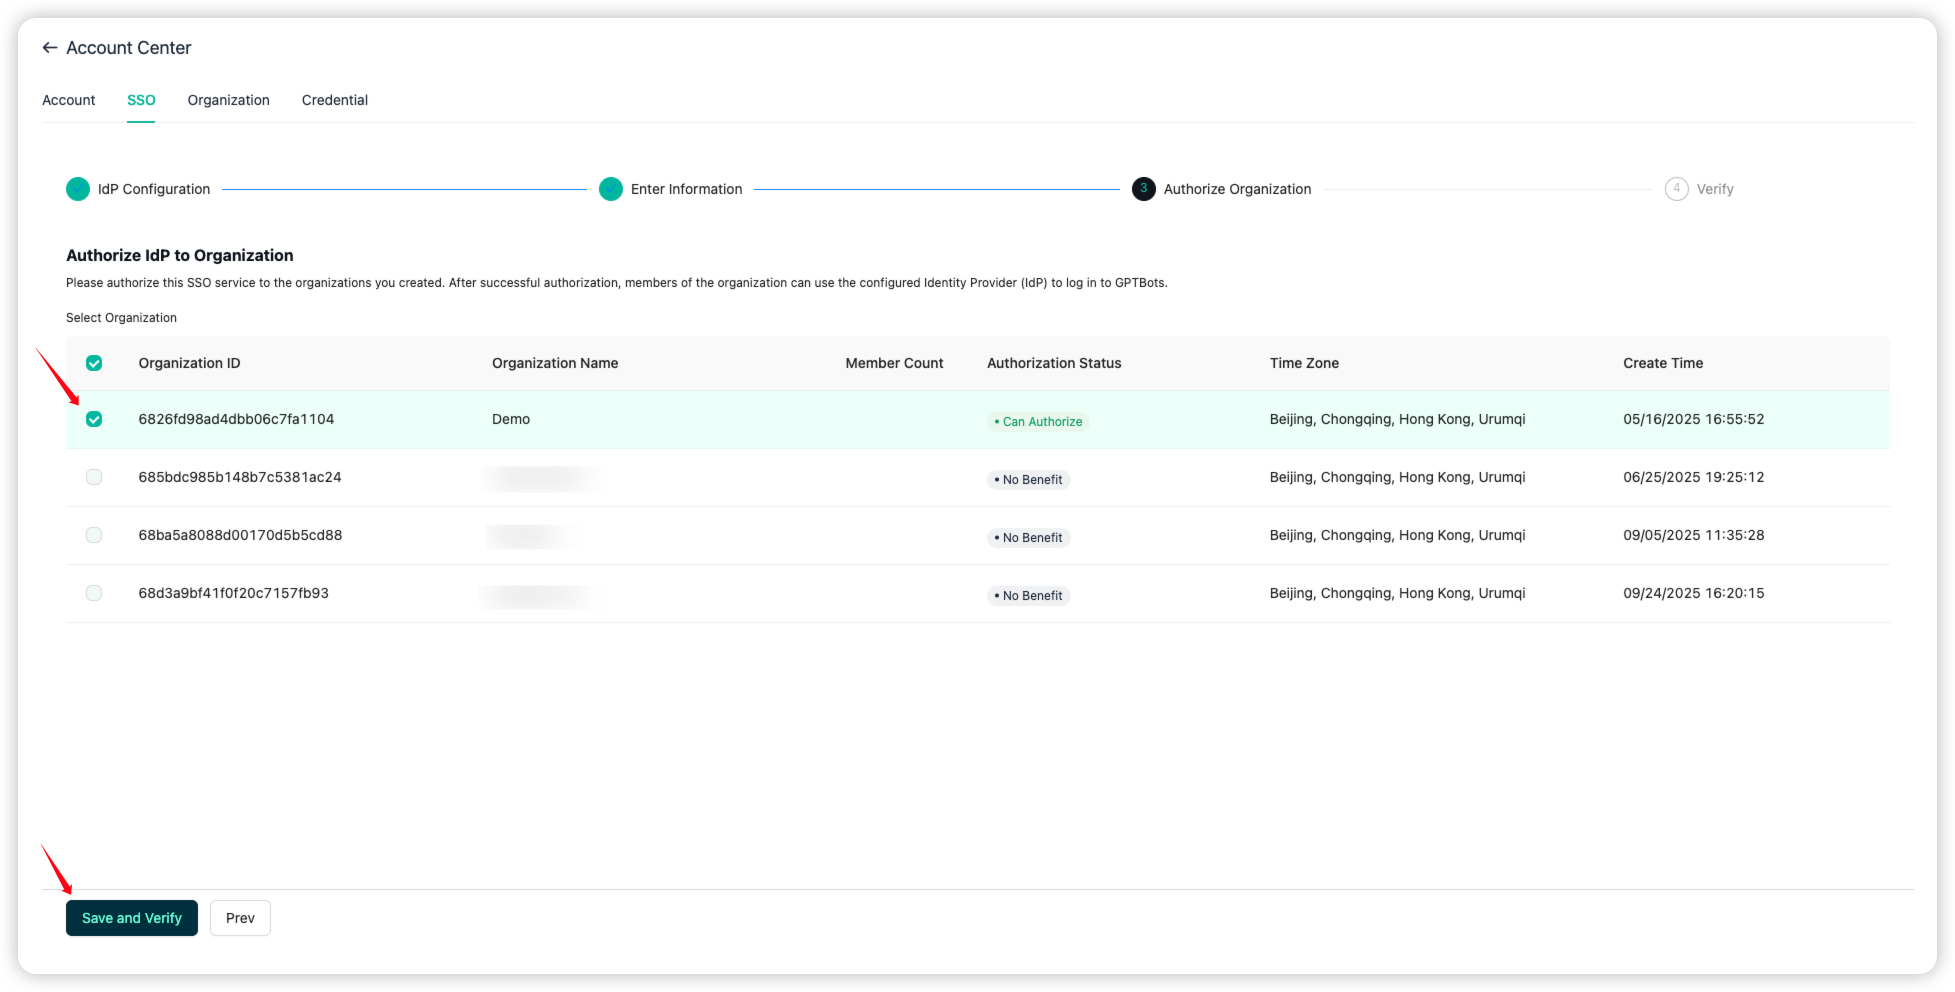
21. 最后,可以保存这个 SSO Login URL 给到组织成员登陆。点击 Complete,即可完成配置。