AWS Cognito OIDC Configuration Guide
AWS Cognito OIDC Configuration Guide
This guide explains how to configure OIDC integration with AWS Cognito on the GPTBots platform.
Configuration Steps
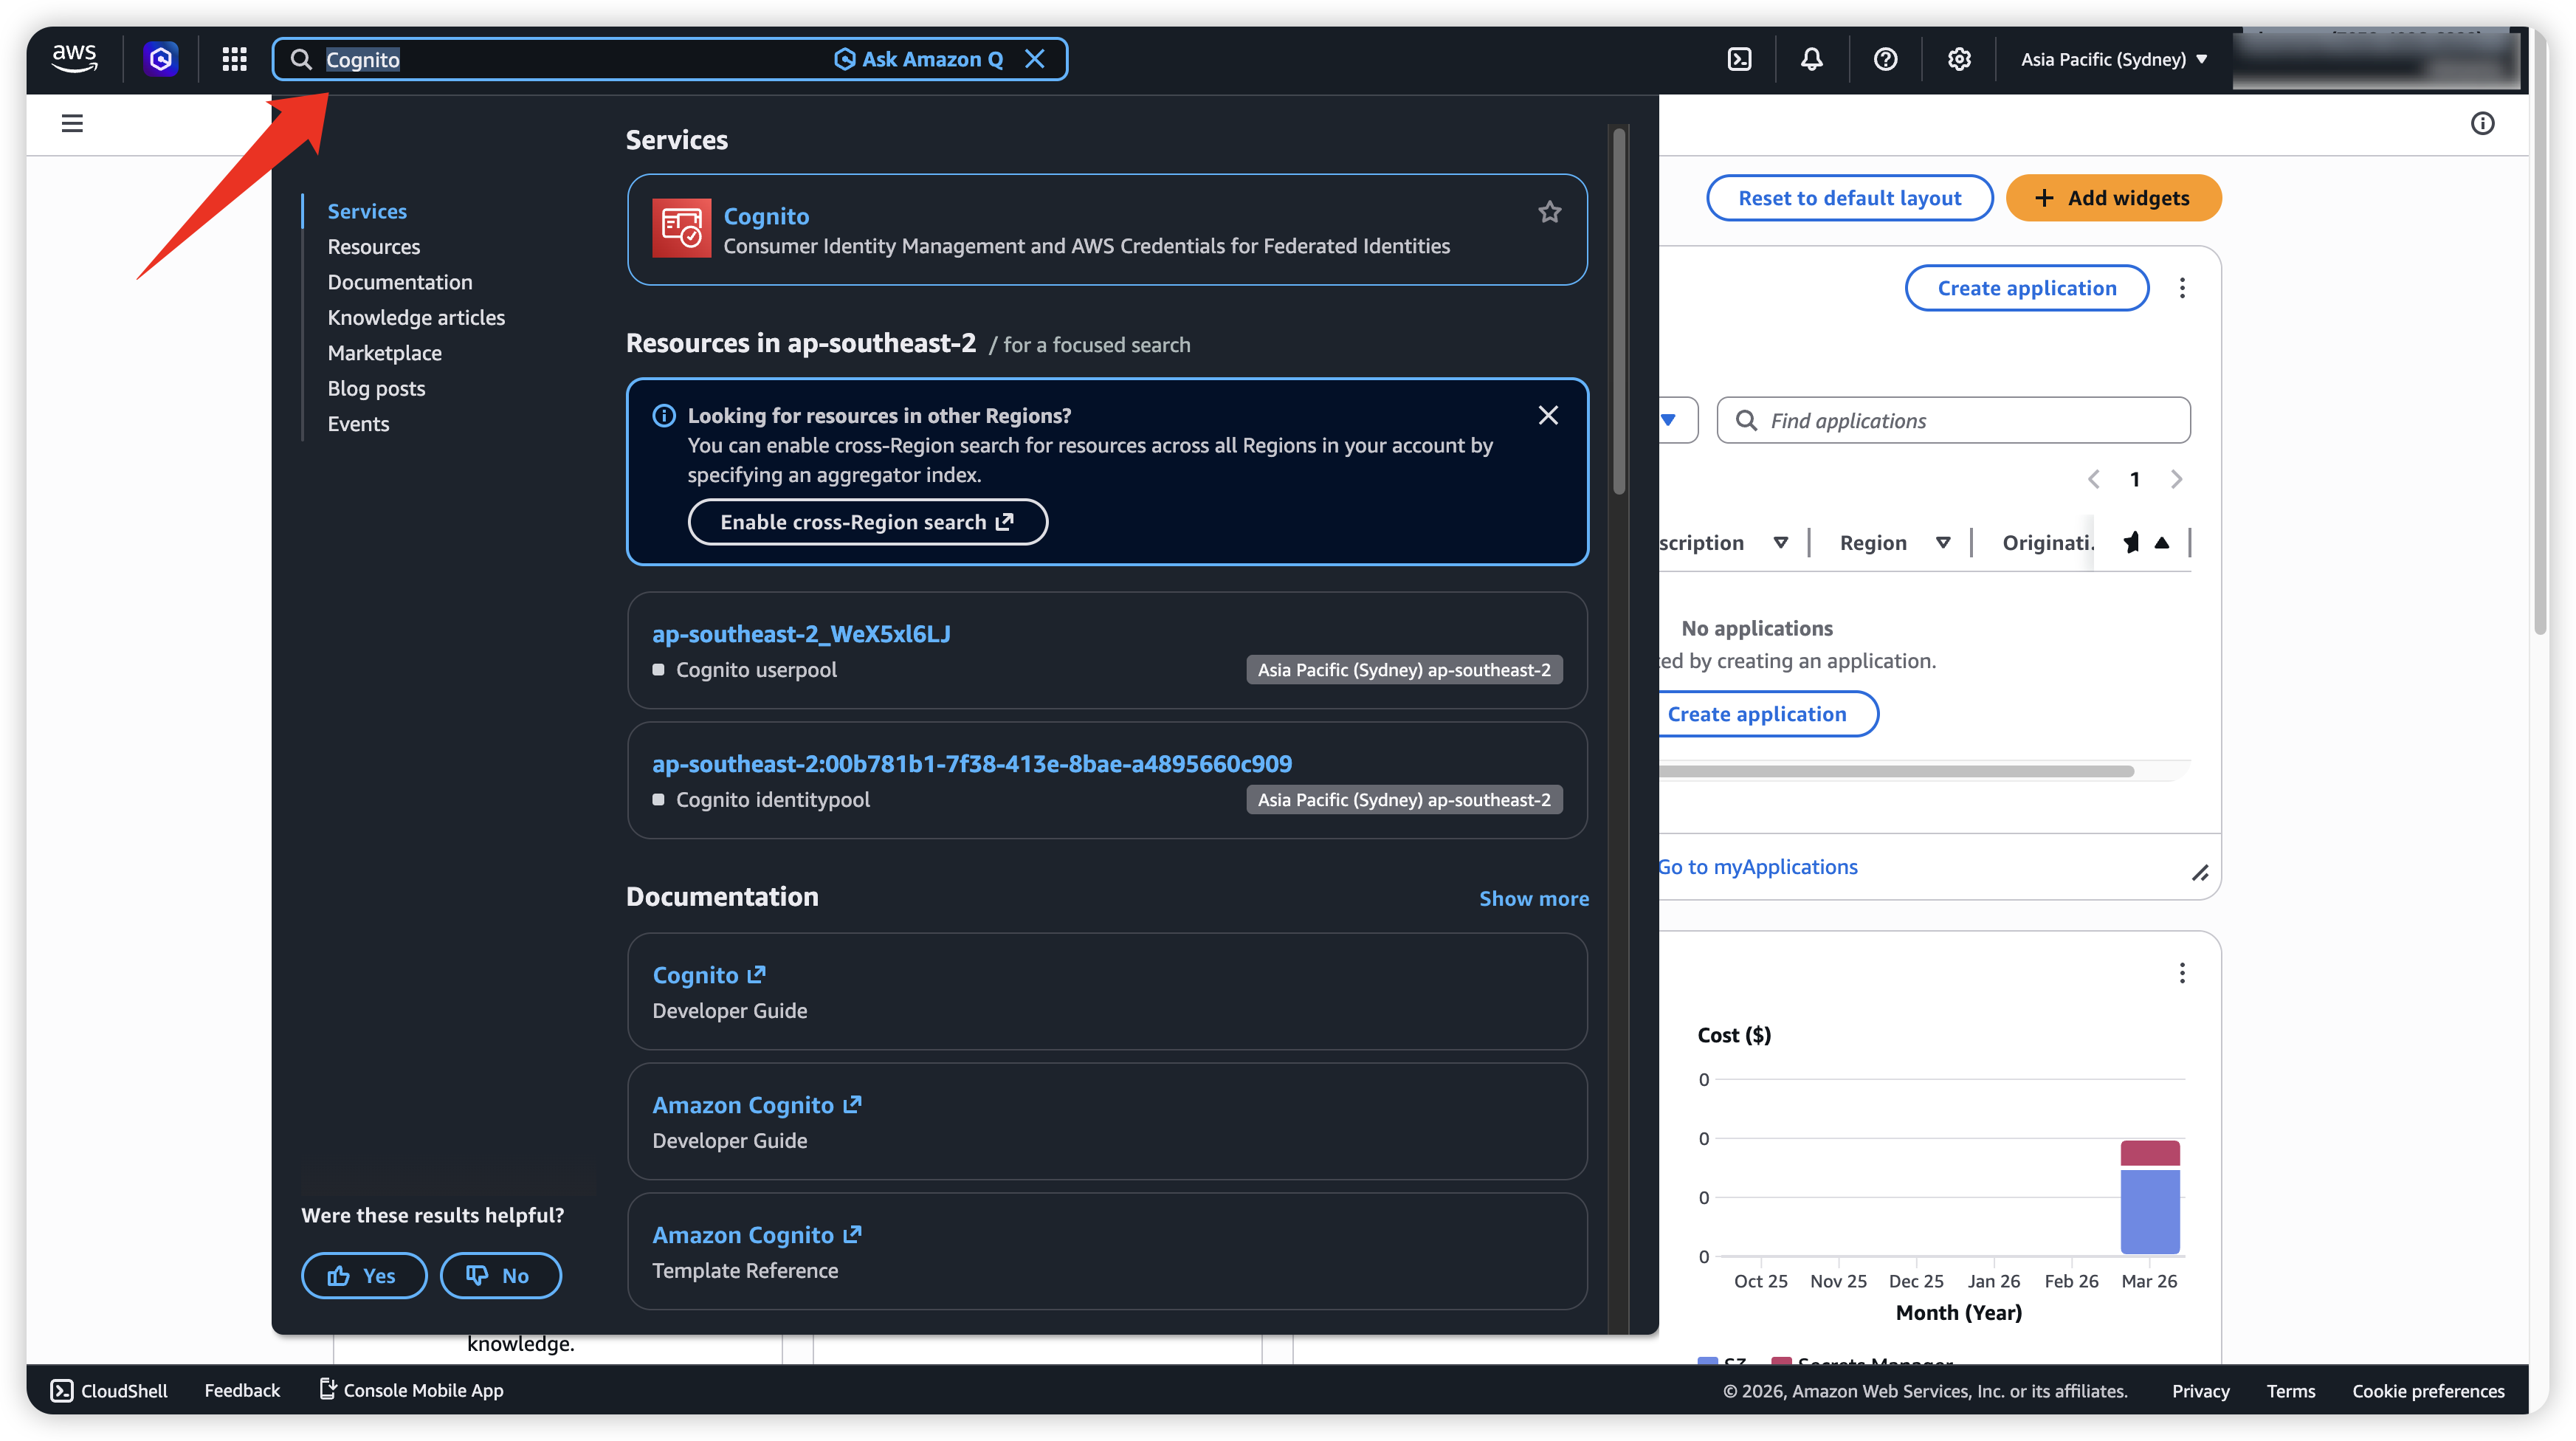
- Sign in to AWS Cognito. Use the top search bar to find Cognito, then click it.
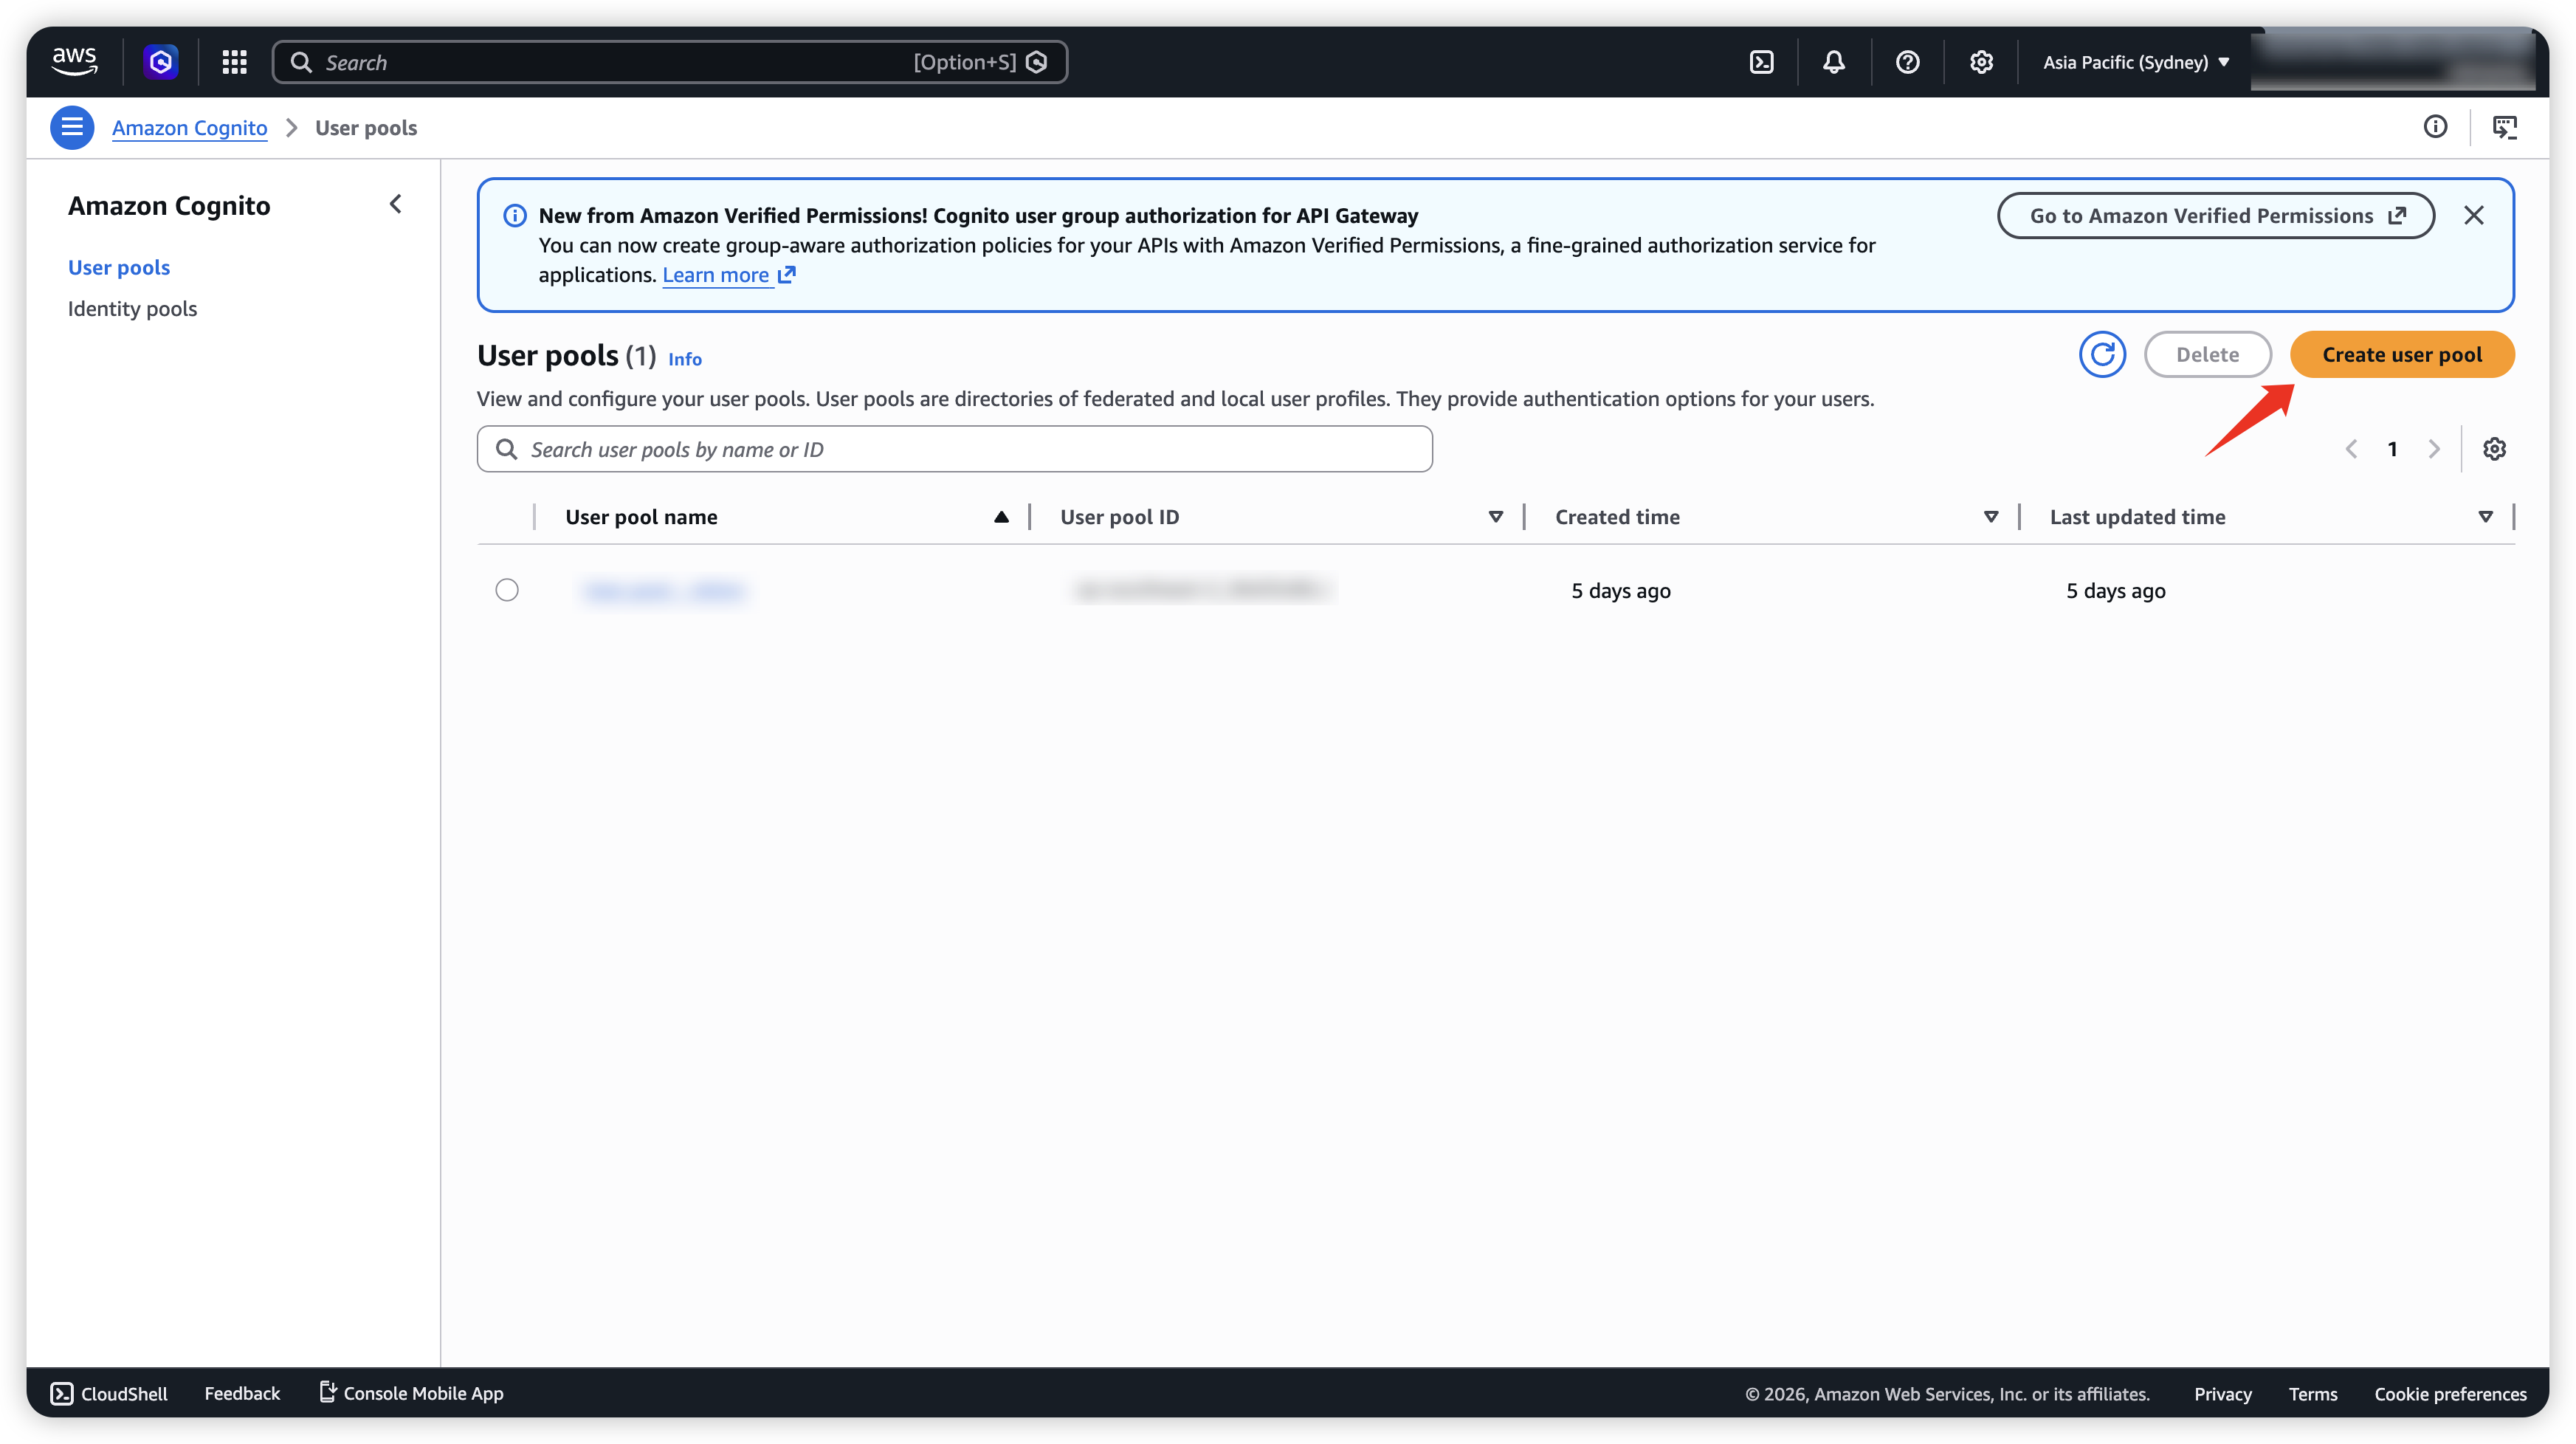
- If there is no User Pool yet, create a new one.
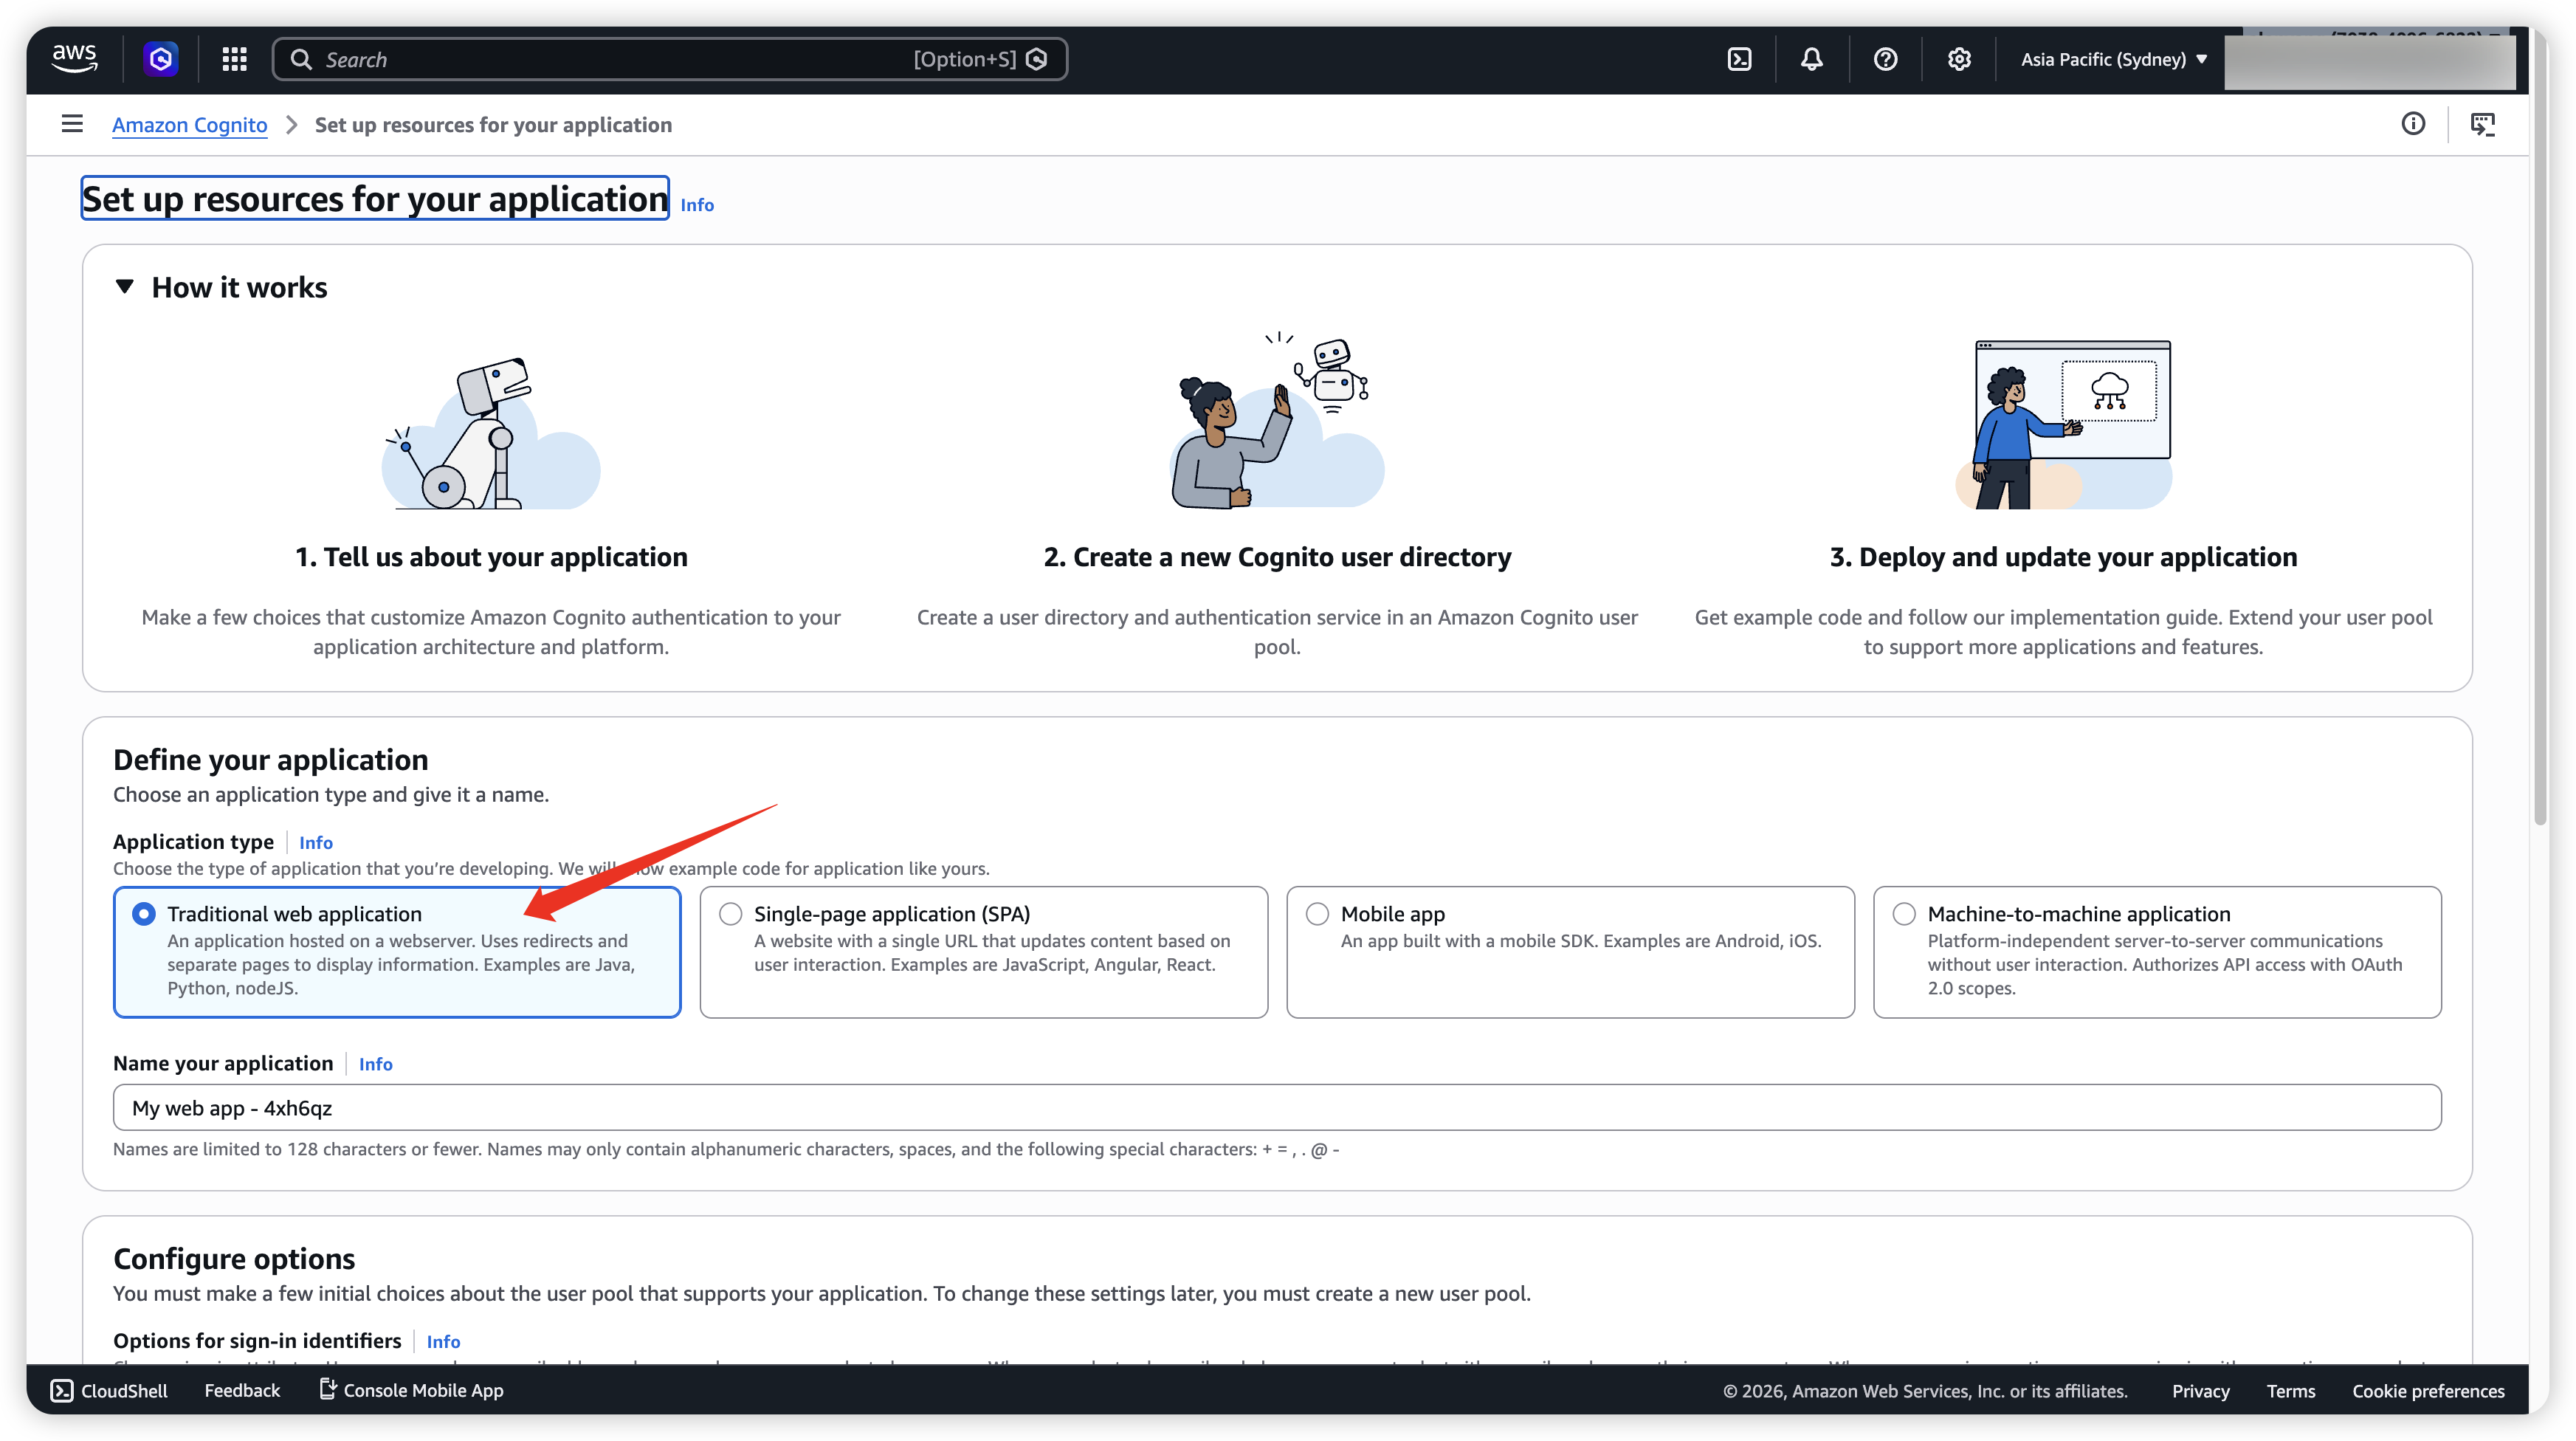
- Configure the basic information as shown below.
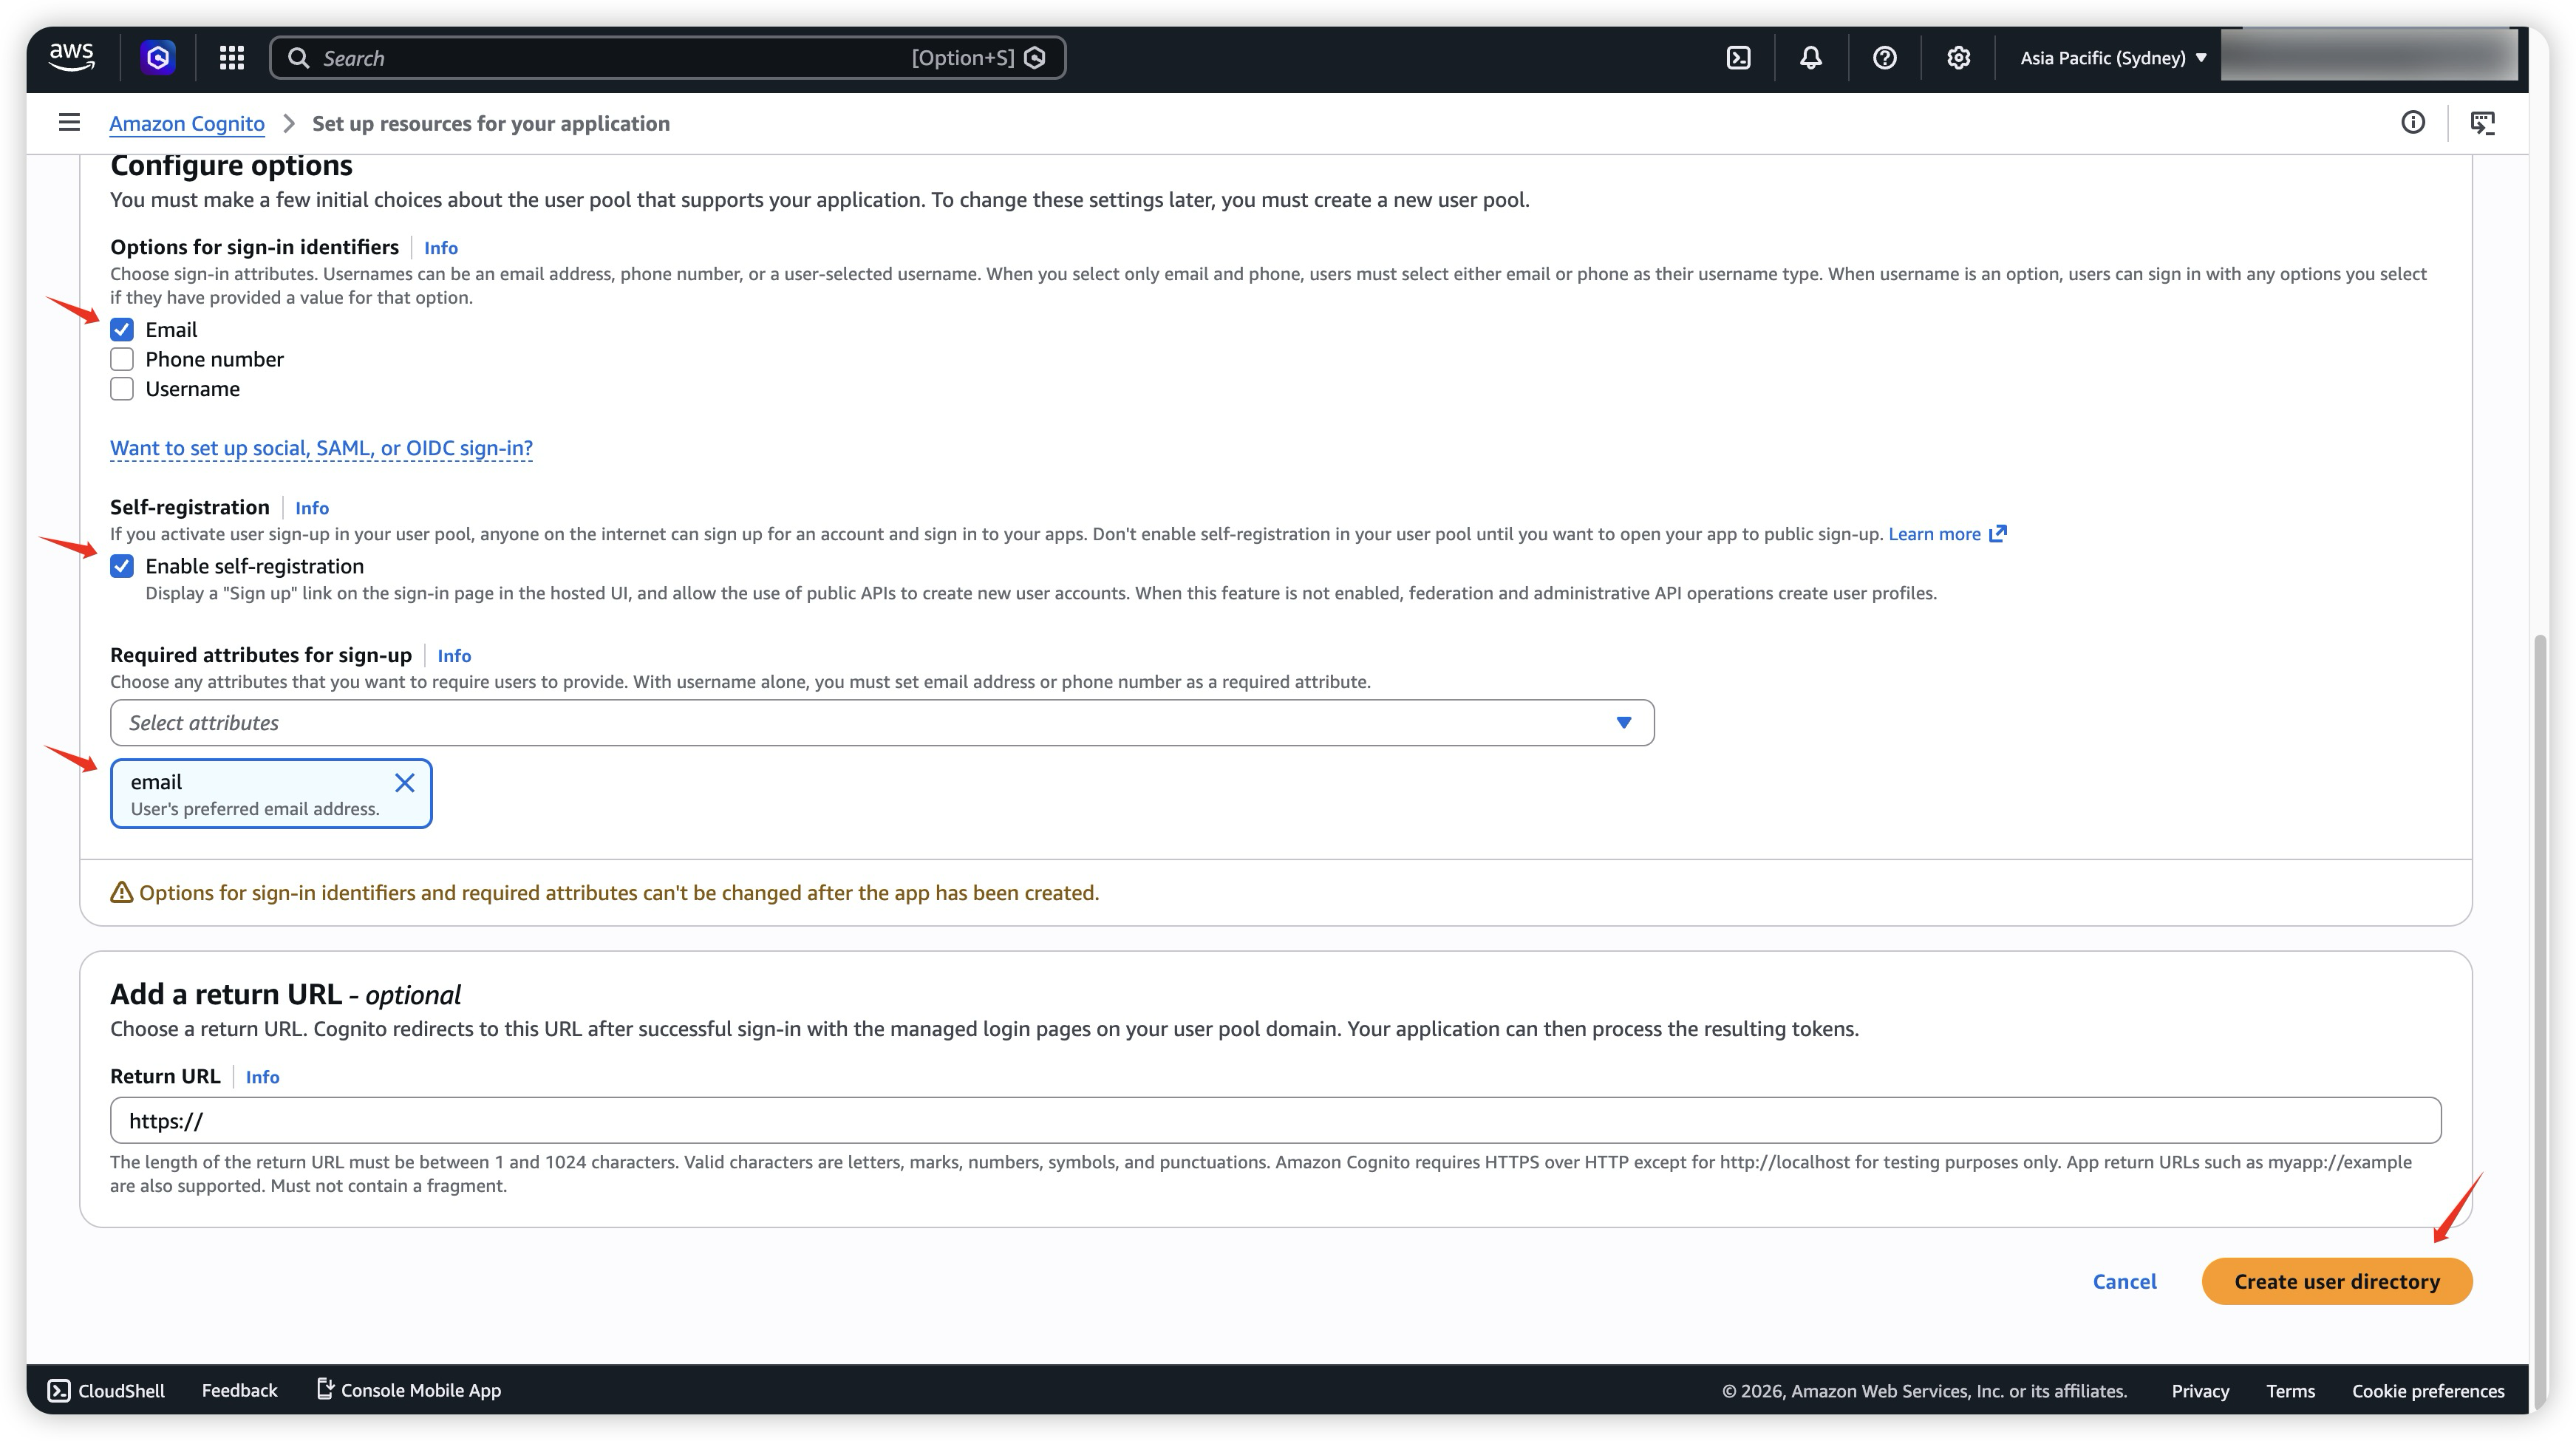
- After creation succeeds, you will be redirected to this page. Scroll down and click Go to overview.

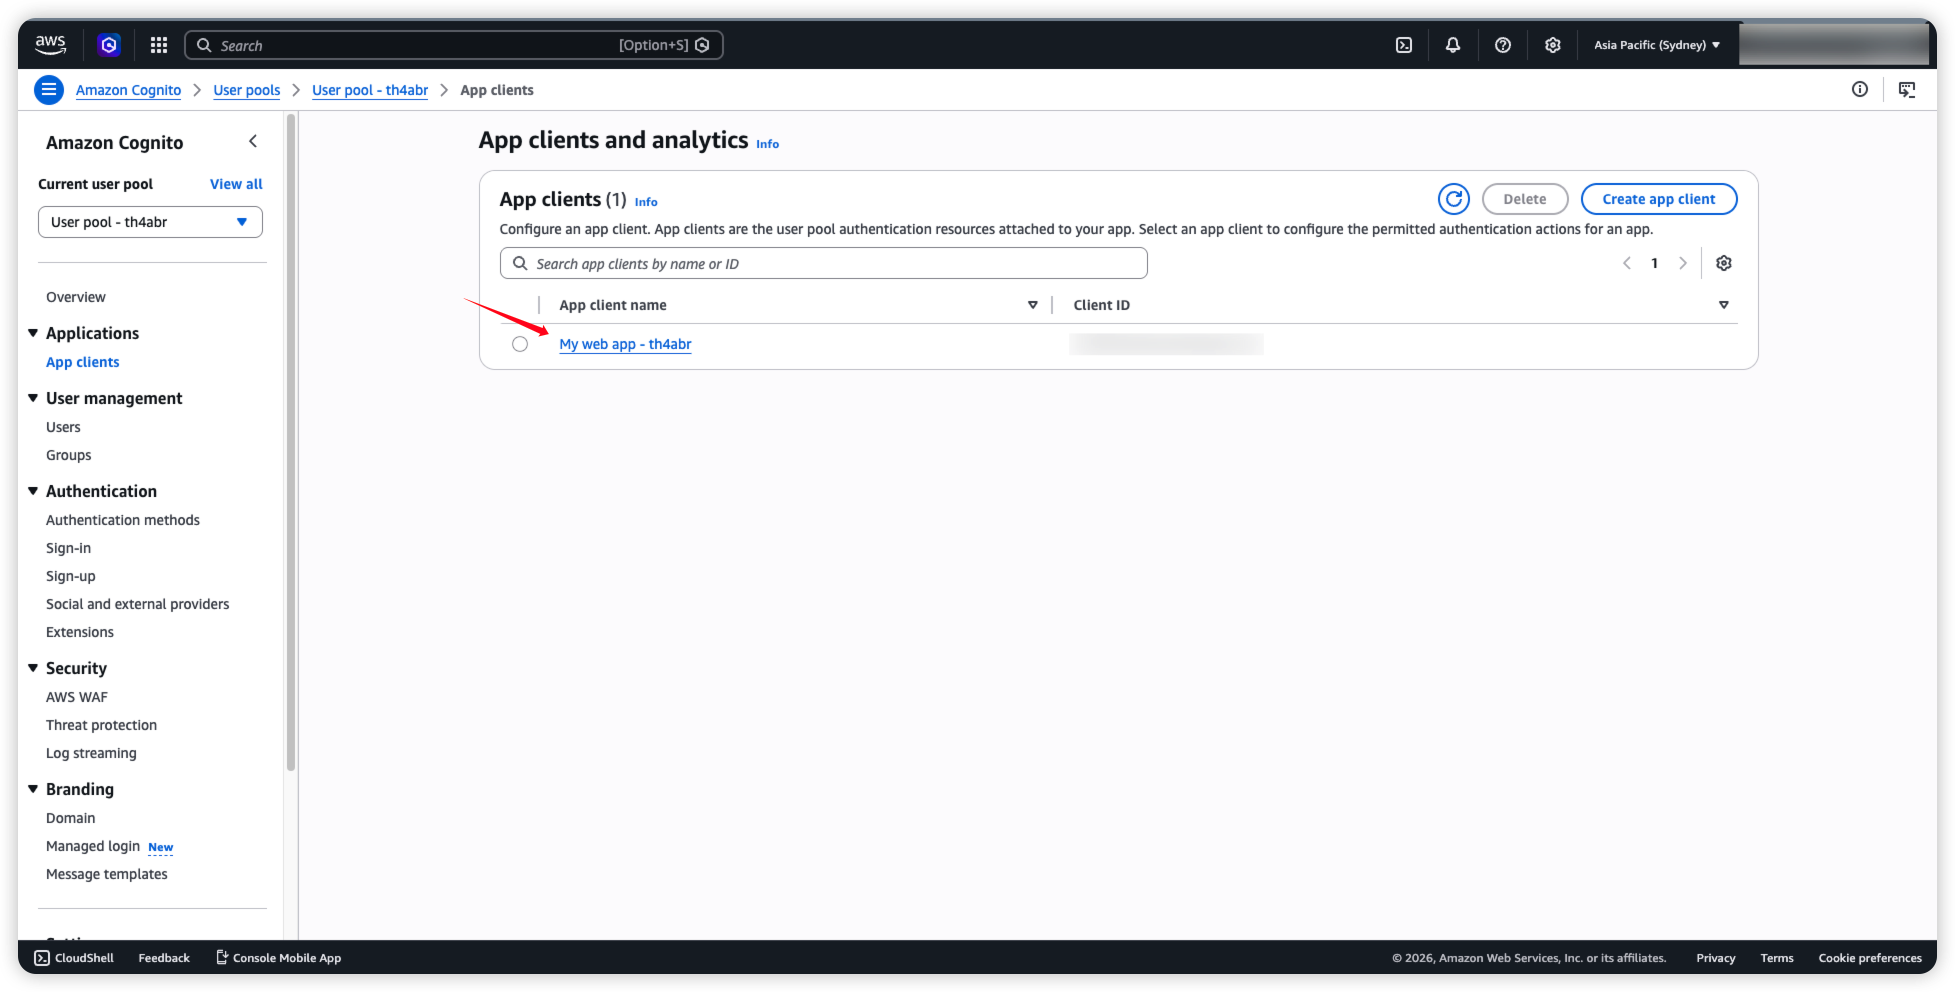
- Next, configure App Clients and click the App Client you just created.
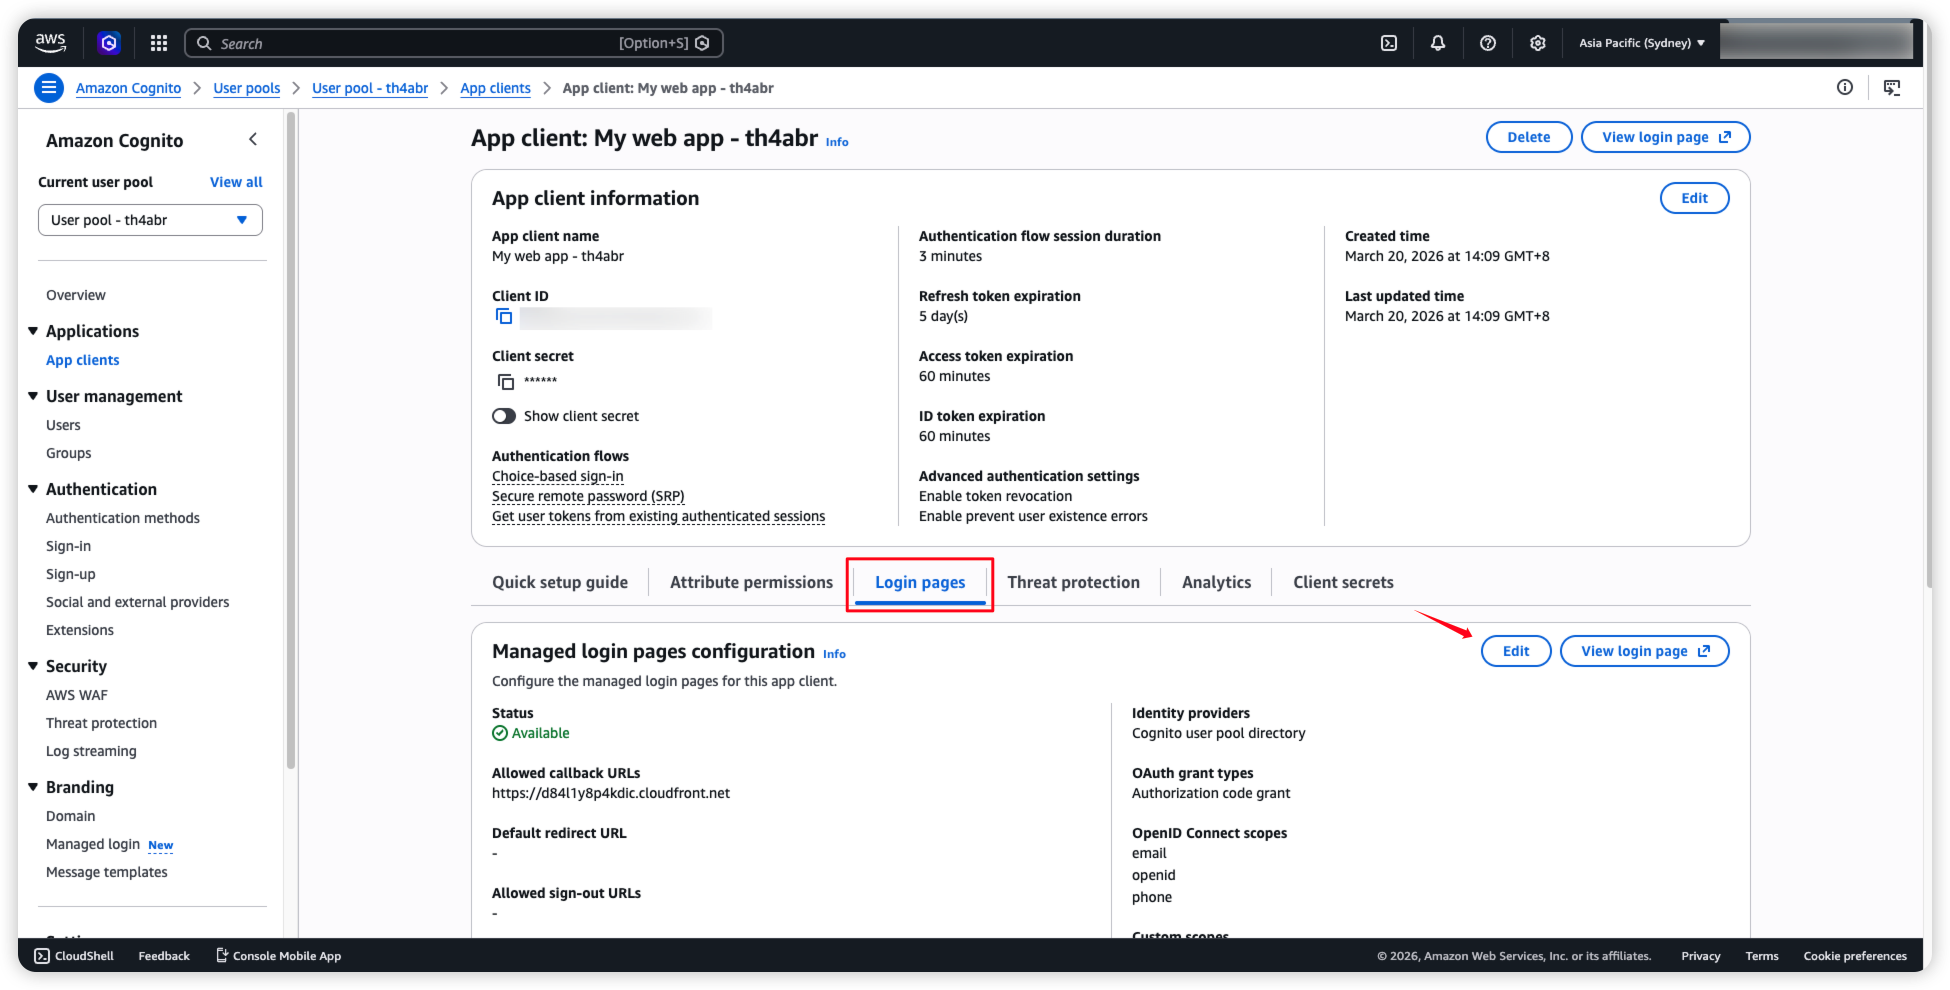
- Find Login pages and click Edit.
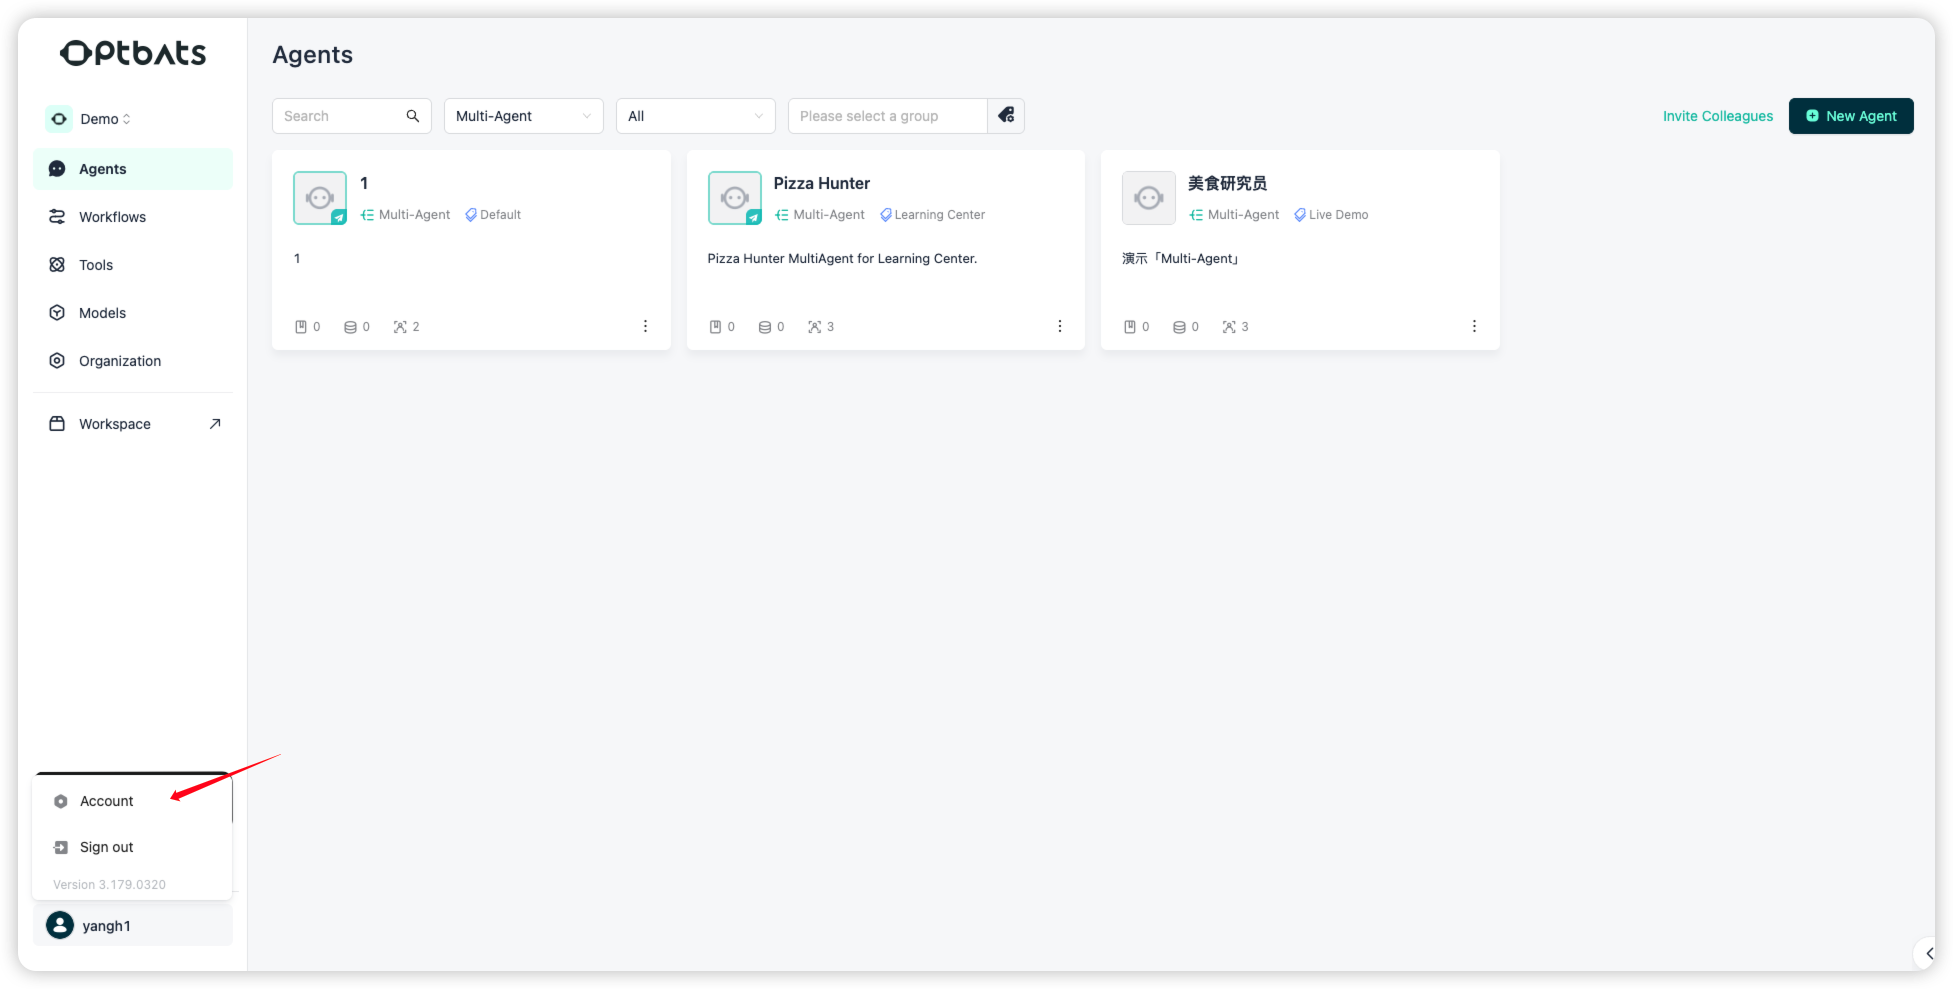
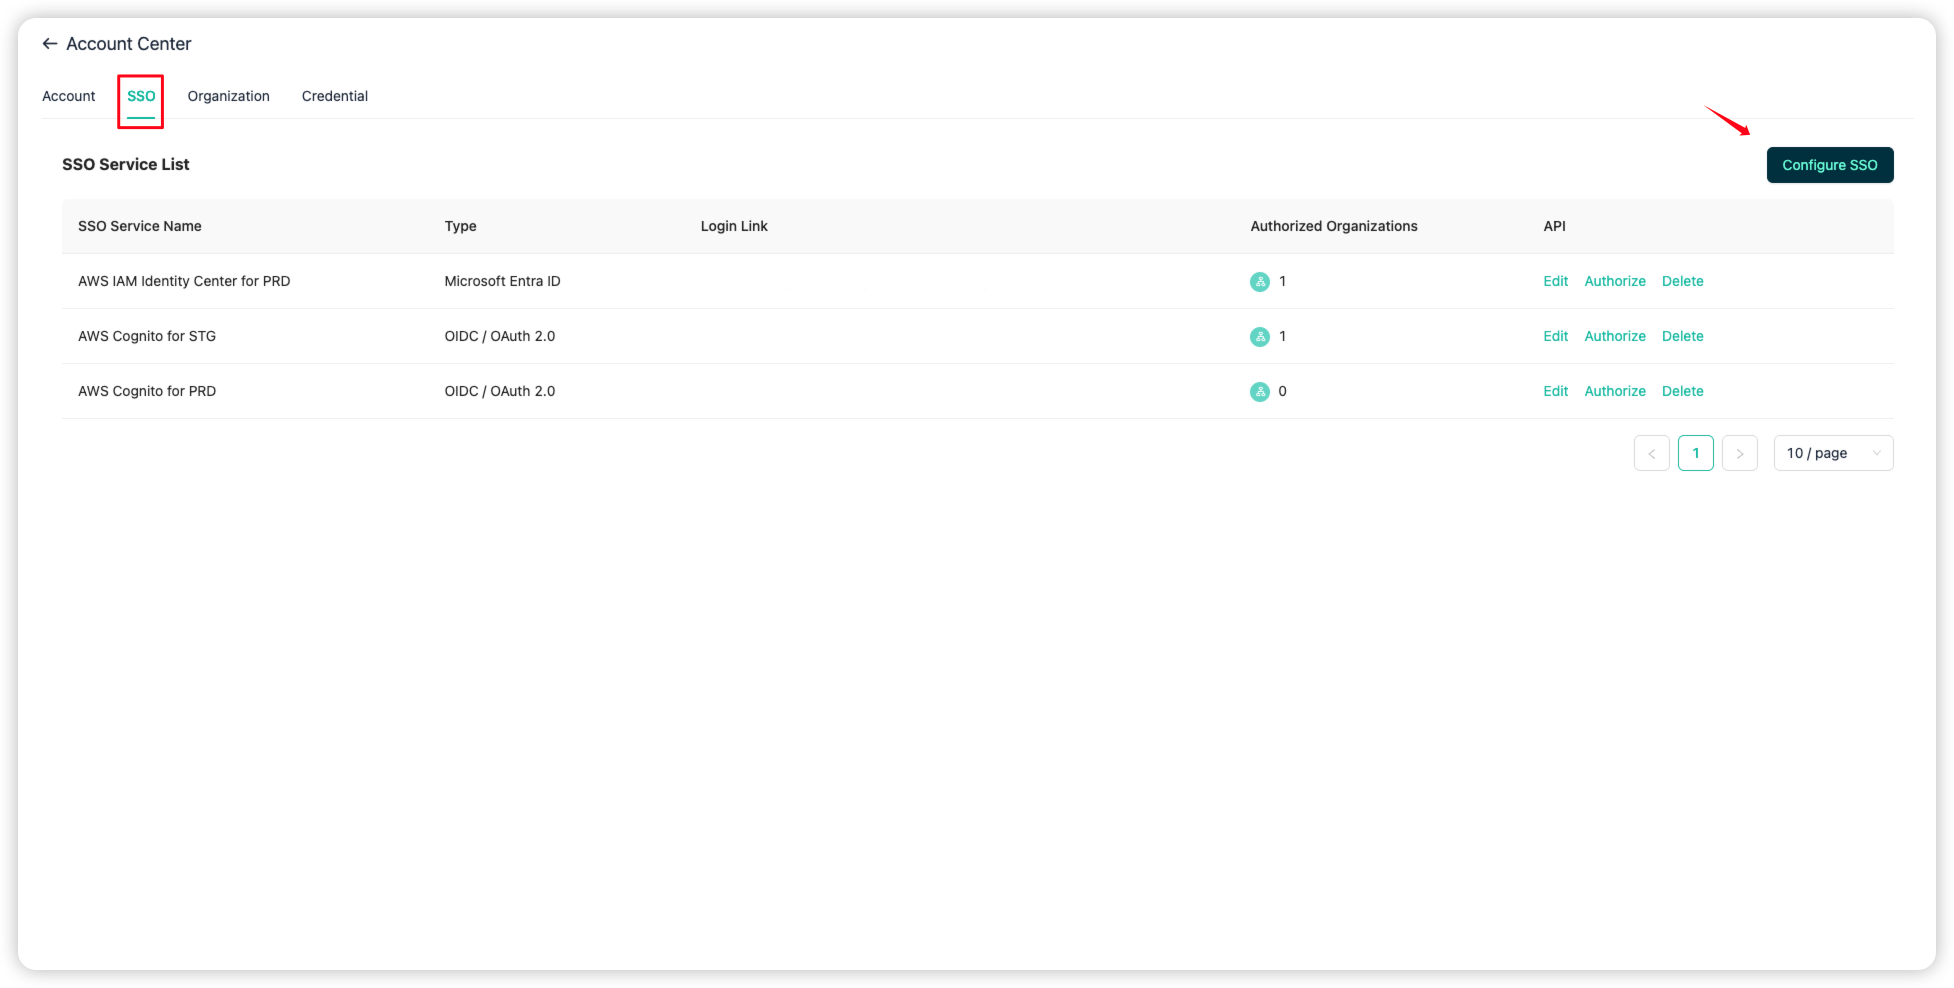
- Go back to the GPTBots platform, click your avatar at the bottom-left, and select Account.
- Open the SSO tab and click Configure SSO.
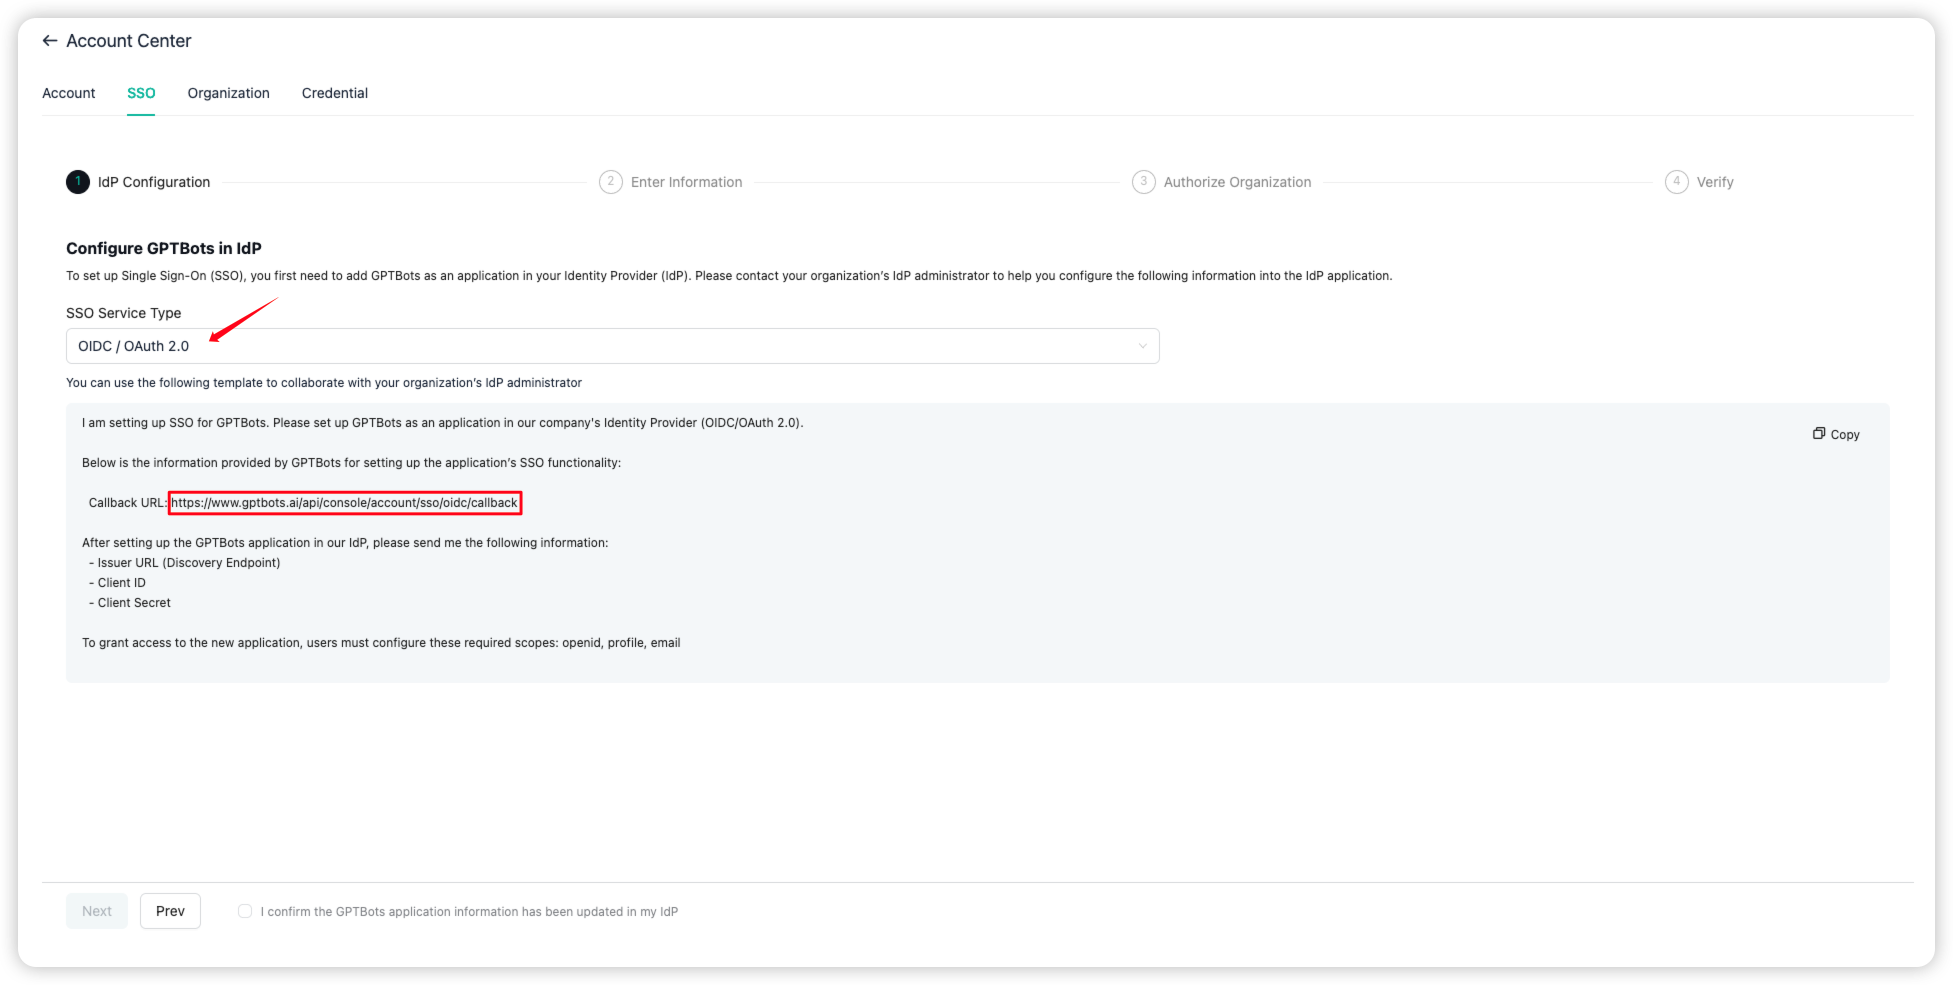
- Select OIDC / OAuth 2.0 and copy the Callback URL shown below.
- Return to AWS Cognito. Paste the copied value into Allowed Callback URLs and Default redirect URL, and enter
https://www.gptbots.ai/signinin Allowed sign-out URLs.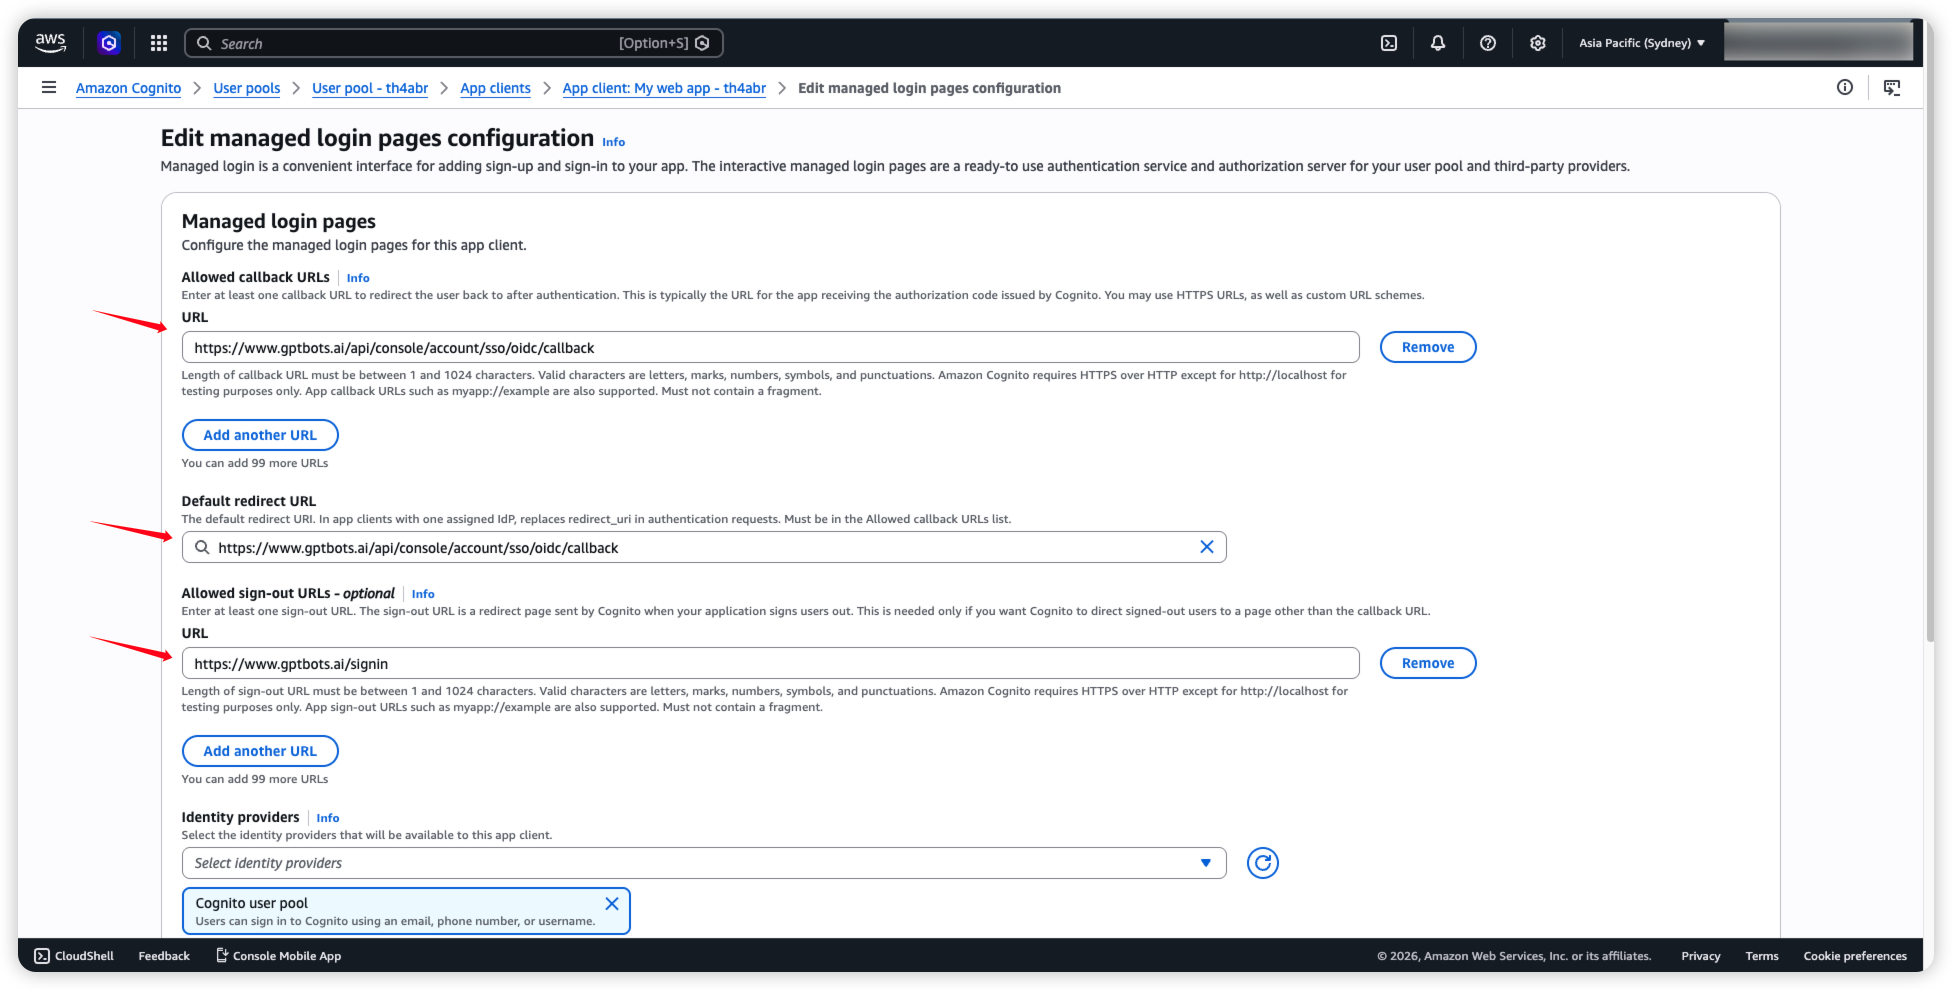
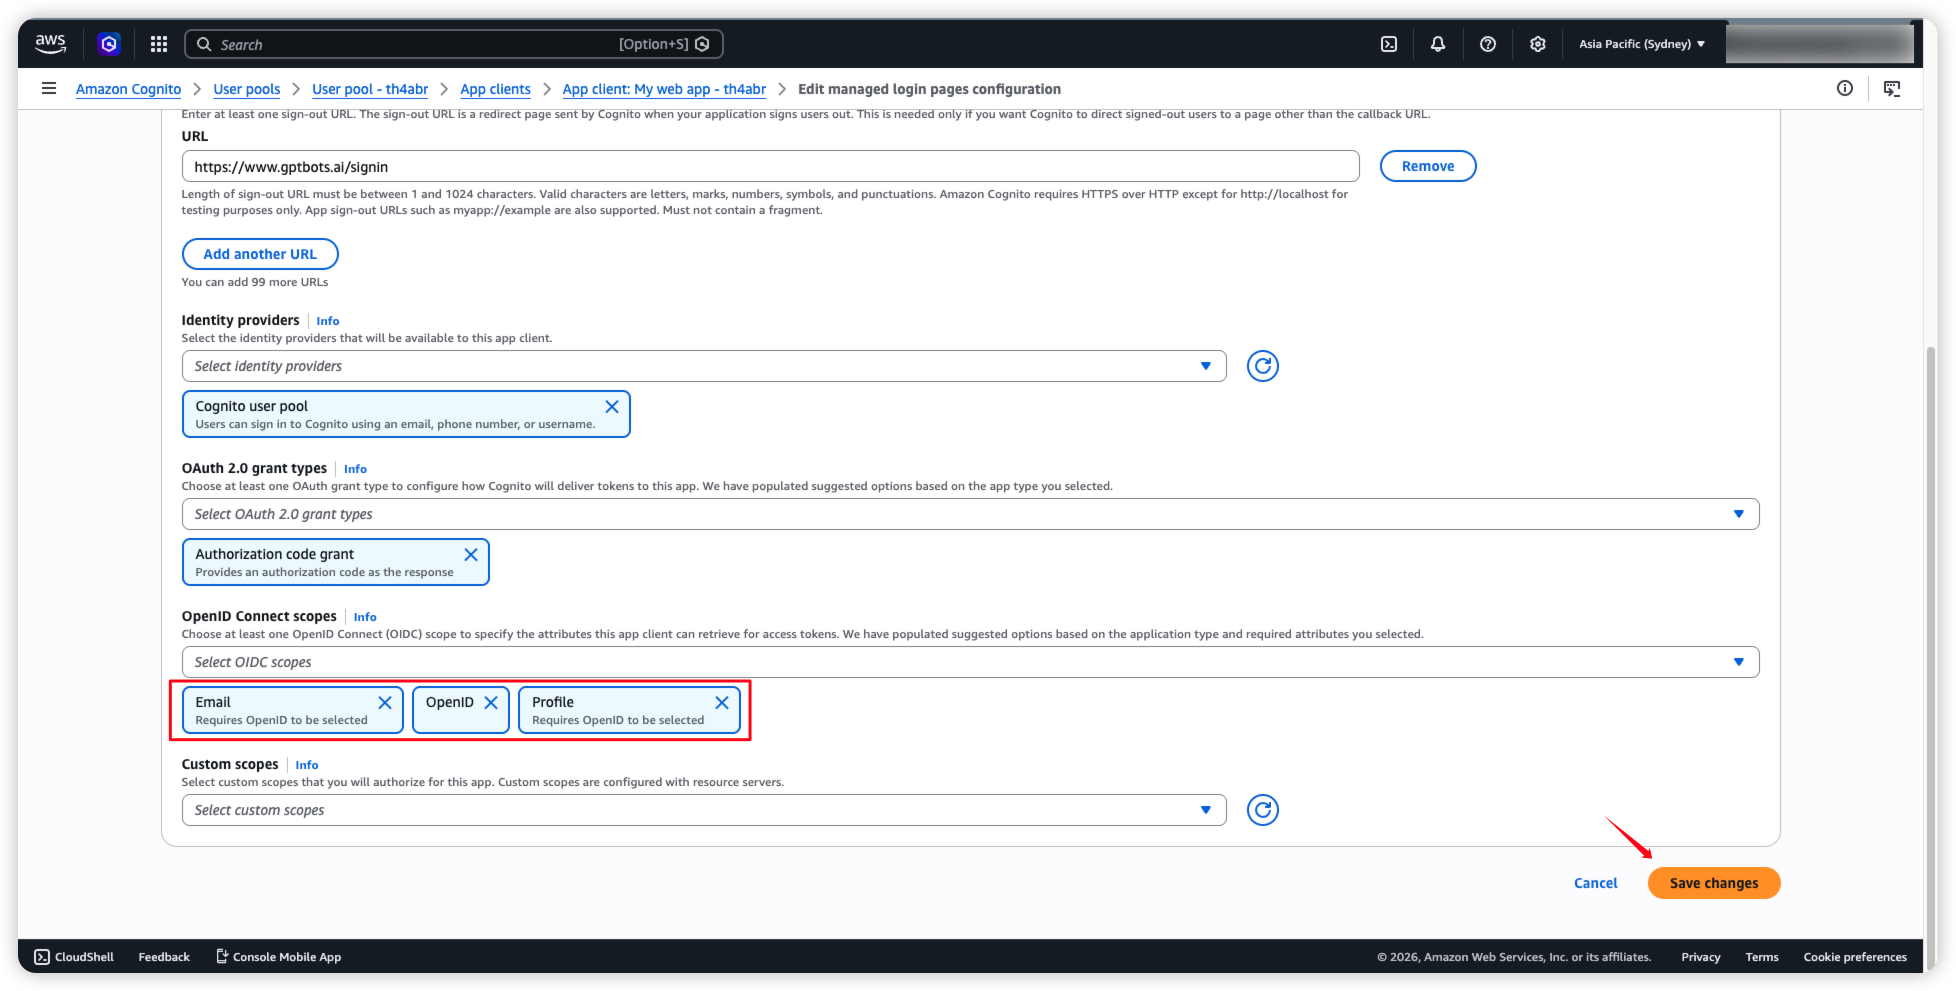
- Scroll down to OpenID Connect scopes, select openid, email, and profile, then click Save changes.
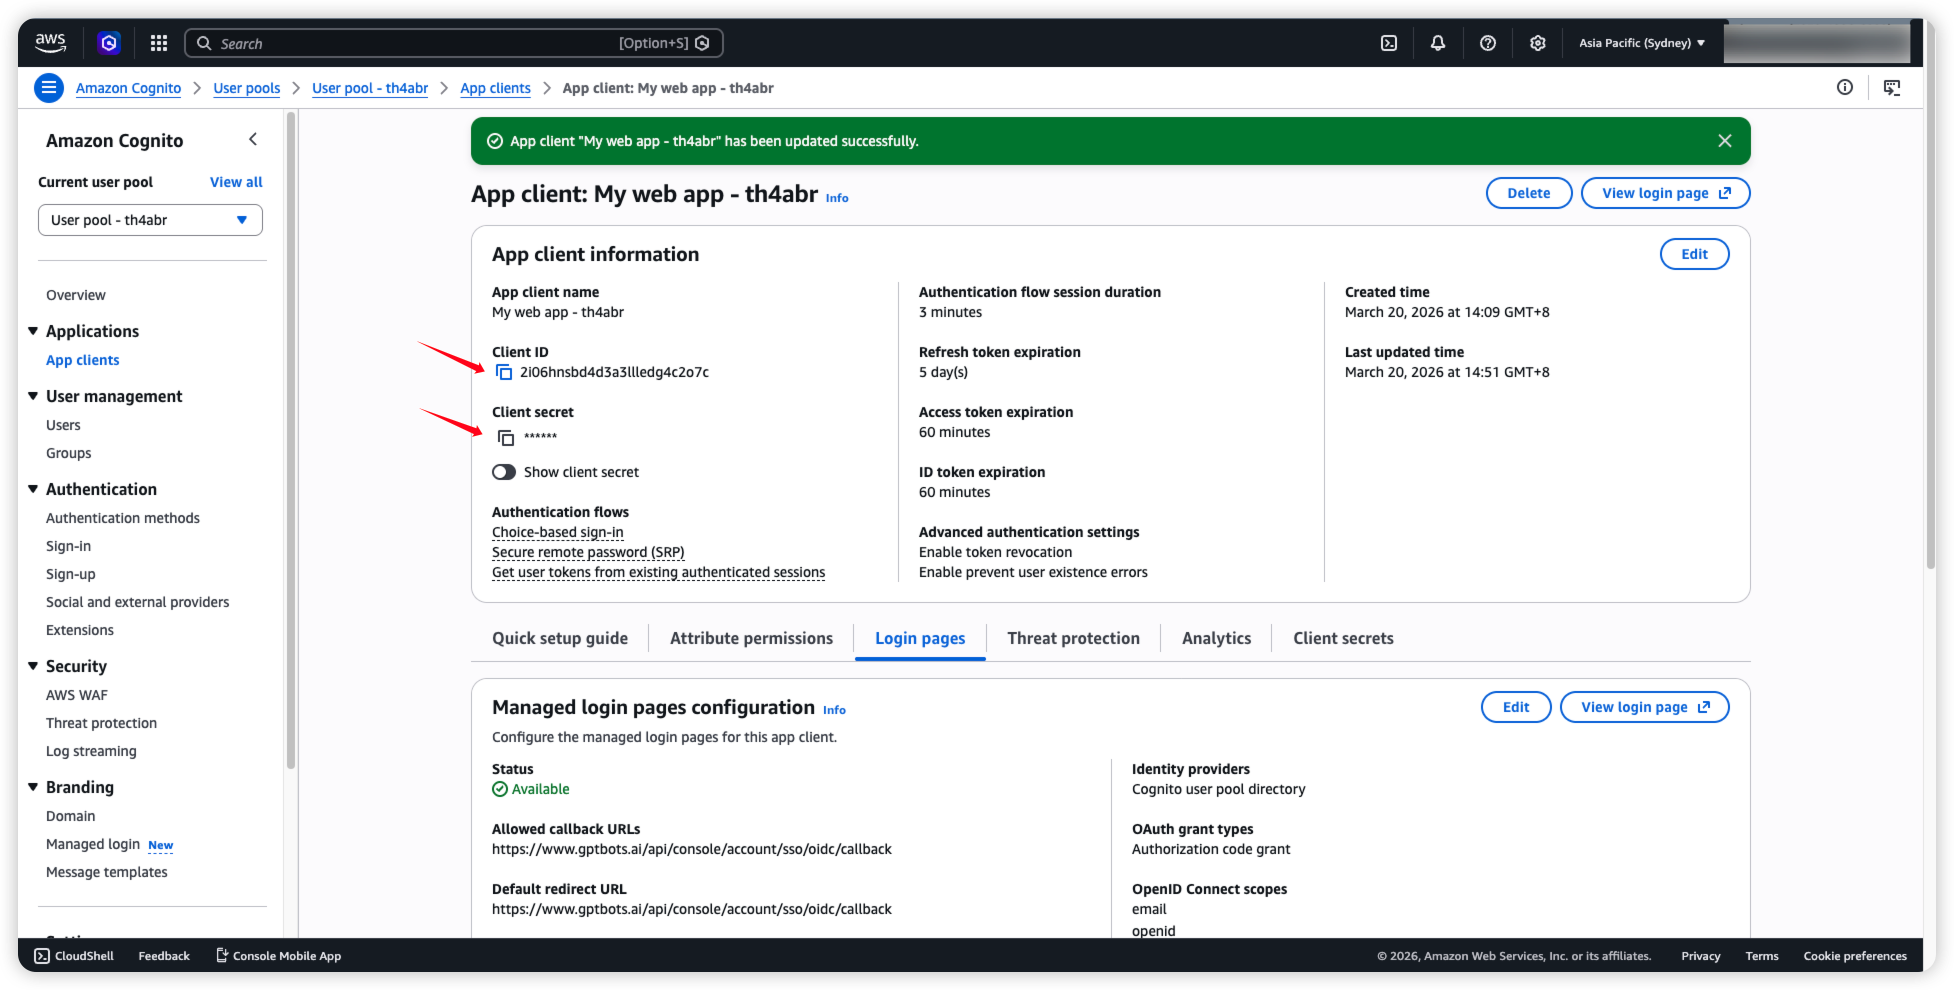
- In App Client information at the top, copy the Client ID and Client secret.
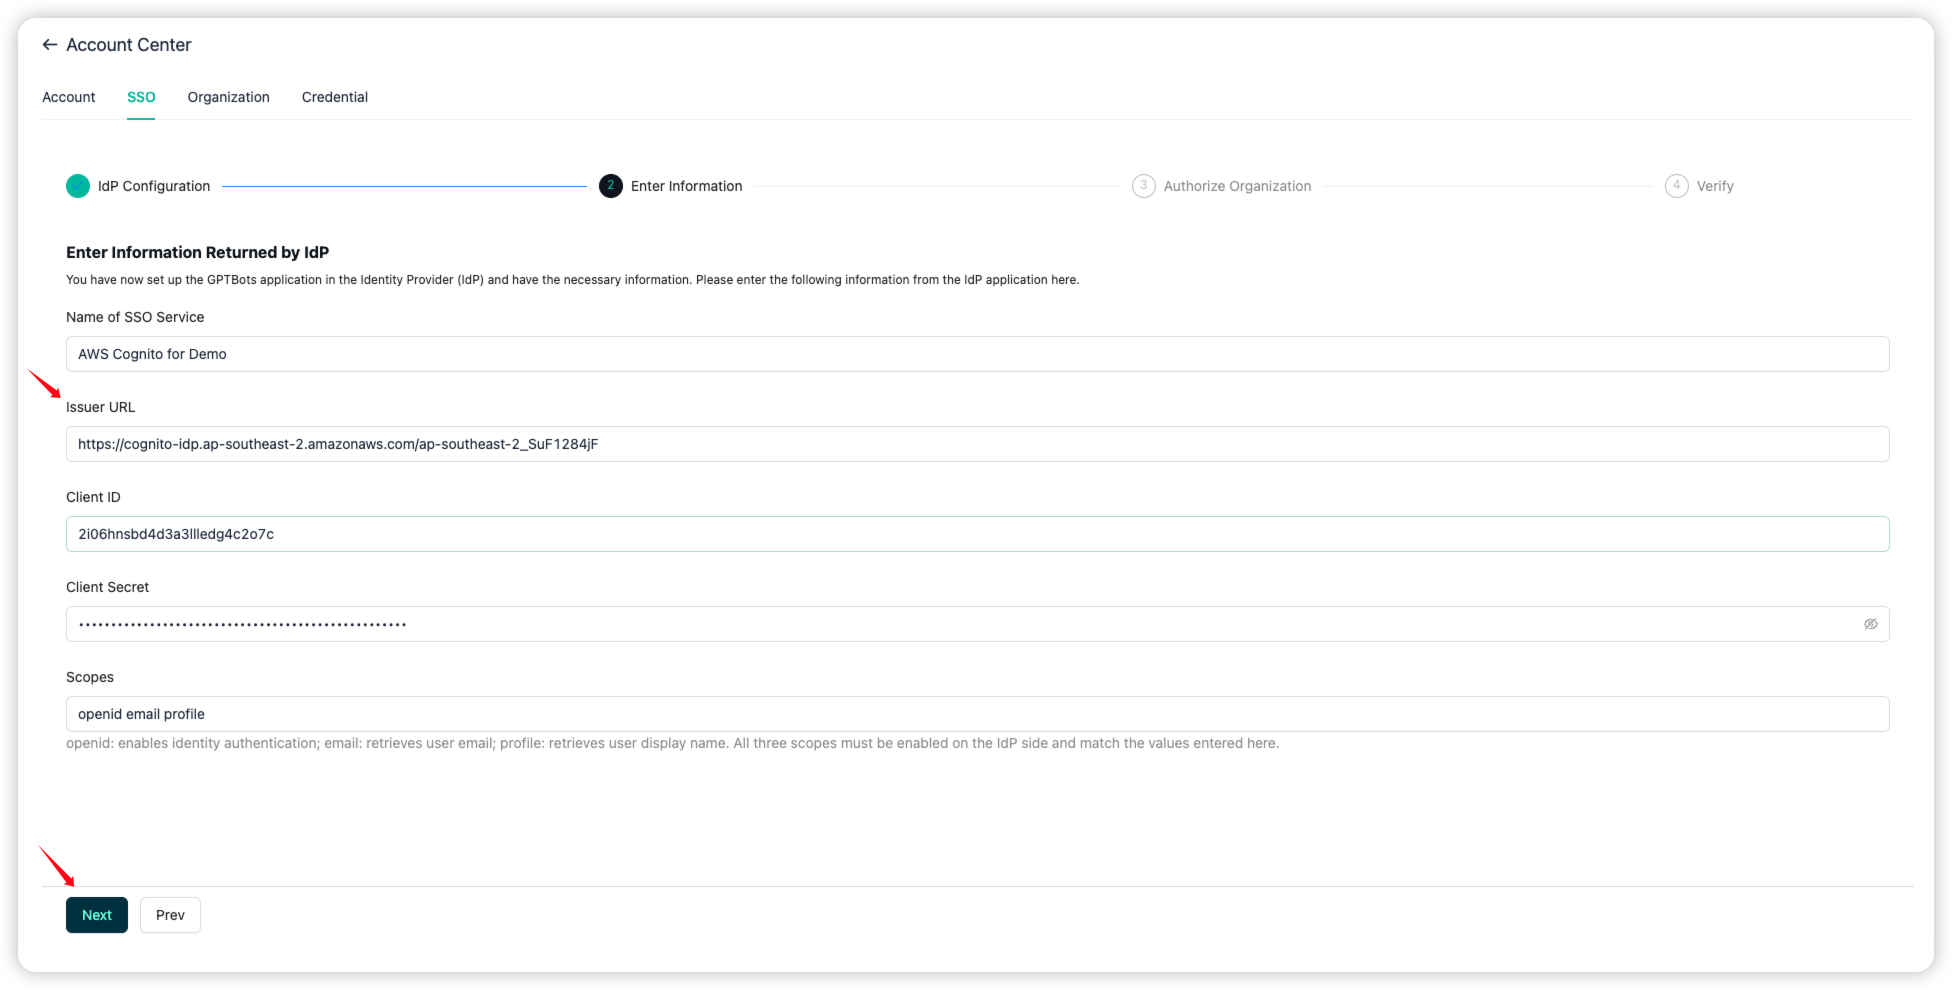
- Go back to GPTBots, check the confirmation box, and click Next.
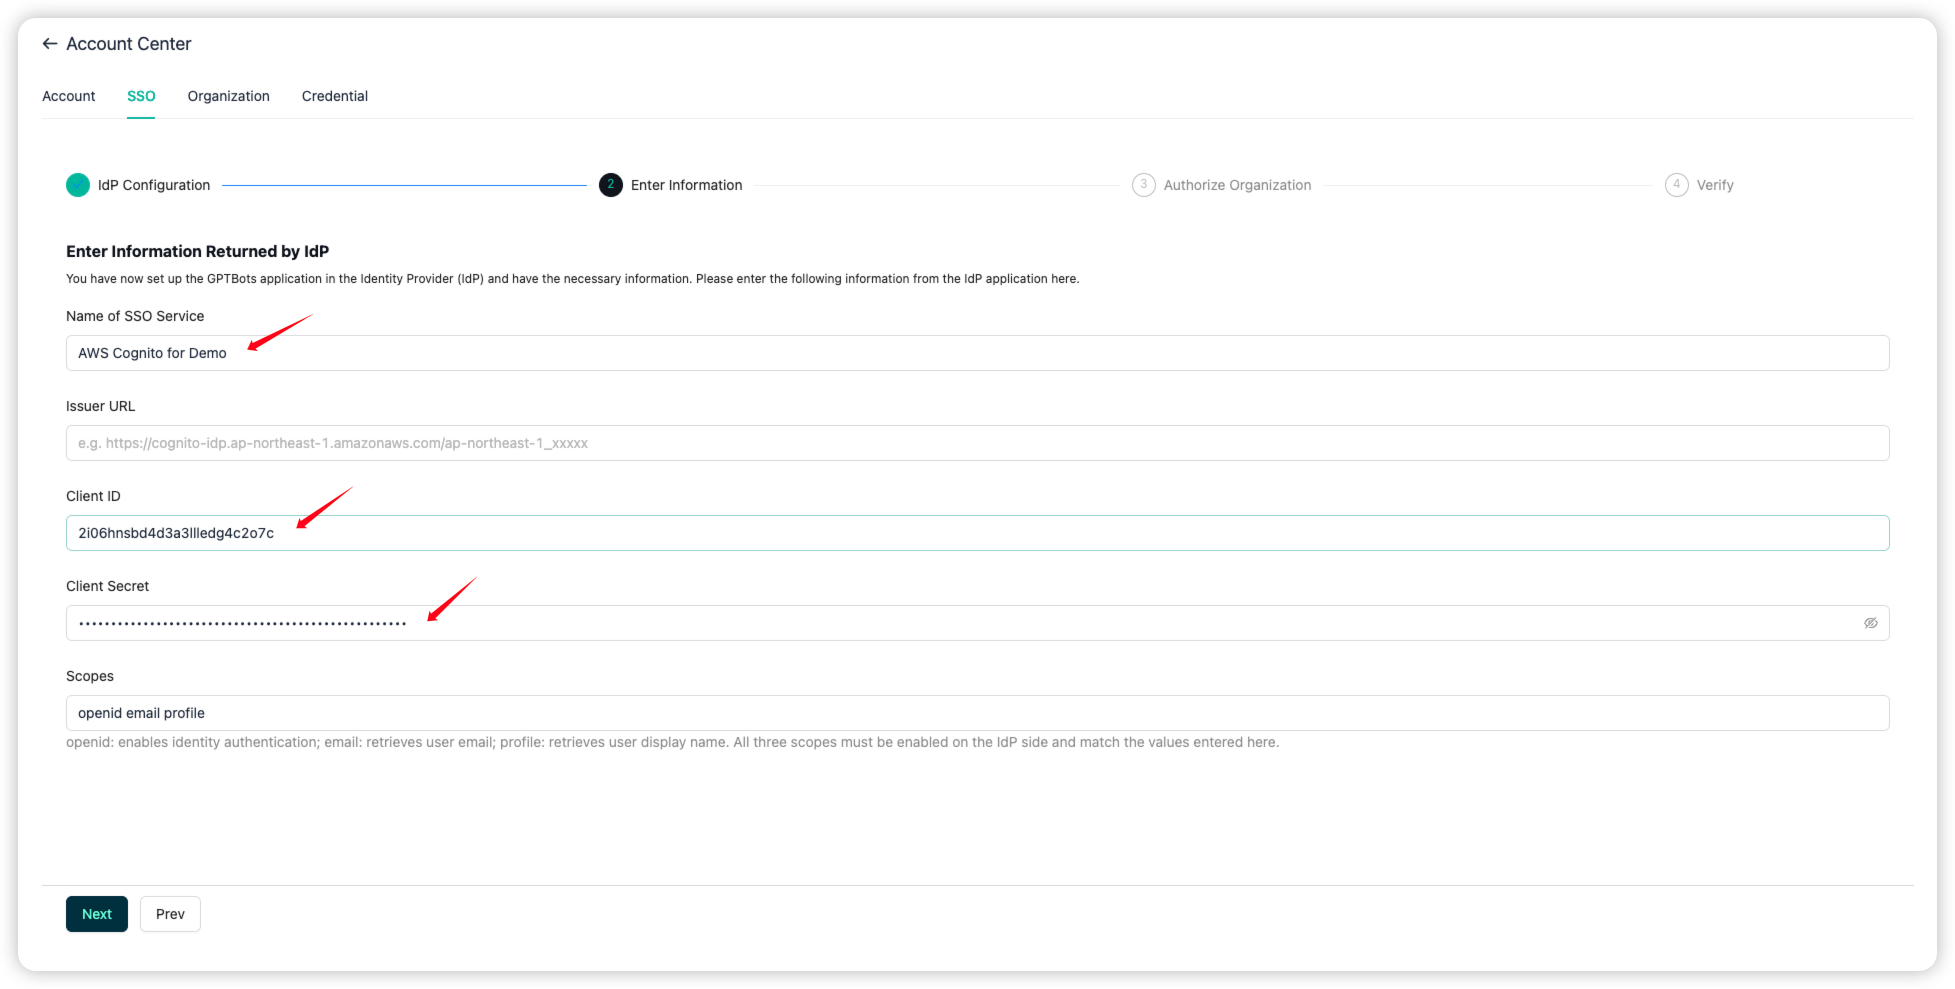
Then paste the copied values into Client ID and Client secret.
Set Name of SSO Service based on your naming preference.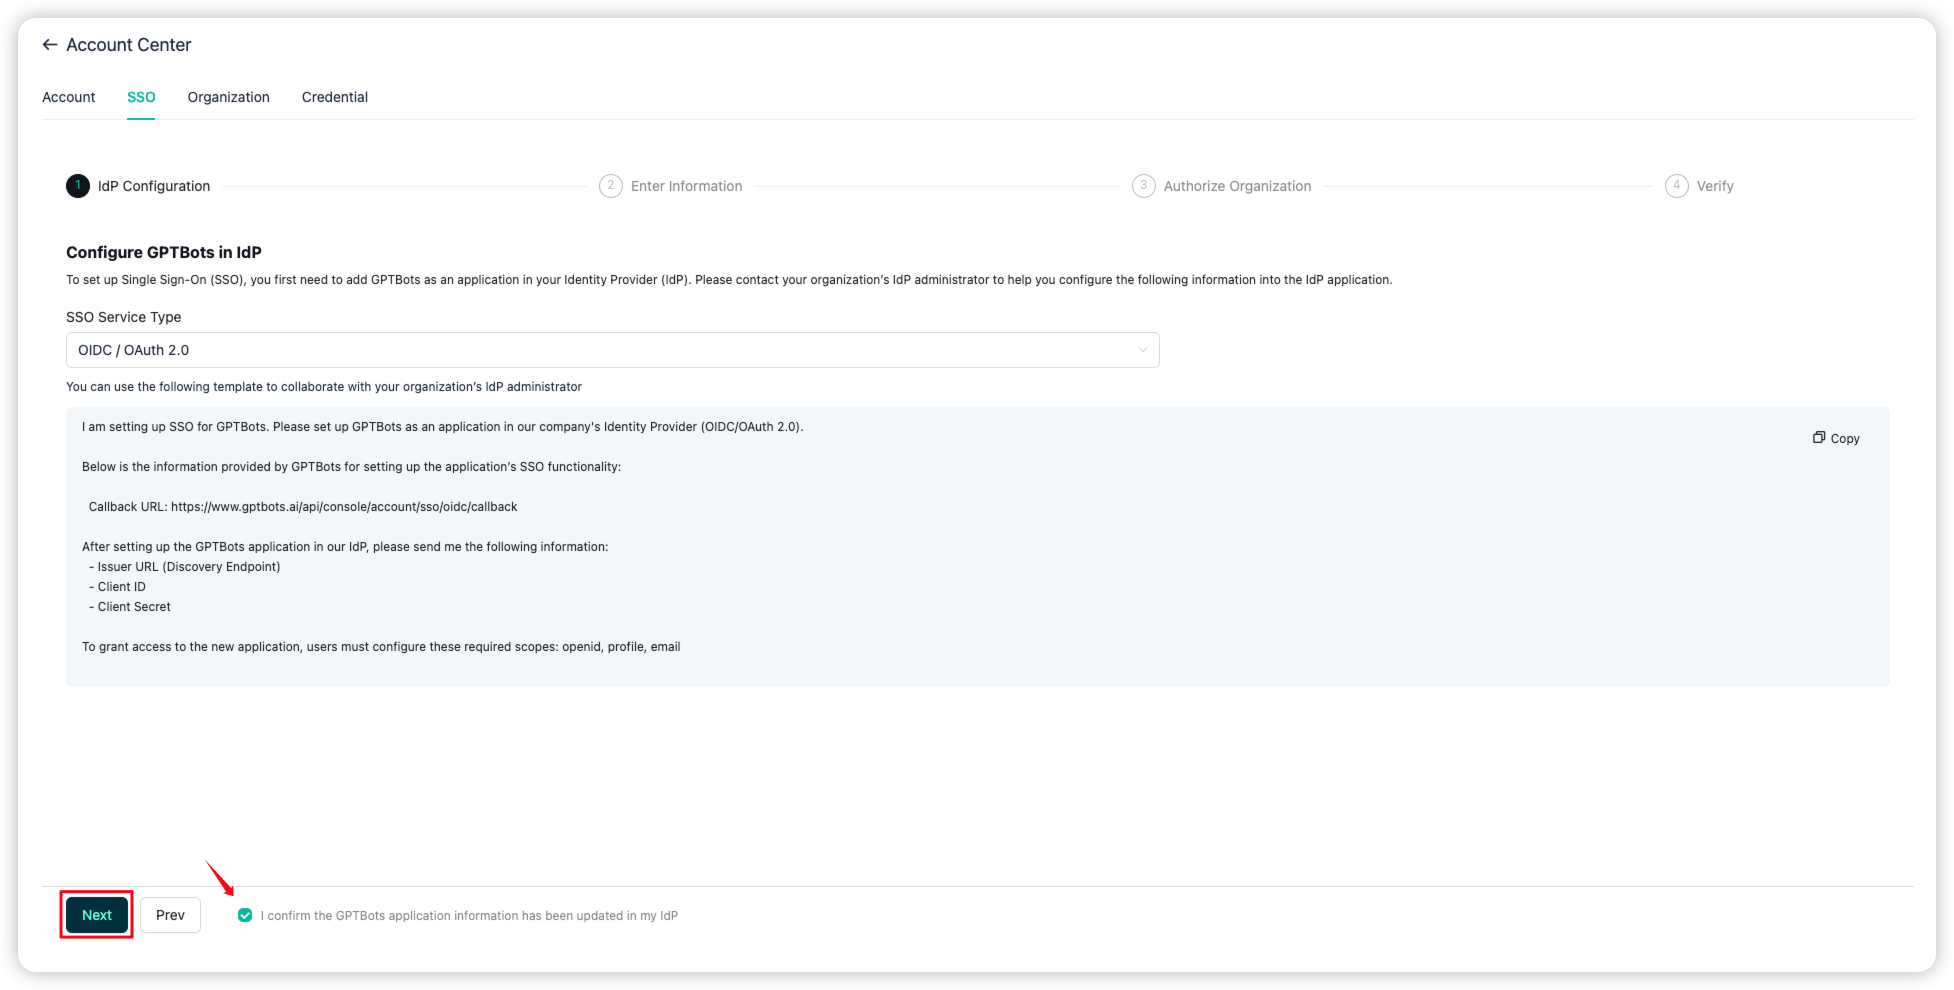
- Return to AWS Cognito, click Overview in the left sidebar, and copy the Token signing key URL.
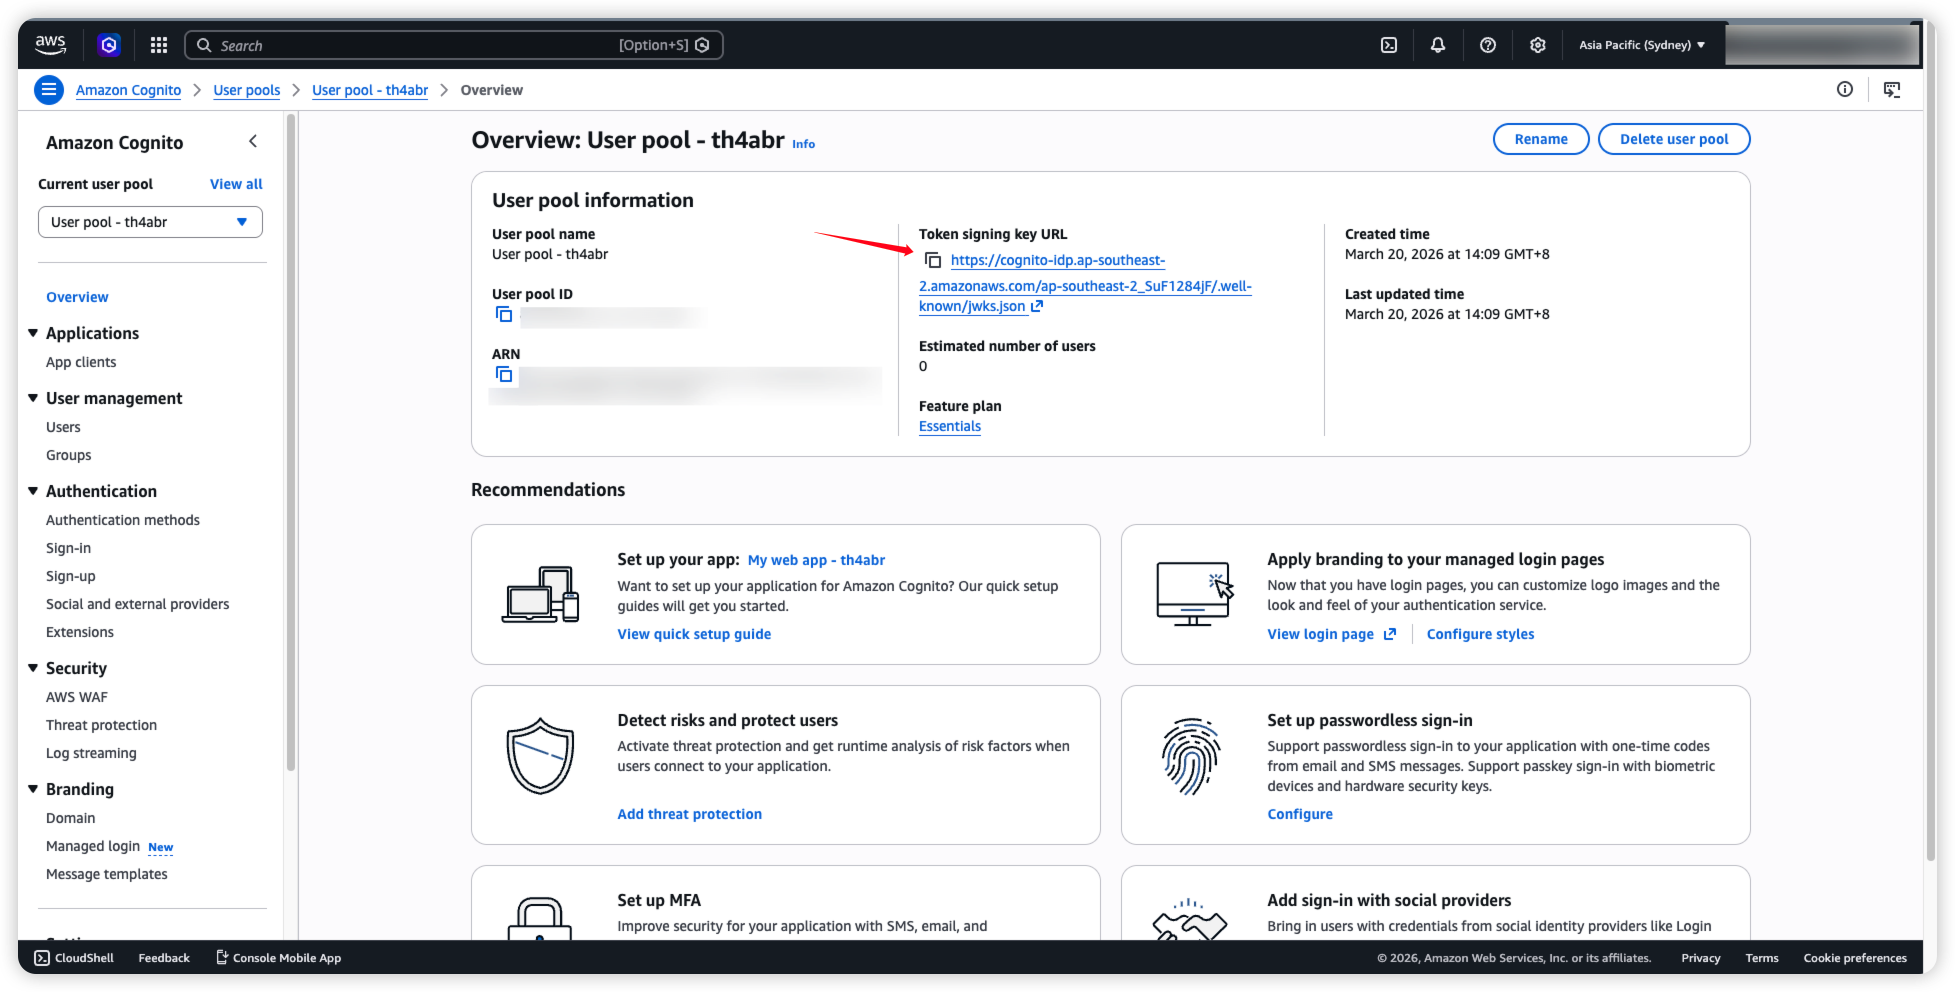
- Paste it into Issuer URL in GPTBots, then click Next.
Note: After pasting, remove the
/.well-known/jwks.jsonsuffix and keep only the base URL.
16. Go back to AWS Cognito to create a user, then click Create user.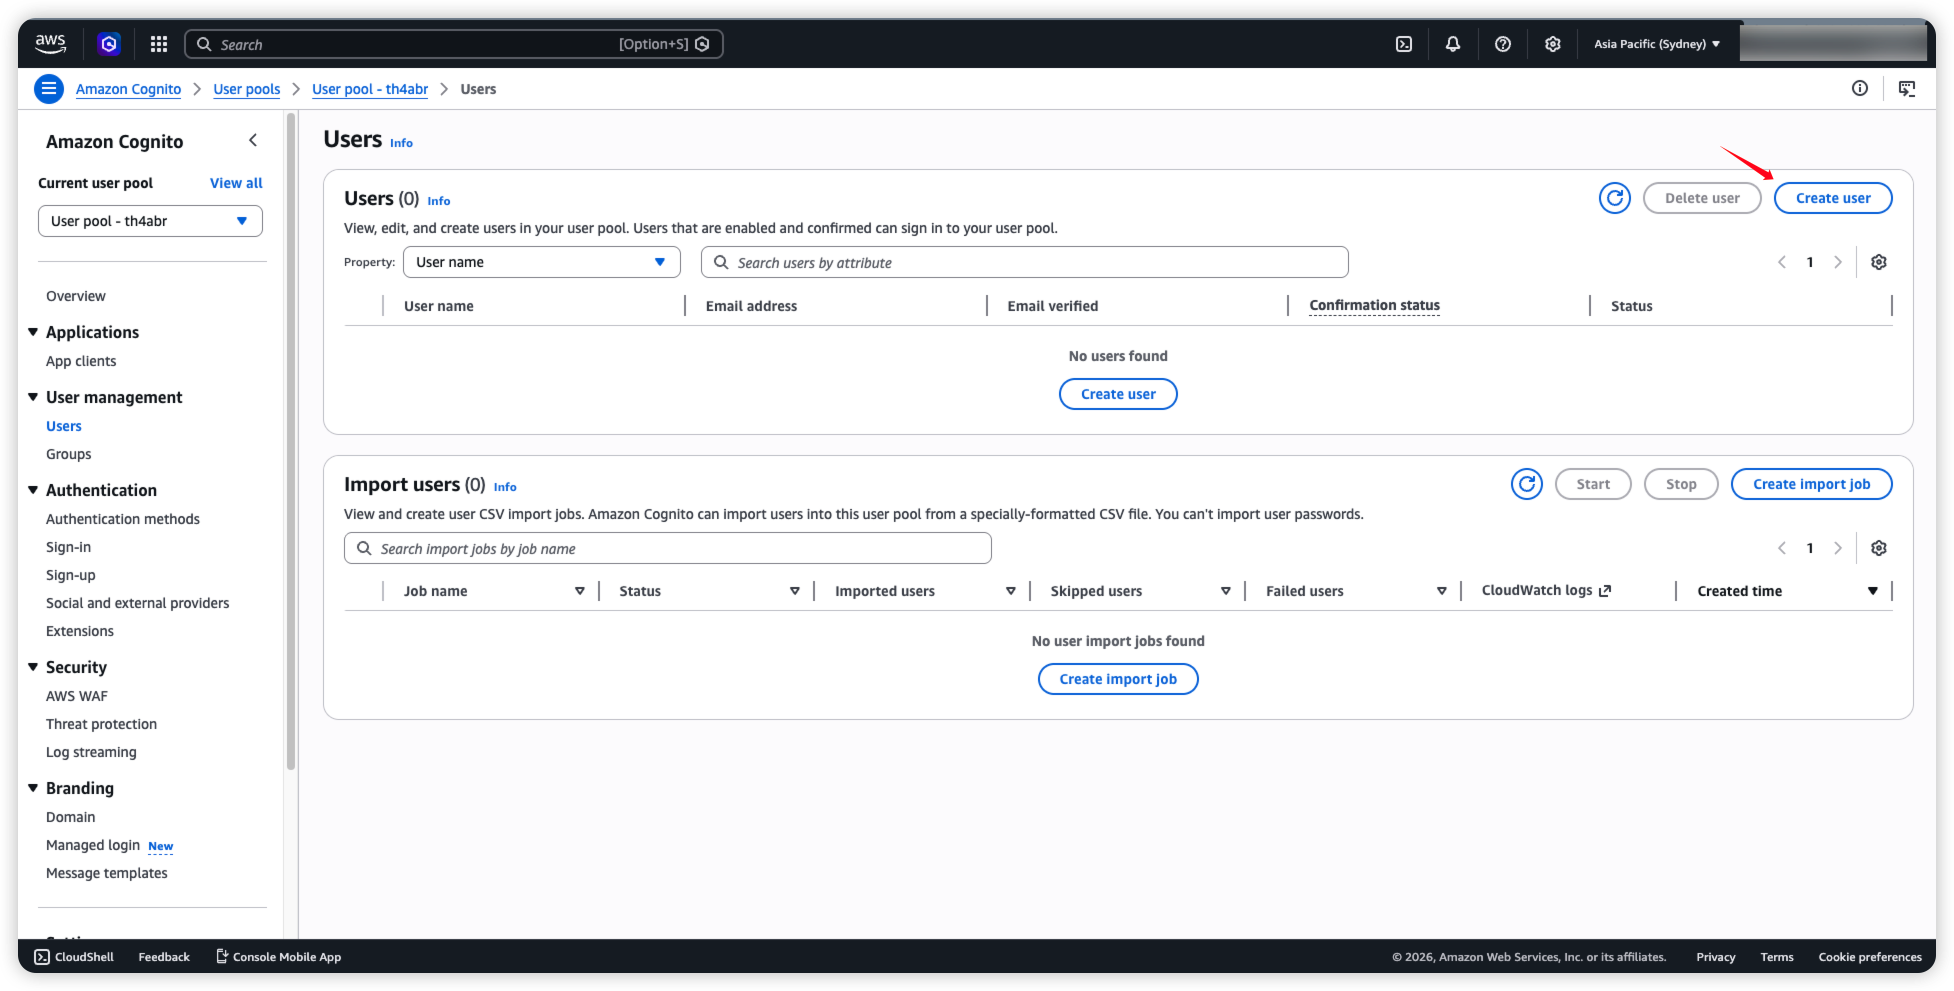
17. Keep the configuration as shown and click Create user.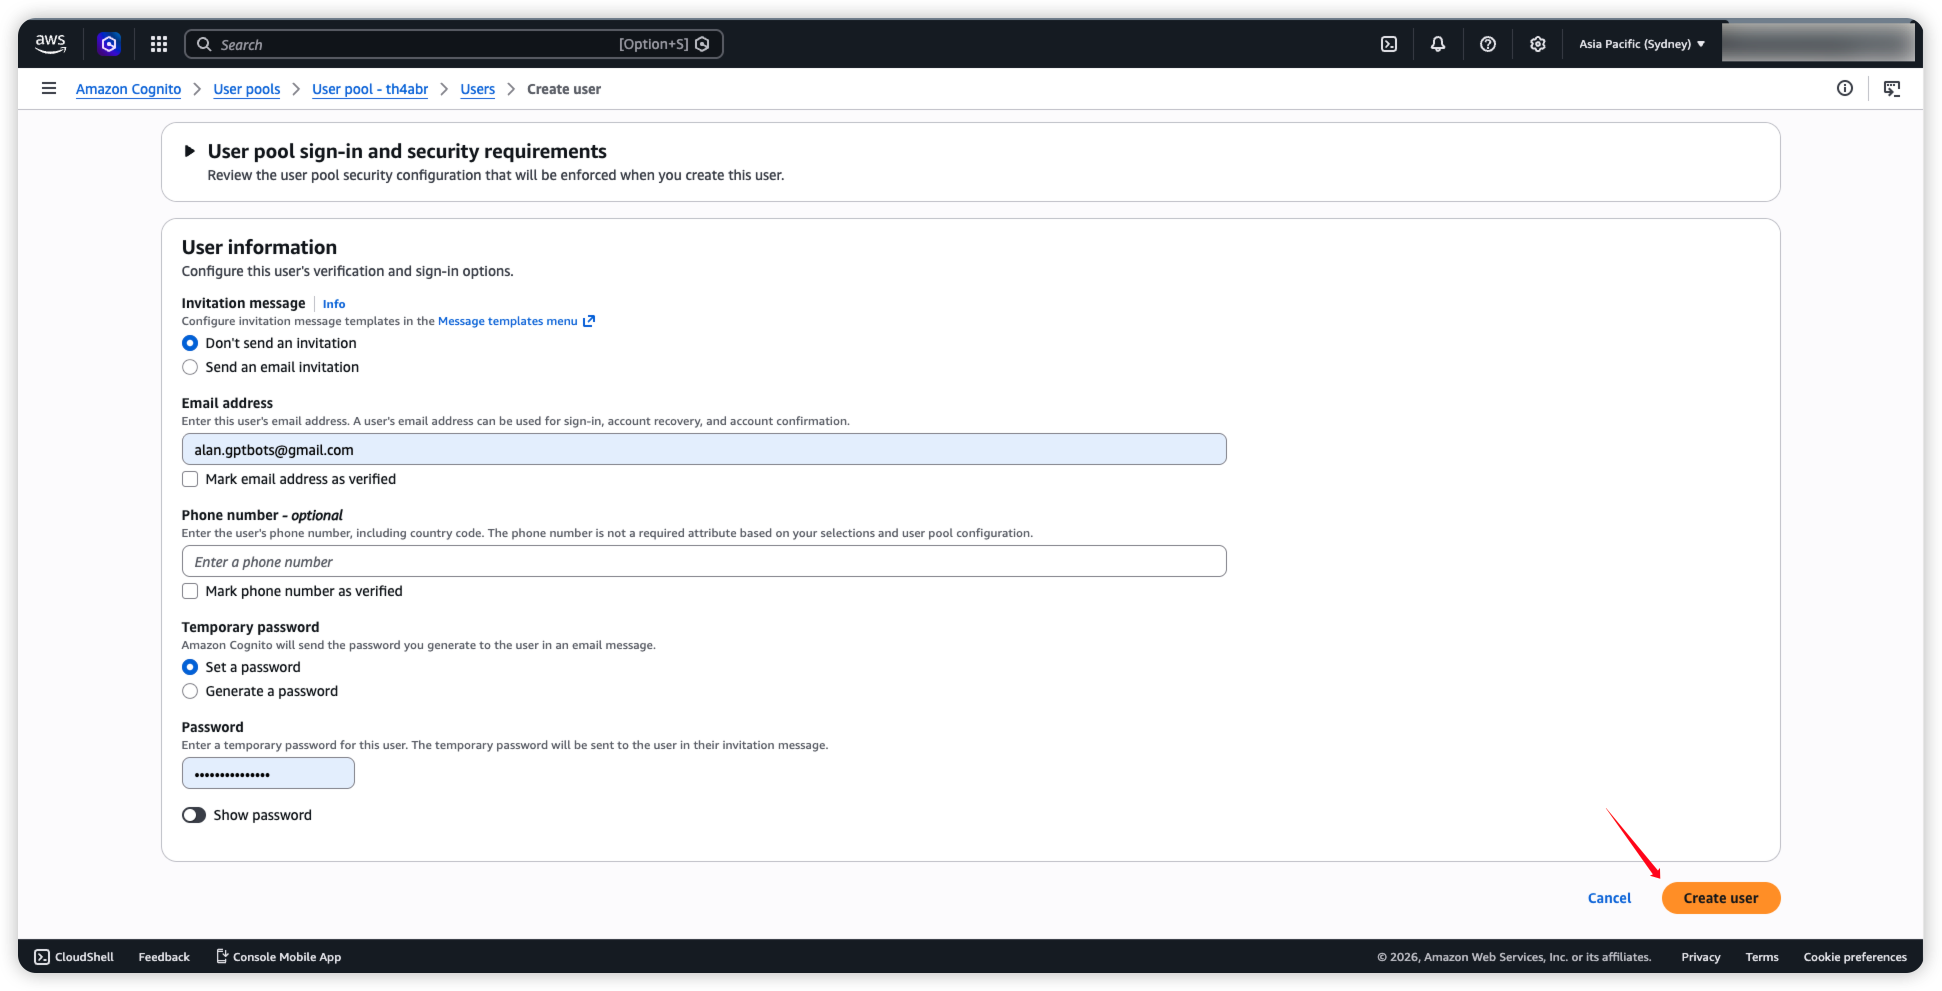
18. In the left sidebar, go to Branding > Domain and click Edit.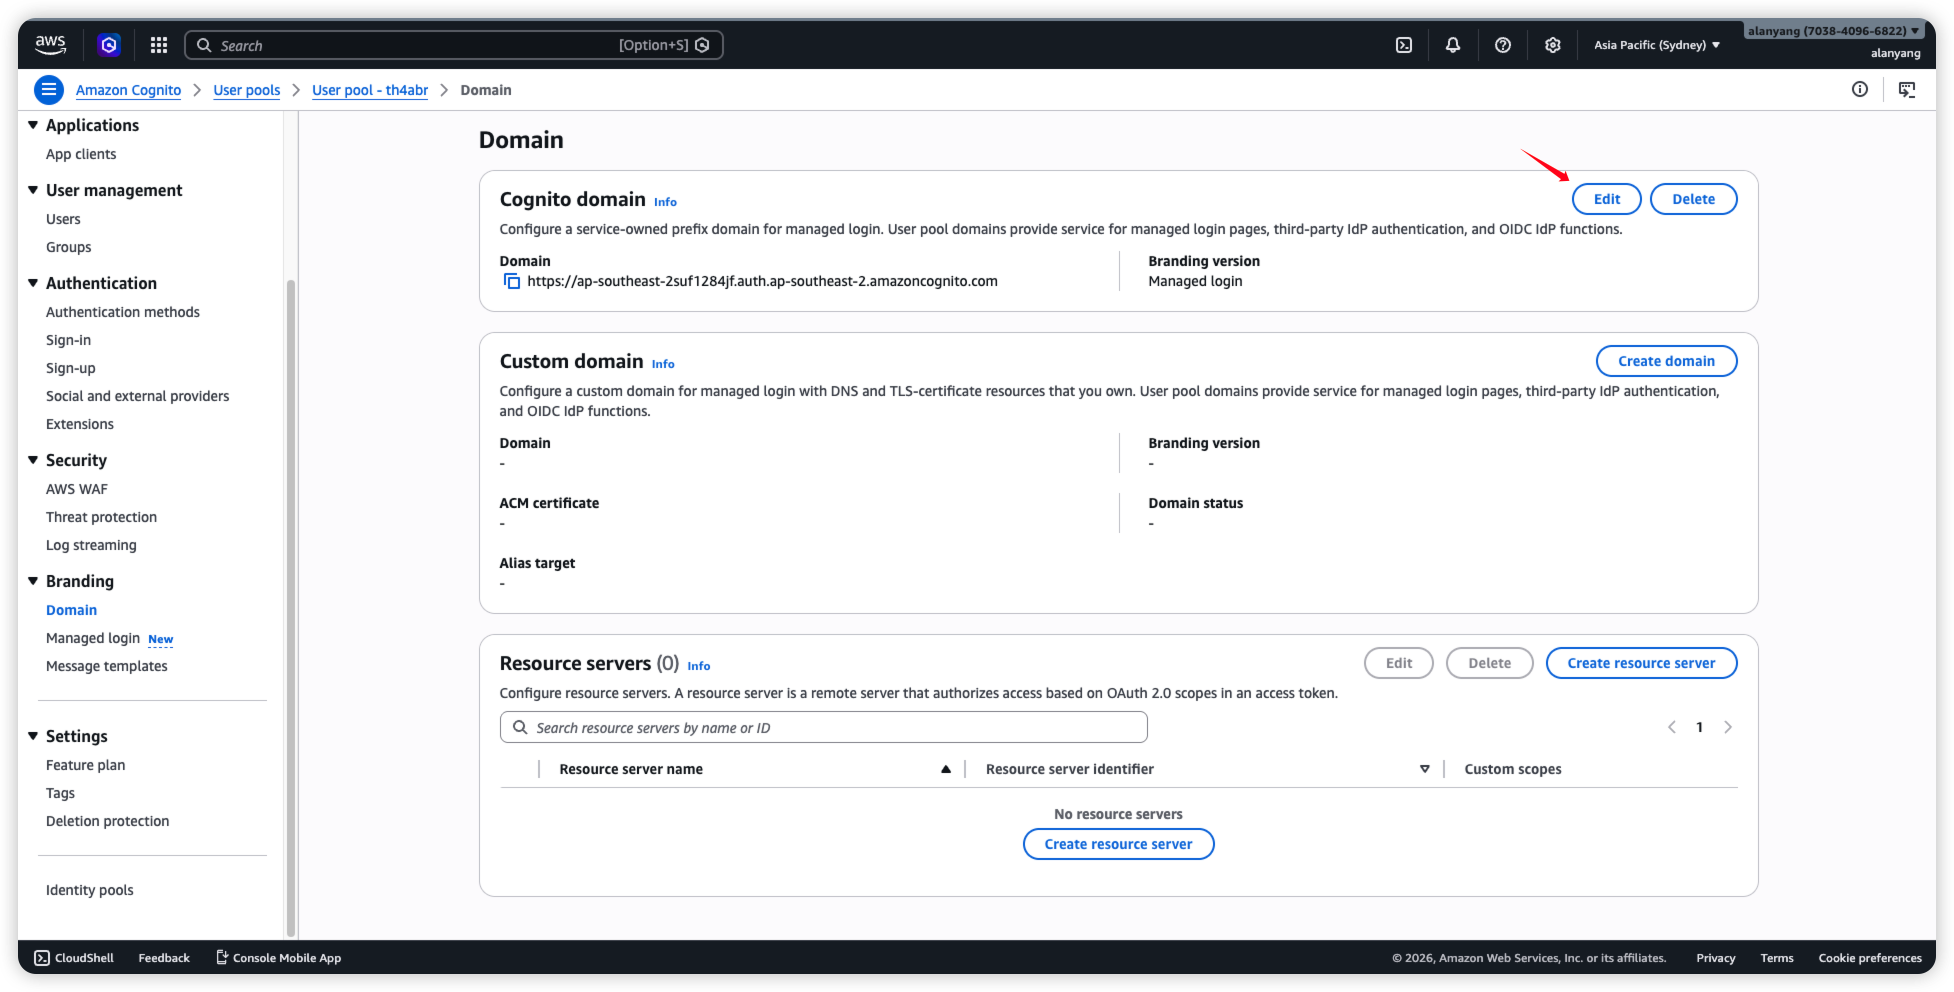
19. Select Hosted UI and click Save changes.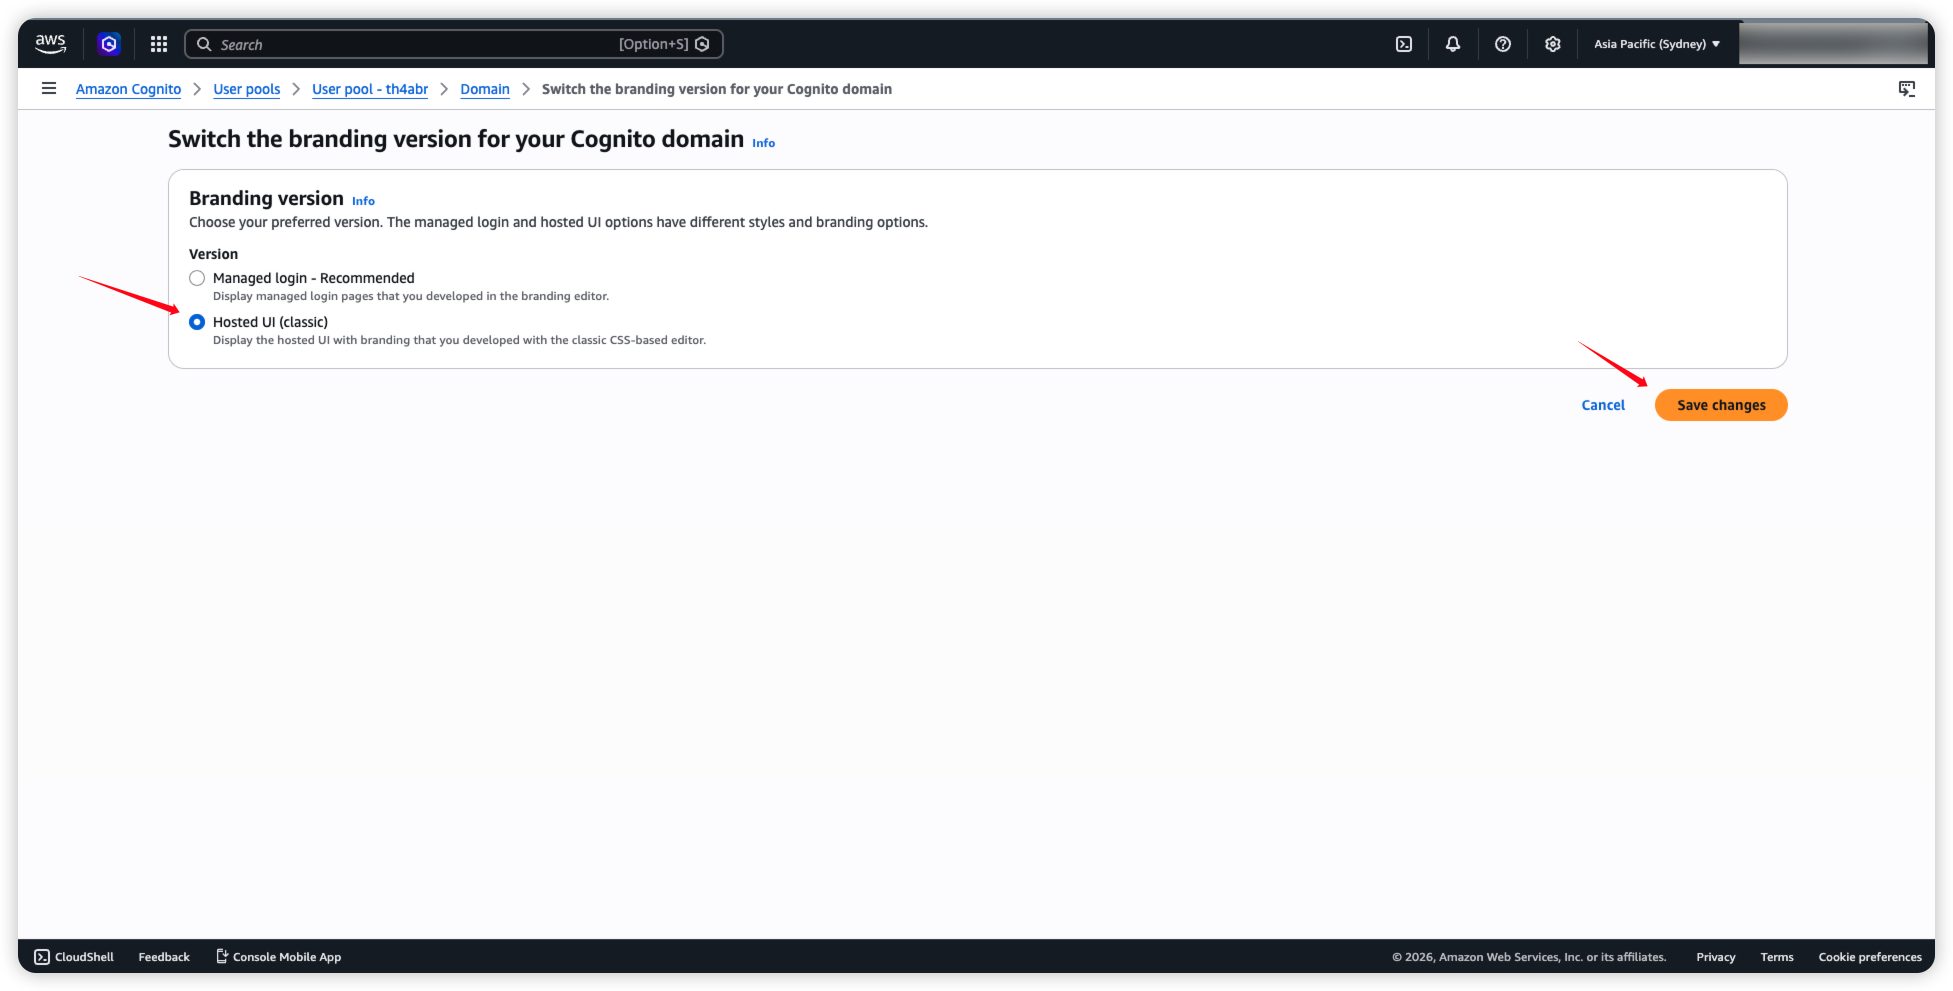
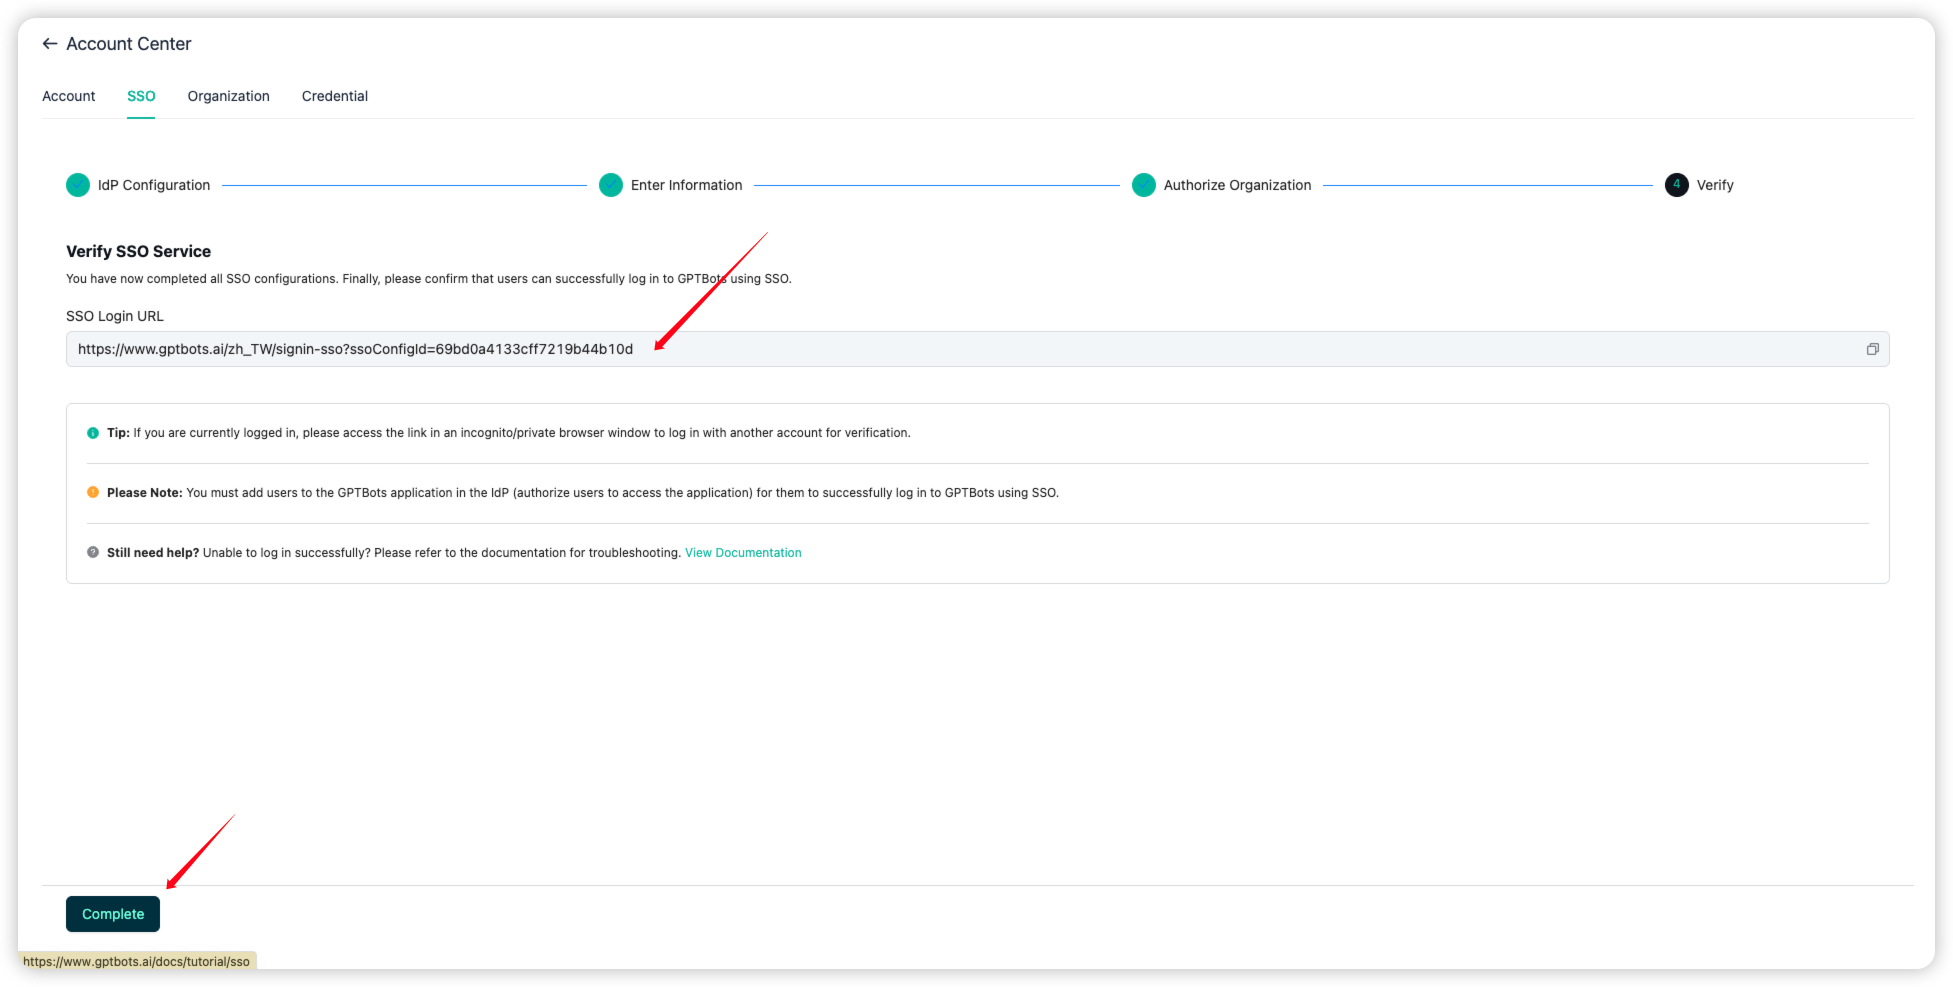
20. Return to GPTBots, choose the organization to authorize, then click Save and Verify.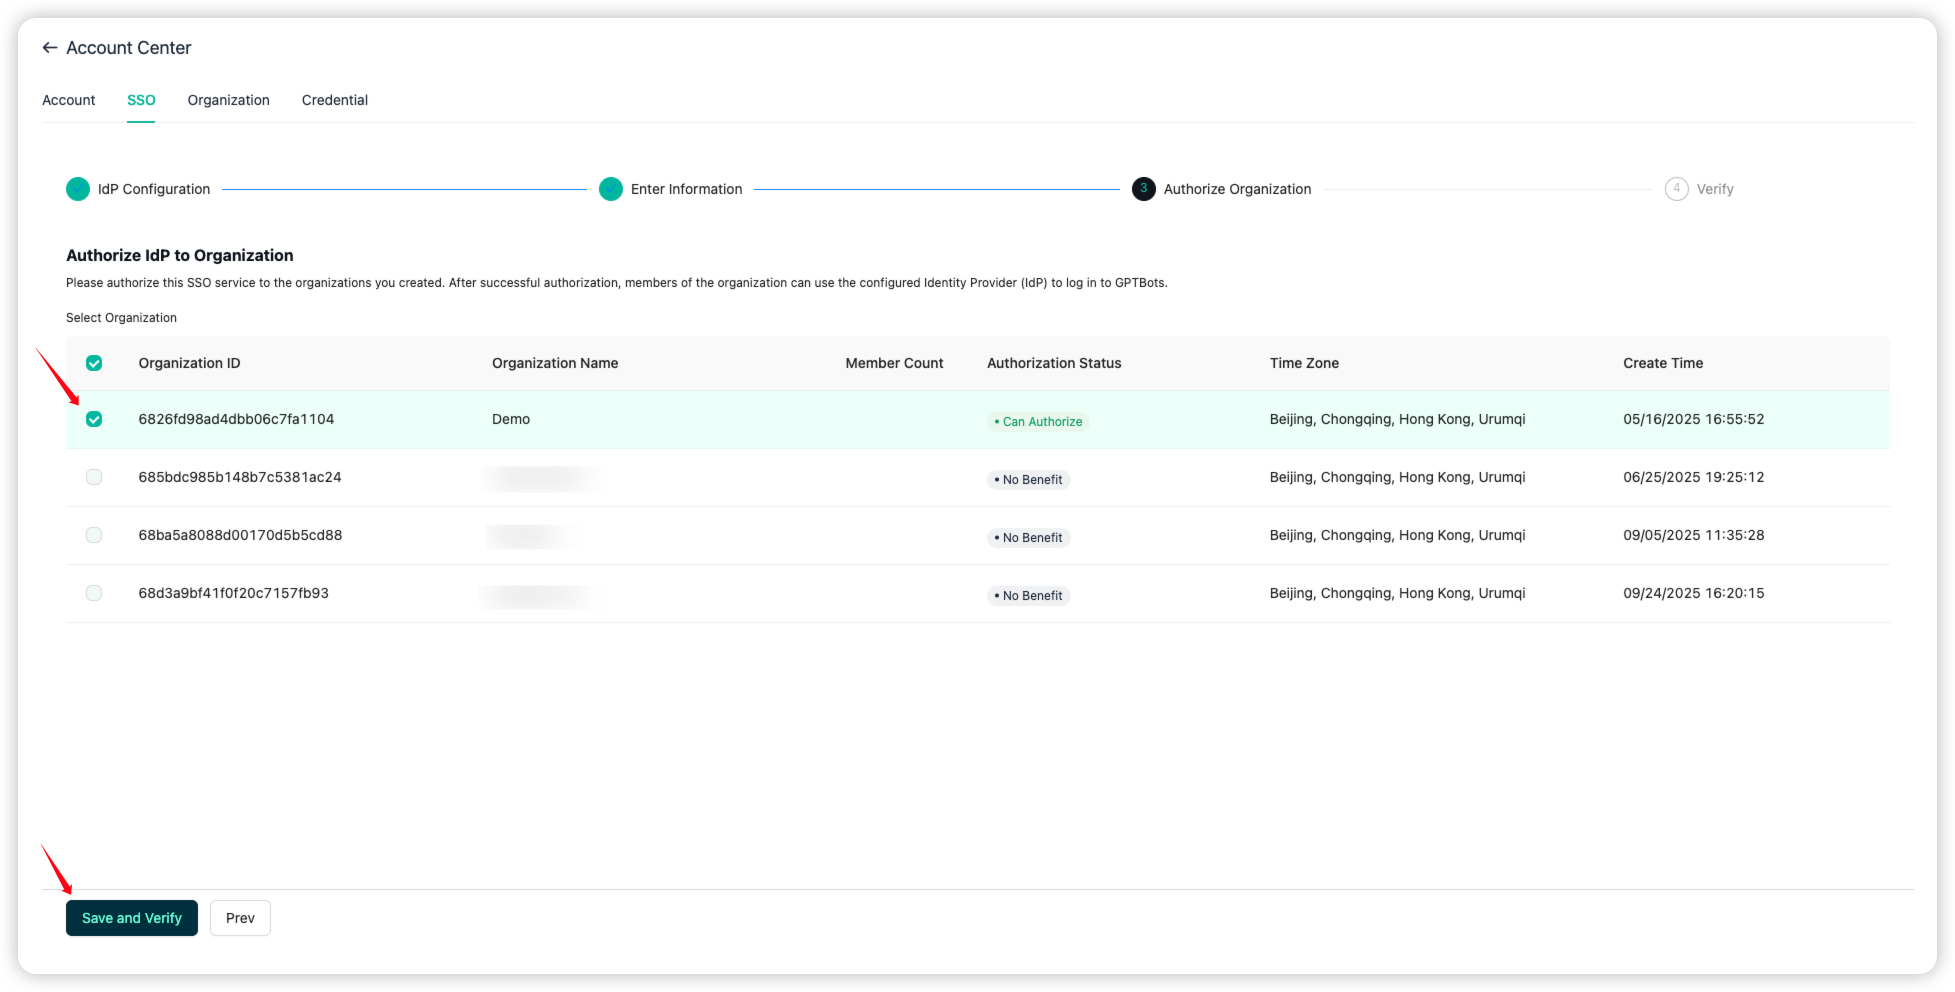
21. Finally, save the SSO Login URL and share it with organization members for sign-in. Click Complete to finish setup.